Maintenance – Hatco FR2 Series User Manual
Page 11
MAINTENANCE
9
GENERAL
WARNING
To avoid any injury, turn the power switch
off at the fuse disconnect switch/circuit breaker
or unplug the unit from the power source
and allow to cool completely before performing
any maintenance or cleaning.
Recommended Cleaning Schedule
Complete draining and cleaning should be done
• On a daily basis.
• Whenever food particles accumulate in the tank.
• Whenever a spill occurs.
• Whenever the unit is to be stored or shipped,
especially in freezing temperatures.
Helpful Hints
• Keep inlet and outlet free of debris.
• Keep false bottoms in place and free of debris.
• Delime unit using a non-corrosive deliming
solution.
CAUTION
Inspect daily for lime buildup inside unit.
Excessive amounts can affect unit performance
and reduce the operating life of the unit.
DRAINING & CLEANING ALL MODELS
NOTE: The holding vessel should be drained
through its own drain valve to discharge debris
and water that remains in it.
CAUTION
Drain holding vessel with power to the unit off,
or element burnout may occur.
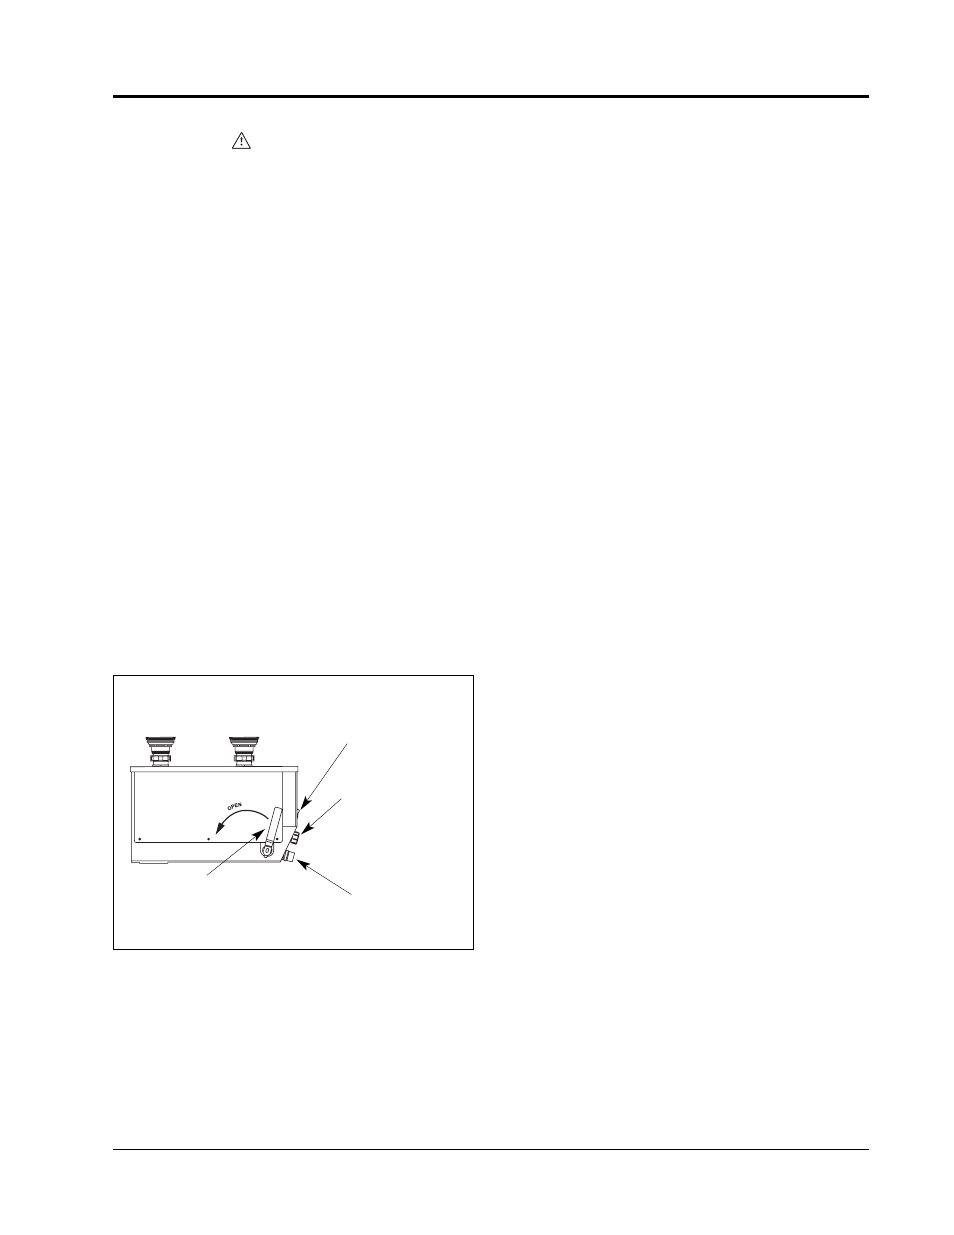
DAILY (See Figure 8)
1. Turn power switch to the OFF position.
2. Drain holding vessel to discharge visible water
and debris. Close drain when finished
3. Wipe visible deposits from the sink or tank.
4. Dissolve a safe, non-toxic, non-corrosive
sanitizer into 1 gallon (3.7 L) of hot water
and pour into tank. Refill the tank 1/2" (1 cm)
above the false bottom with hot water
and soak for at least 15 minutes.
NOTE: Follow the sanitizers instructions
for the proper mixture of water and sanitizer.
5. Connect one end of a drain hose onto the sump
drain outlet with the other end in a bucket
or open site drain in a manner according
to local plumbing codes.
6. To drain the unit open the sump drain valve
by moving the valve handle backwards until
it completely stops. Water will now flow from
the drain hose.
7. Thoroughly wash unit with fresh water until
discharge is clear and all sanitizers have been
removed and rinsed.
8. Close sump drain by moving handle all
of the way forward until it stops. See Figure 8.
9. Reinstall perforated water baffle/false bottom
in correct position.
10.Follow normal operation instructions.
Figure 8. Hydro-Heater Side View
Form No. FR2M-0604
Sump Drain Handle
(Closed)
Sump Drain Outlet
Power Switch
INLET
OUTLET
Clean-out Cap
(2- or 3-element
units only)