Т³гж 4, Dimension figure, 34 installation schematic diagram – haier FCD-8 User Manual
Page 4: Side view
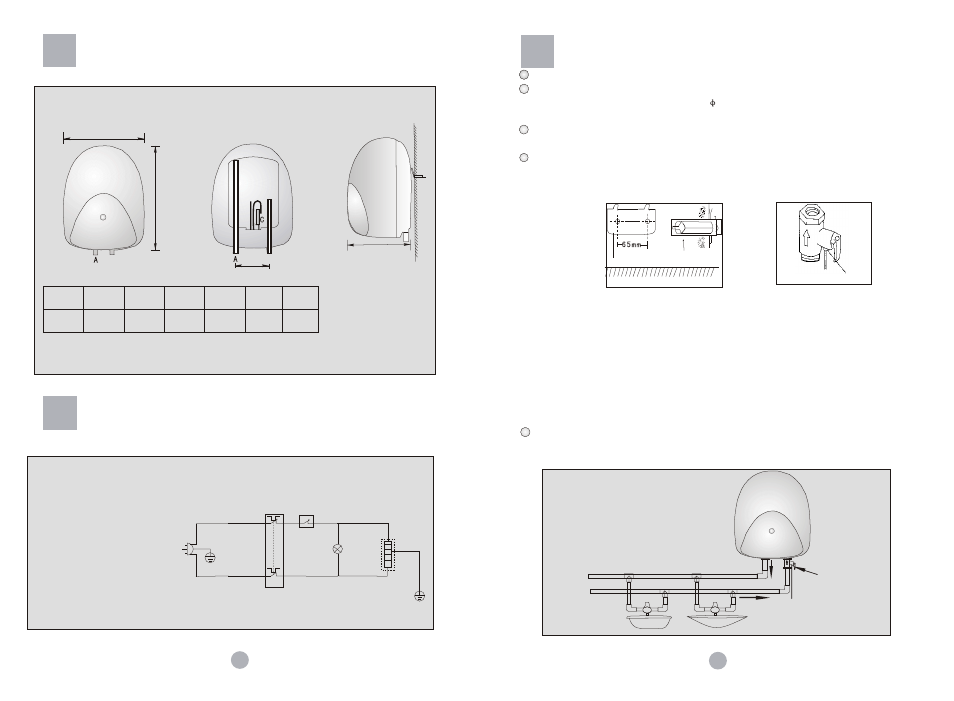
Dimension Figure
£¨Figure 1£©
3
4
Installation
Schematic Diagram
Front view
Cutaway view
Side view
a1
c1
b1
d1
A Hot water outlet
B Cold water inlet
C Mg anode rod
D Heating element
E Enamel tank
F Wall-mounting bracket
F
B
B
D
E
L:Brown wire
N:Blue wire
MT:High temperature limiter
EH:Heating element
E:Yellow/green wire
Thermostat
BT:
HL:Heating indicator
L
N
E
BT
HL
EH
E
MT
Cold water inlet
(Figure 4) for reference in installation only
Hot water outlet
Safety valve
(Figure 3)
Connect to drain hose
(Figure 2)
Wall-mounting
plate
Expansion bolt
Model Volume
Net
weight
a1
b1
c1
8L
325mm
414mm
100mm
255mm
8kg
d1
FCD-8
Remarks: the petmitted error limit of above parameters is 10%.
Be sure to have it installed by the appointed staff. It adopts wall-mounting installation.
First decide the installation location according to the usage requirement. Make two
holes in the wall with depth 70mm and
9mm by churn drill as per the indication of
installation diagram.
Fasten the wall-mounting plate on the wall tightly with two expansion bolts as per
indicated in Figure 2. Check and confirm that the bolts are not loose.
Hang the water heater vertically onto the wall by the wall-mounting plate. Confirm it
is firmly mounted. Please reserve certain space for the future maintenance during
installation.
When the power is switched on, and the water heater starts operating, there may
be some water discharged from the pressure relief hole of safety valve. It is due to
the water expansion under heating, and is normal phenomenon. The pressure
relief hole shall communicate with the air directly. Do not block it.
Fasten the drain hose to the drain thread of safety valve by twisting (see to
Figure 3). According to the need, you could truncate or elongate the hose in your
favor. Connect the other end of drain hose to the sewer to avoid polluting the
room by splashing. The drain hose connecting to the safety valve shall be kept
downward sloping in installation and in a frost-free environment.
Be sure to check and confirm that the tank is filled with water, there's no leakage
at each joint and the power supply complies with the stipulation before switching
on the power.
If the water
heater will be installed in the bathroom without sewer, we suggest you add drain
hose.