Basic bandsaw operation -- horizontal position – Harbor Freight Tools METAL CUTTING BANDSAW 93762 User Manual
Page 19
SKU 93762
For technical questions, please call 1-800-444-3353.
Page 19
from its electrical outlet.
(see Figure s.)
Wait until the Saw Blade (82) comes
15.
to a complete stop. Then, remove
the workpiece and scrap material
from the Vertical Cutting Plate (189).
(see Figure s.)
Remove the Locking Pin (153) and
16.
turn the Support Plate (150) to the
left. Then, lower the Body Frame
(60) to its horizontal position.
(see Figure s.)
basic bandsaw operation --
horizontal position:
1.
warning! Always wear ANSI-
approved safety impact eye goggles
when operating the Bandsaw.
do not plug the power cord plug
2.
into an electrical outlet until all
necessary adjustments (as previ-
ously discussed in this manual)
have been made.
3. Raise the Body Frame (60) to its full
vertical position, making sure it locks
in place by turning the Support Plate
(150) to the right until it firmly locks
into the Body Frame and inserting the
Locking Pin (153).
(see Figure s.)
Secure the workpiece in the Vise as-
4.
sembly (138, 141). When cutting a
large workpiece, make sure its entire
length is properly supported. If nec-
essary, use a roller stand (not includ-
ed) with a larger workpiece.
(see Figure t.)
If cutting several workpieces at the
5.
same length, you may wish to adjust
the Stock Stop (157) to the desired
position.
(see Figure t.)
Once all necessary adjustments to
6.
the Bandsaw have been made, plug
the Power Cord Plug into the near-
est
120 volt, grounded, electrical
outlet. (see Figure t.)
Turn the Power Switch (164) to its
7.
“on” position, and slowly lower the
Body Frame (60) until the Saw Blade
(82) is just above the workpiece cut
line.
(see Figure t.)
Before cutting, turn on the Bandsaw
8.
and check for excessively loose Saw
Blade (82) tension or machine vi-
bration. If this is found, turn off the
Bandsaw and correct the problem
before using.
(see Figure t.)
Allow the Saw Blade (82) to turn up
9.
to full speed before feeding the Saw
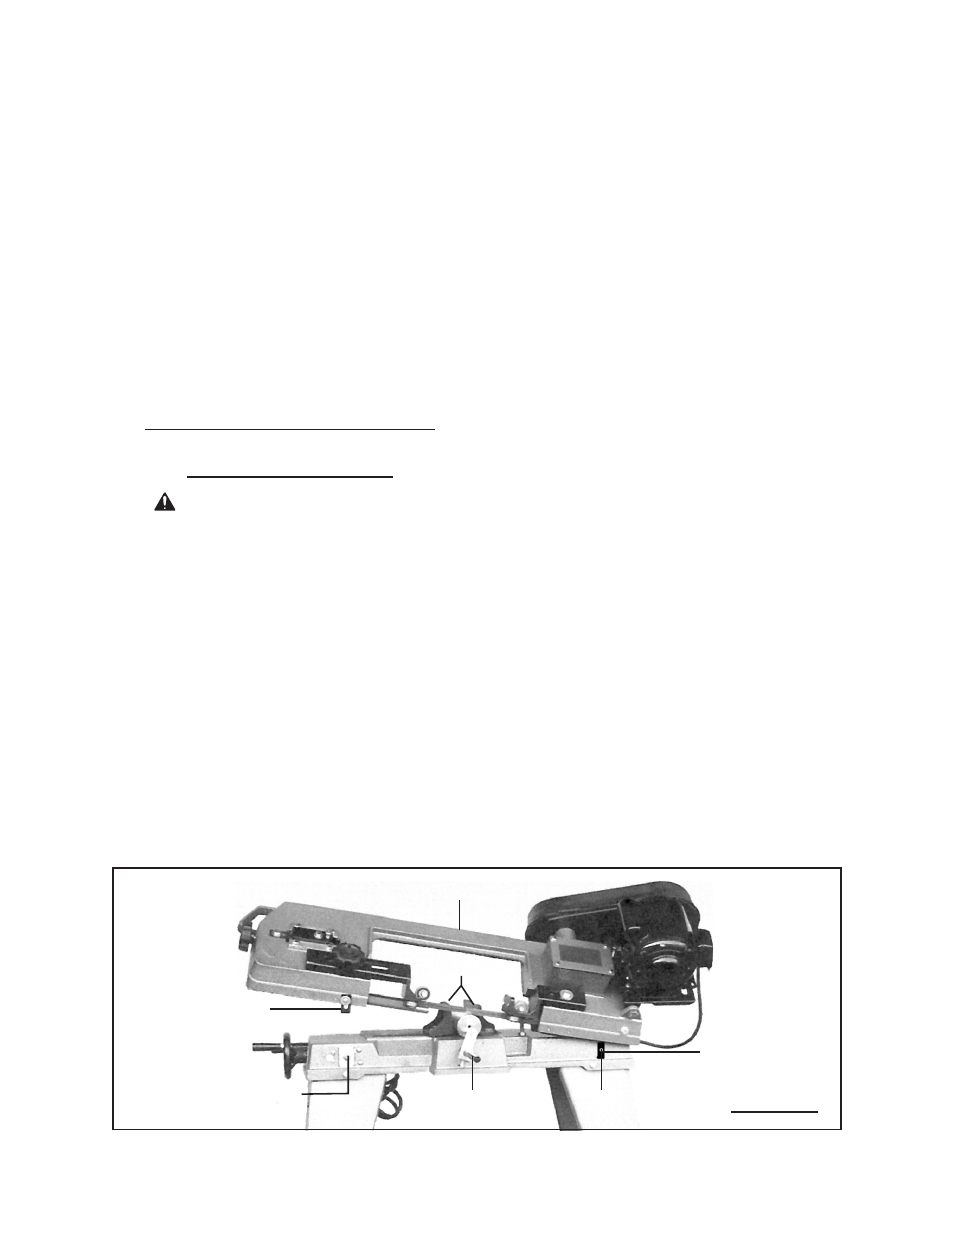
vise assY.
(138, 141)
stocK stop
(157)
bodY Frame
(60)
support plate
(150)
power switch
(164)
Figure t
switch push-
oFF tip (41)
locKing pin
(153)