Hotpoint MWH221 User Manual
Page 8
8
B
F
B
G
D
E
G
C
D
D
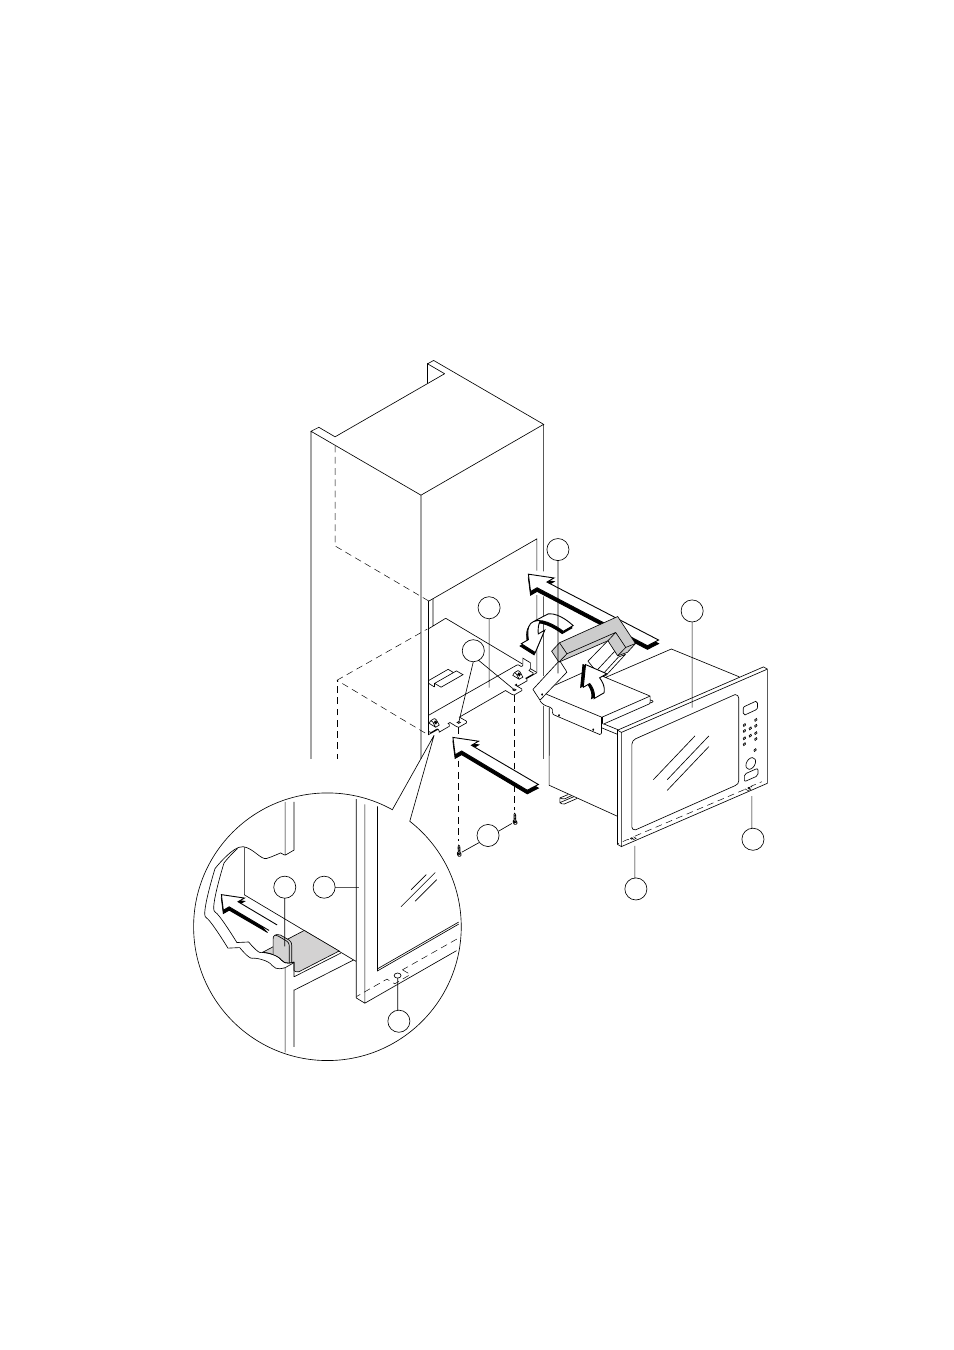
4. Open the lid of the smoke discharge (C) fully (if fitted)
5. Slide the appliance into the recess. Keep sliding it until the front of the oven (G) is resting against the cup-
board and the holes (D) under the oven are aligned with the holes (E) in the fastening bar (B).
6. Fasten the appliance to the fastening bar (B) using the previously removed screws (X).
ELECTRICAL CONNECTION - IMPORTANT:
If the appliance is provided with supply cord AND plug, the appliance shall be positioned so that the plug is always
accessible. If the appliance is provided with a supply cord WITHOUT the plug, the appliance must be connected to a
fixed main wiring incorporating a disconnection switch with contact separation of at least 3 mm in all poles and pro-
vided with permanent connection to earth.
- X SY51 (12 pages)
- EW63 (40 pages)
- RGB744WEAWW (2 pages)
- S230G DY230G (36 pages)
- 6665 (3 pages)
- 6666 (69 pages)
- COUNTER SAVER PLUS RVM1325WW (2 pages)
- BD42 (40 pages)
- DQ89I (32 pages)
- RVM1635 (80 pages)
- BD42 Mk2 (40 pages)
- Oven (36 pages)
- S150E (43 pages)
- EW45 (44 pages)
- MWH 121 (16 pages)
- AHP69PX (16 pages)
- RVM1335WC (2 pages)
- DQ77 (48 pages)
- BS42 BS52 (36 pages)
- BS73 BS63 (20 pages)
- S130E (36 pages)
- UY46 (40 pages)
- BD52 BD62 (48 pages)
- DY46 BD42 BD32 (40 pages)
- BU82 BU72 BU71 (40 pages)
- DOUBLE OVEN (36 pages)
- COUNTER SAVER PLUS RVM1625SJ (2 pages)
- BS61 MK2 (40 pages)
- JES636 (32 pages)
- BD62 BD52 (48 pages)
- EG71 (32 pages)
- BD62 (52 pages)
- RVM1535 (40 pages)
- 6685X (36 pages)
- RVM1425 (40 pages)
- AHP67X (36 pages)
- rvm1625 (40 pages)
- MWH211 (23 pages)
- BD52 (48 pages)
- BU62 BU65 (36 pages)
- BS73E (20 pages)
- SE48101PX (20 pages)
- EDC51 (28 pages)
- 6675 (3 pages)