Plunger and adjustment wedge installation, Rebuilding procedures, Primary lock installation – Holland Hitch XL-FW232-02 User Manual
Page 5
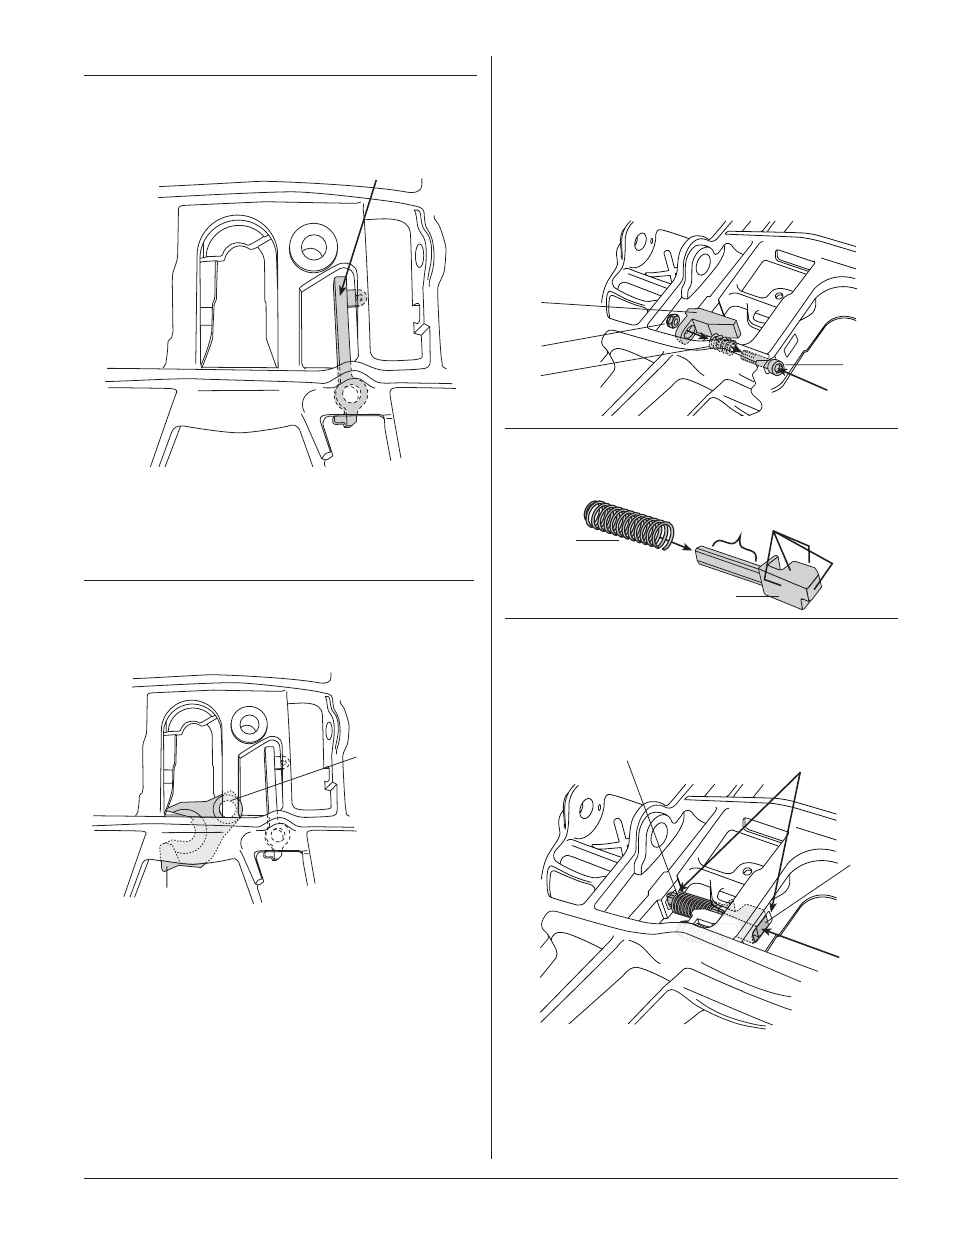
Plunger and Adjustment Wedge Installation
1.
Install the adjusting screw (20) through the hole locat-
ed in the throat of the fifth wheel casting. Install the
compression spring (23) over the screw, then slide the
adjusting wedge (22) over the screw (see FIGURE 6).
Compress the spring and install a lock nut (21).
Tighten the screw with a 1⁄2˝ Allen wrench until the
nut is flush with the end of the bolt.
2.
Lubricate the tail and faces of the plunger with a
light grease (FIGURE 7).
XL-FW232-02
5
REBUILDING PROCEDURES
continued
Primary Lock Installation
continued
3.
Place the secondary lock (10) into its approximate
location in the casting (see FIGURE 4).
4.
IMPORTANT:
Coat the lock pin hole in the swinging
lock (6) with Never-Seez
®
(supplied with kit).
This is
vital
.
DO NOT USE
any substitute lubricant.
(See FIGURE 5.)
10
FIGURE 4
20
21
22
23
FIGURE 6
18
17
Apply lubricant
FIGURE 7
LOCK PIN HOLE
Lubricate with
Never-Seez
®
before putting
in position
6
FIGURE 5
5.
Insert the swinging lock (6) between the ramps (see
FIGURE 5). Temporarily set it under the rear rib.
3.
Install the spring (18) in the casting. See FIGURE 8.
4.
Insert the plunger (17) through the plunger slots in the
casting and the spring (18). Use the helper block to
hold the plunger in place with the spring compressed
(see FIGURE 8).
Plunger slots
18
17
FIGURE 8