Operating instructions – Euro-Pro SELECT EP923H User Manual
Page 8
OPERATING INSTRUCTIONS
OPERATING INSTRUCTIONS
Fig. 4
Using Your Steam Cleaner with
Steam Pocket
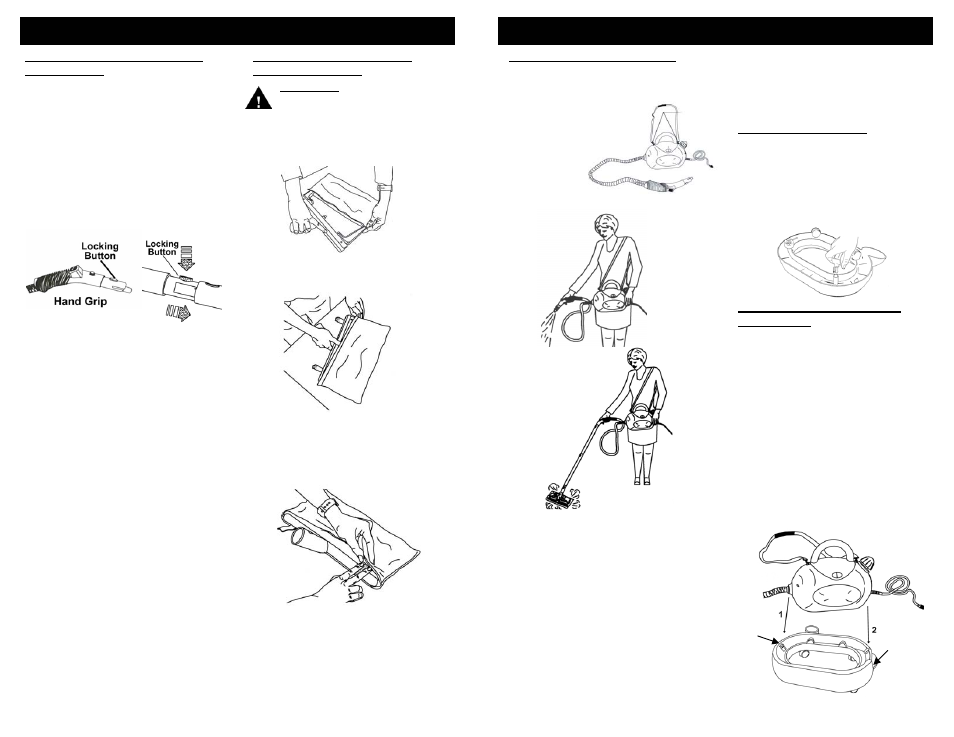
Step 1: Connect one of the extension
tubes to the hand grip on the
flexible steam hose. To
attach the extension tubes
one onto the other or onto the
hand grip, press the locking
button ensuring that it fits into
the hole. (Fig. 2, Fig. 3) To
disconnect, repeat the
operation by pressing the
locking button and pulling the
two sections apart.
Fig. 3
Bring the velcro strips that are on the
back side of the steam pocket towel
over the steam pocket frame and
attach to the inside of the front side of
the steam pocket towel. (Fig. 6)
Fig. 5
Fig. 6
NOTE:
Fit the steam pocket frame with the
angle adapter onto the extension
tube.
Step 2: If the angle adapter is not attached
to the steam pocket frame, hold the
steam pocket frame your left hand.
With the angle adapter pointing
downward, insert it into the hole of
the steam pocket frame, then turn
the steam pocket frame 180°.
Step 3: Insert the electrical power cord
into the wall outlet. Heating time
is approximately 8-10 minutes with
cold water. Filling the steam
generator with hot water will shorten
the heat up time.
NOTE: Do not use the soap injector with
the steam pocket attachment.
3.
6
Fig. 2
Attaching the Steam Pocket
Towel to the Frame
Using the detachable shoulder strap
allows for greater freedom of movement
when both hands are needed for
various cleaning tasks.
To attach the shoulder
strap to the steam
cleaner, simply snap
the shoulder strap
hooks onto the
connecting
rings on the
unit body.
See Fig. 23, 24 & 25.
The casters for the caddy for the
steam cleaner are packed and
shipped unassembled. To assemble
the casters to the caddy, simply insert
the caster stem into one of the four (4)
holes in the base and push downward
with the palm of your hand. (Fig. 26)
Repeat for the next three (3) casters.
Fig. 26
Attaching the Steam Cleaner
to the Caddy
1. After you have inserted the castors
to the base of the caddy, turn the
caddy right side up on a flat, level
surface. Place it with the rear
locking latch to your right.
2. Hold the steam cleaner with the
power cord also to your right.
3. Insert the left side of the steam
cleaner (#1 in the illustration
below) down into the caddy making
sure that it clips into the front
locking tab.
4. Then press down on the right
side of the steam cleaner (#2 in the
illustration below) so that the rear
locking latch locks in place.
(Fig. 27)
Fig. 27
Rear
Locking
Latch
Front
Locking
Tab
Attaching the Shoulder Strap
Fig. 23
Fig. 25
Fig. 24
IMPORTANT:
When using the
steam cleaner with the shoulder
strap, avoid rocking or tilting the unit
excessively as this may cause water
to enter the hose and be discharged
along with the steam.
WARNING:
Always insure the
unit is “UNPLUGGED” from the
wall receptacle prior to attaching
or removing accessories.
Assembling the Caddy
1. Slide the steam pocket towel over the
steam pocket frame. (Fig. 4)
2. Bring the towel all the way to the top
of the steam pocket frame. (Fig. 5)
11