Arming station operation guide – Elk Keypad Arming Station -M1KPAS User Manual
Page 6
SYSTEM NOTES
Central Monitoring Station: _______________________________ Acct. # ______
Installation Company: ________________________________________________
Address: ________________________________ Phone: ___________________
City: ___________________________________ St: _______ Zip: ___________
Exit Delay 1 Timer in seconds: _______
Exit Delay 2 Timer: _______
Entry Delay 1 Timer in seconds: _______
Entry Delay 2 Timer: _______
Burglary Alarm (Audible) Cutoff Timer in minutes: _______
Fire Alarm (Audible) Cutoff Timer in minutes: _______
User
Code
Digits
4 digits ____ or 6 digits ____
F Key + 1 Function: _______________________ Single Press? Y or N Silent? Y or N
F Key + 2 Function: _______________________ Single Press? Y or N Silent? Y or N
F Key + 3 Function: _______________________ Single Press? Y or N Silent? Y or N
F Key + 4 Function: _______________________ Single Press? Y or N Silent? Y or N
F Key + 5 Function: _______________________ SinglePress? Y or N Silent? Y or N
F Key + 6 Function: _______________________ SinglePress? Y or N Silent? Y or N
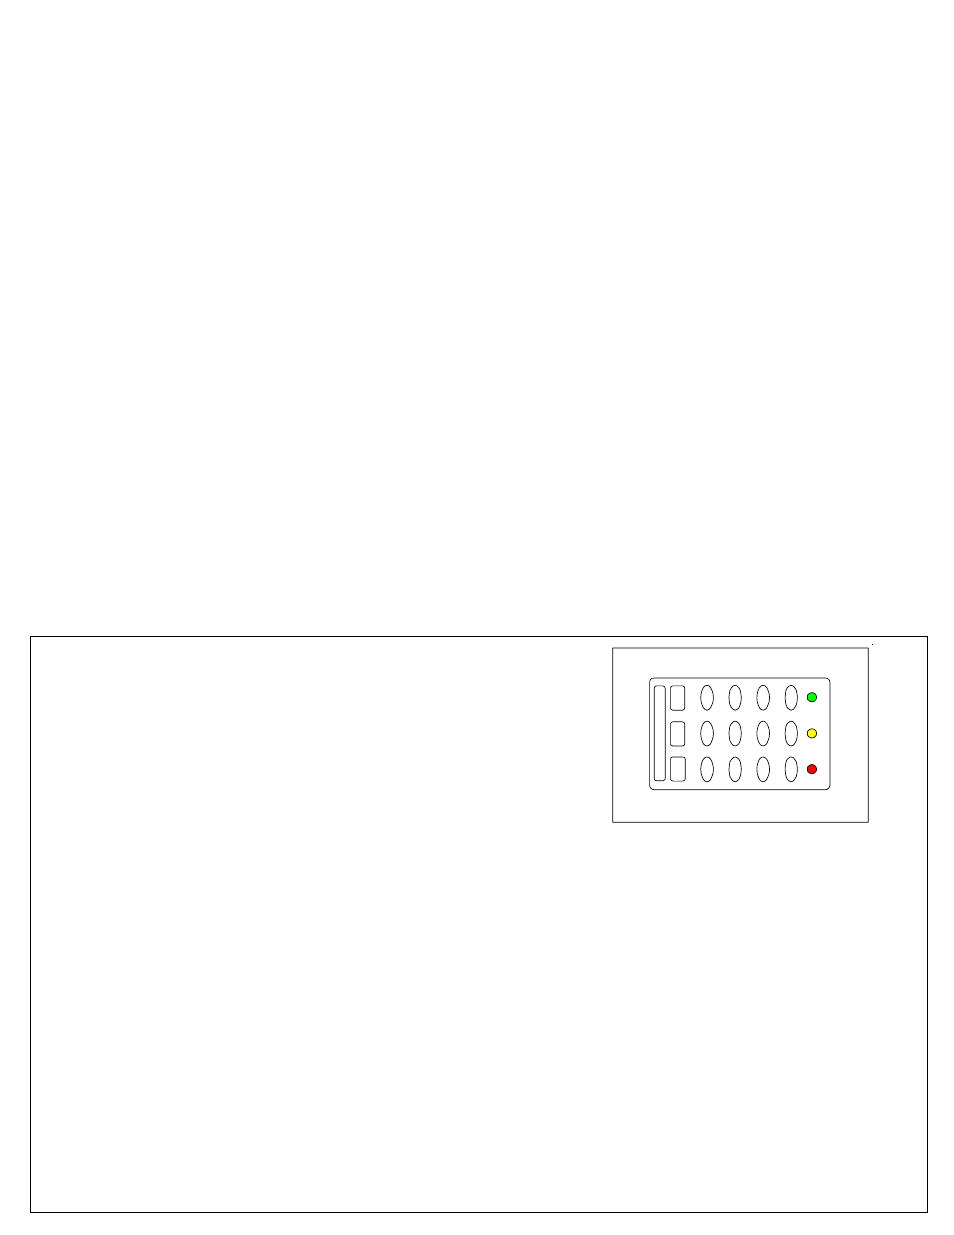
ARMING STATION OPERATION GUIDE
Ready Light -
Light is ON when all burglar zones are secure and the
system is OK for arming. If this light is OFF
, one or more zones are
violated (not secure) and the system cannot be armed. If light is
FLASHING it indicates that the system may be "Force Armed". Force
arming permits partial security even though one or more zones are
violated. Force armed zones are temporarily bypassed. If a force
armed zone becomes secure it will be re-instated into the system. For
maximum security
, all zones should be secured before the system is
armed.
Trouble Light -
Light is ON when any system trouble (AC Fail, Low
Battery
, etc.) exist
s on the system. In addition, this light will be ON if
a zone is manually byp
assed. NOTE:
The M1KP
A
S
Arming S
tation
cannot be used to manually bypass or unbypass a zone. It will be
necessary to have an LCD display keypad (M1KP or M1KP2 to
diagnose trouble indications.
Armed Light-
Light is ON when the system is armed. The mode of
arm will be indicated by the lighted Exit or Stay pushbuttons. Light is
OFF when the system is disarmed. If an alarm activation occurs this
light will blink as an alarm memory indication until a user code is
entered to acknowledge the alarm.
Exit Key -
The light behind this key will be ON when the system is armed in the Away (not occupied) mode.
All perimeter and interior zones should be active in the away mode.
Stay Key -
The light behind this key will be ON when the system is armed in the Stay (occupied) mode. Only
perimeter (doors and windows) zones should be active. Interior zones are ignored in the stay mode.
* Key -
This key serves as a clear or reset key
. If an error is made while entering digit
s, pressing this key
clears the error. Three presses is a master clear.
# Key -
This key is currently not used on the M1KP
AS.
"F"
Function Key -
T
o activate any one of the 6 programmable special functions you must press the "F" key
followed by any of the keys 1 thru 6 within a 4 second time window. The activation is programmed by the
inst
aller for special event
s or conditions such as Fire, Police, or Medical emergency
.
These functions may also
be used for non-alarm type applications such as: gate or door openers, lights, irrigation controls, etc. Activation
may be programmed for single or double press, which helps prevent accidental activation. If double press is
programmed, it will be necessary to repeat the exact same keystrokes twice, back to back in a short time
period. The double press is used as a safeguard against accidental activation.
User Codes
!
User Codes are required for arming, disarming, and to authorize certain features of your system. User
codes can be either 4 or 6 digits (refer to System Notes).
!
If a mistake is made while entering a user code, press the asterisk ( * ) key and enter the code again.
!
To prevent someone from hunting for a code the system can be set to temporarily lockout the keypad
after repeated incorrect codes. Consult your installer or installation record sheet for the number of
incorrect attempts allowed.
Checking the Ready Status
!
When the
Ready
light is off, one or more zones are violated. The system cannot be armed until you
secure or bypass the violated zone(s).
!
A display style keypad will be required in order to identify violated zones.
!
When the
Ready
light is on steady the alarm system is ready to be armed.
!
If the
Ready
light is flashing, it indicates the system can be armed even though one or more zones are
violated. This only occurs if the violated zones are programmed as force-armable. Arming will temporarily
exclude these violated zones from the system. If a force armed zone becomes secure while the system
is armed, it will automatically become live, meaning that it can activate an alarm if violated. This feature
is handy for a garage door. The system can be armed while the door is up. After backing out of the
garage and closing the door, the garage door will become normal and it will be re-included into service.
R
e
ad
y
Tr
ou
b
le
A
rm
e
d