Tannoy 8" Compact Ceiling Mounted Subwoofer for Installation Applications (Pre-Install)(Pair) User Manual
Page 11
20
CMS 801 Series
Quick Start Guide
21
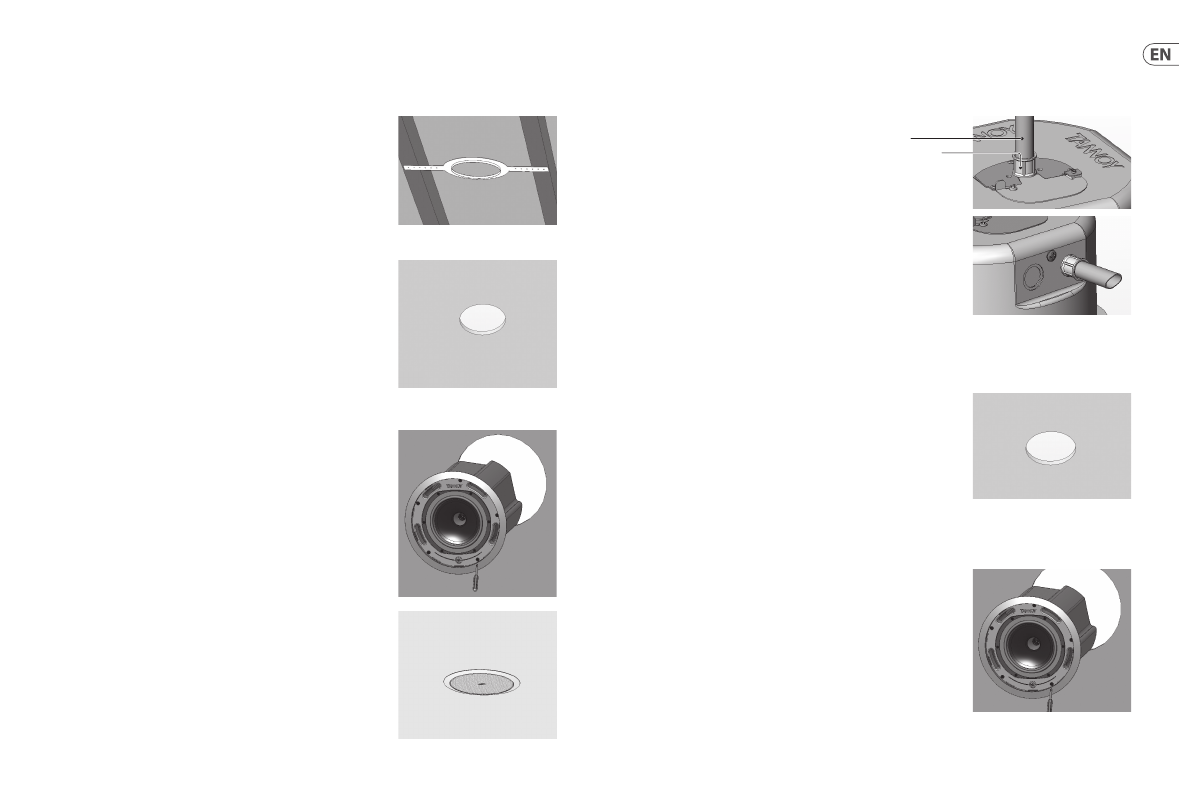
1. Attach the back can to the installed conduit. This can be attached in
two ways:
a. You can use the clamp at the back of the pre-install back can.
The product will accept a squeeze connector with a thread size of up
to 22 mm: To remove the cable clamp, simply unscrew the threaded
washer (under the wiring cover) which holds the cable clamp in place
and replace it with a conduit squeeze connector.
b. You can use any of the three knock-out points at the sides of the
PI back can (19 mm, 22 mm or 28 mm diameter):
2. Lay the speaker wiring to where the speaker will be fitted and complete the
plastering work on the ceiling.
3. Cut out the hole in the ceiling using a circular saw or pad saw
4. Go to the ’Wiring and Setting Up’ section for instructions on wiring and
setting up then return to point 5 below.
5. Slide the speaker assembly through the hole and turn the screws to extend
the mounting wings. Tighten the screws until a firm grip is achieved.
If using a power driver, Tannoy recommends a torque setting of 1.5 Nm.
DO NOT OVERTIGHTEN!
1. Nail or screw the plaster ring to the joists.
2. Lay the speaker wiring to where the speaker will be fitted and complete the plastering work
on the ceiling.
3. Cut out the hole in the ceiling using a circular saw or pad saw.
4. Go to the ’Wiring and Setting Up’ section for instructions on wiring then return to
point 5 below.
5. Slide the speaker assembly through the hole and turn the screws to extend the mounting
wings. Tighten the screws until a firm grip is achieved.
If using a power driver, Tannoy recommends a torque setting of 1.5 Nm.
DO NOT OVERTIGHTEN!
6. Insert grille by pushing it onto the speaker.
Conduit Squeeze
Connector
Conduit
Mechanical Installation Instructions for Optional Plaster Ring:
An optional plaster (mud) ring bracket is available from Tannoy. This bracket is designed to be pre-installed into newly
constructed, non-suspended ceilings.
Instructions for Optional Pre-Installation Back can (Pi Models Only):
An optional pre-install back can is available for all pi (pre-install) models. This back can is designed to be pre-installed into newly constructed, non-suspended ceilings.
Note that the CMS 801 PI model’s transformer is pre-attached to CMS 801 PI back can for easy install.