6 auto leveling, Caution – Creality Ender-3 S1 Pro FDM 3D Printer User Manual
Page 6
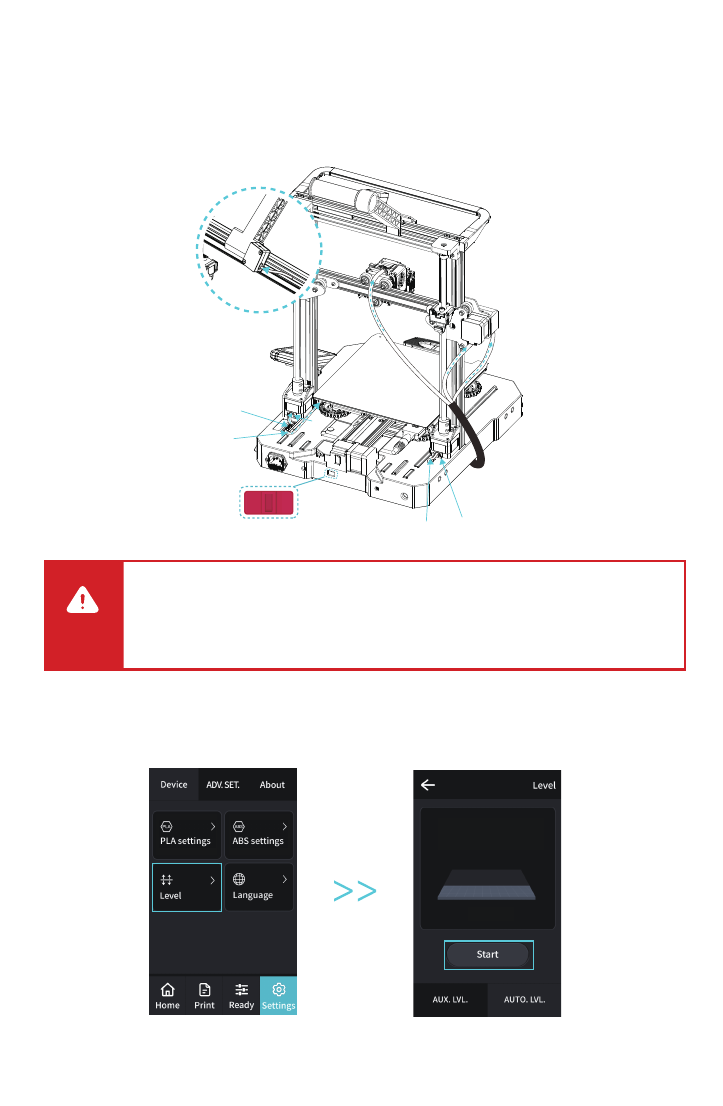
1.
Connect the nozzle to the 24-pin port as shown in the figure.
2.
Follow the yellow label on the 6-pin (4 wires)
port to connect the X-axis and Z-axis stepper motors.
3.
Connect the X-axis limit motor according to the yellow
label on the 3pin (2 wires) port.
4.
Connect the 3-pin (3 wires) 2.0 port to the pinboard, and connect the 3-pin (3
wires) 2.54 port to the filament detector.
5.
The LED light 3pin (2 wires) 2.54 port is connected to the expansion
port of the adapter board.
Caution:
●
Please ensure the correct position for the power supply switch and mains before
supply connection, in order to avoid damage to the device.
●
If the mains between 200V and 240V, please select the 230V for the power supply
switch (default is 230V).
●
If the mains between 100V and 120V, please select the 115V for the power supply switch.
6 Auto Leveling
1.
Go to "settings" and tap "leveling" to enter the CR Touch leveling interface.
Tap "start" and wait for the automatic leveling to complete.
(Please use the CR Touch for automatic leveling first. If the CR Touch lights up in
red and it cannot be leveled, please use the auxiliary leveling again.)
Filament detection wiring
X
Filament detection wiring
LED light wiring
Z2
115V
230V
Z1
Z-Axis Motor Cable
X
0%