Quick start guide, Installing the mounting accessory – Digital Watchdog DWC-P336PARAMW Parapet Mount Bracket for PTZ Dome Cameras (White) User Manual
Page 2
Quick Start Guide
Rev Date: 01/20
Copyright © Digital Watchdog. All rights reserved.
Specifications and pricing are subject to change without notice.
INSTALLING THE MOUNTING ACCESSORY
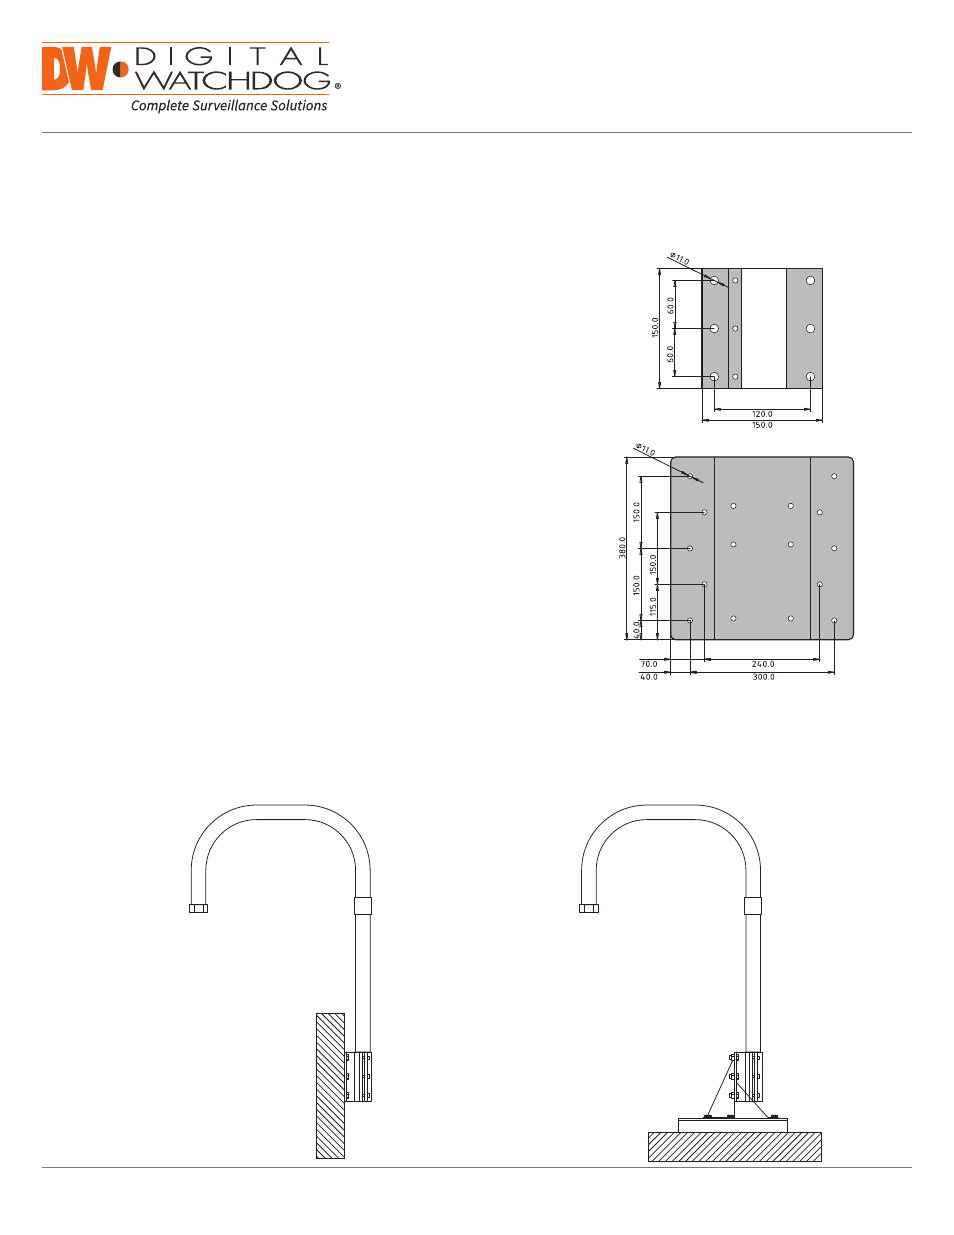
Roof mount installation
Parapet mount installation
Before the installation
1. The hardware necessary to install the mount depends on your installation
requirements.
2. The mount has pre-drilled holes for use with 3/8-16 (M10) type hardware
(recommended). Use as many of the mounting holes as possible.
3. Multiple fastening positions facilitate mounting flexibility. For a roof or
parapet installation, mount the camera using a minimum of five fasteners
on each side of the mounting plate.
4. Adding a sealant around the bolt holes between the mount and mounting
surface can prevent damage from water leakage
5. Be sure that the mount is installed in a location that can support the load.
All mounting hardware must have a minimum pullout strength of 600 lb
(272 kg) per bolt.
6. When mounting to wood, use screws long enough to penetrate at least
2.5” (64 mm).
7. When mounting to a steel structure, drill holes according to the
mounting pattern.
8. When mounting to masonry or concrete, use lead anchors or expansion
bolts installed according to the manufacturer’s instruction.
9. Run all necessary cabling to the location selected for the installation. Pass
the cables through the mount’s pole and connect to the camera as needed.
Mount hole size: inch (mm)