Wall mounting – VIEWSONIC 24" Frameless Touchscreen Monitor User Manual
Page 12
12
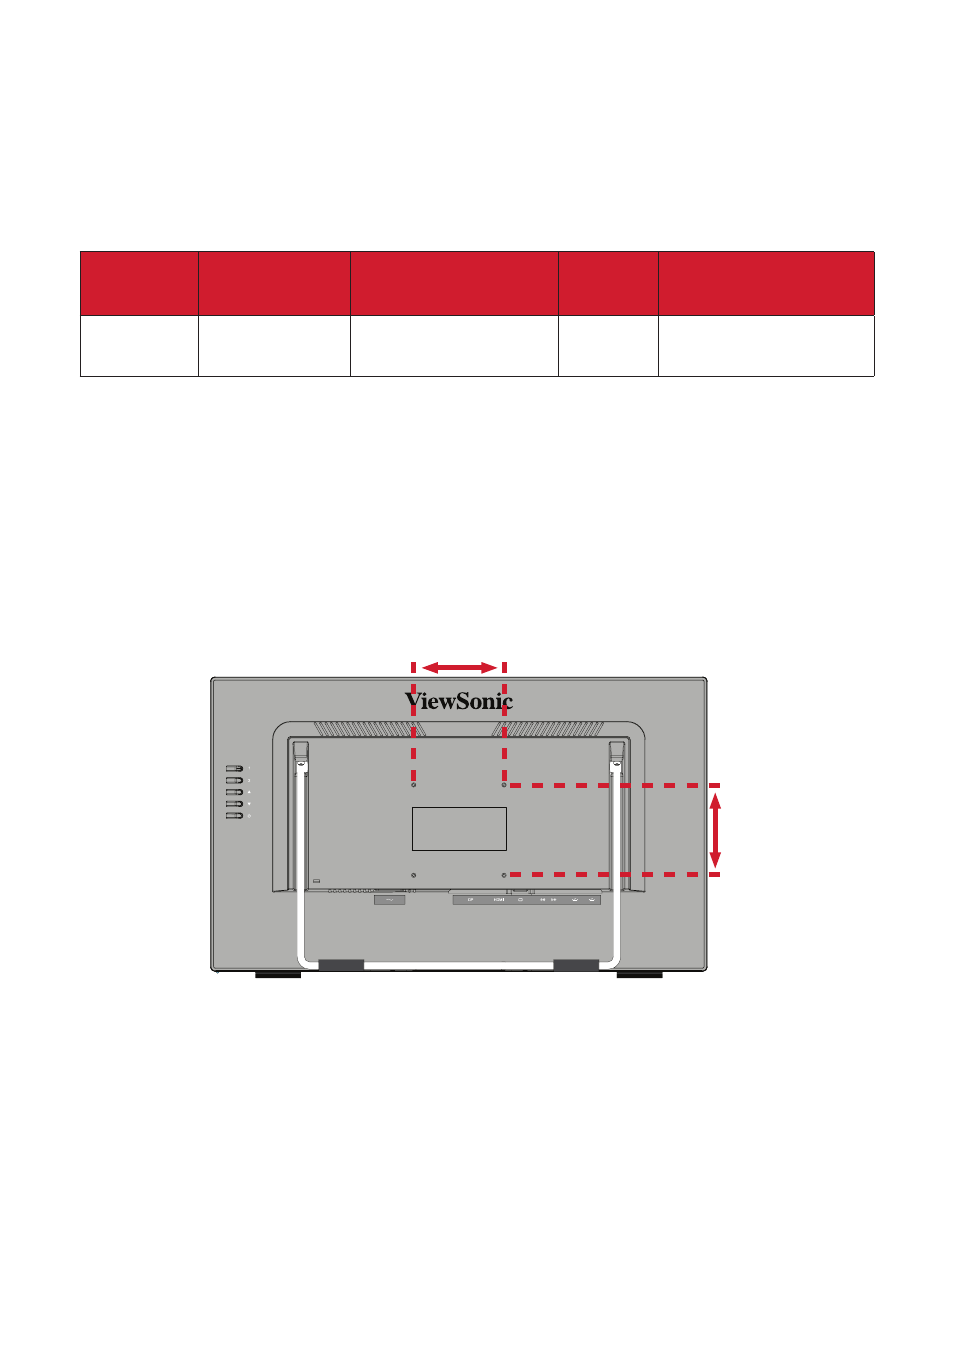
Wall Mounting
Refer to the table below for the standard dimensions for wall mount kits.
NOTE:
For use only with a UL certified wall mount kit/bracket. To obtain a wall-
mounting kit or height adjustment base, contact ViewSonic® or your
local dealer.
Maximum
Loading
Hole pattern
(W x H)
Interface Pad
(W x H x D)
Pad Hole
Screw Specification
& Quantity
14 kg
100 x 100 mm 115 x 115 x 2.6 mm Ø 5 mm
M4 x 10 mm
4 pieces
NOTE:
Wall mount kits are sold separately.
1.
Turn off the device and disconnect all cables.
2.
Place the device on a flat, stable surface with the screen facing down.
3.
Unscrew the attached stand and carefully remove it (if applicable).
4.
Attach the mounting bracket to the VESA mounting holes at the rear of the
monitor. Then secure it with four (4) screws (M4 x 10 mm).
100 mm
100 mm
5.
Follow the instructions that come with the wall mounting kit to mount the
monitor onto the wall.
- N4200W (42 pages)
- E71F (18 pages)
- Z90 (16 pages)
- Optiquest Q2201WB (2 pages)
- A90F+ (19 pages)
- M50 (16 pages)
- CD4230 VS12541 (45 pages)
- VX2453mh-LED (25 pages)
- GT775 (22 pages)
- G220F (19 pages)
- VX910 (21 pages)
- VX724 (21 pages)
- Optiquest Q9B (23 pages)
- P95f+-2 (19 pages)
- E50 (21 pages)
- E90 (2 pages)
- VX2739WM (2 pages)
- VX900 (21 pages)
- PS775 (16 pages)
- PT775 (18 pages)
- CD5233I (52 pages)
- G810 (20 pages)
- V1250 (66 pages)
- PERFECTFLAT PF77 (18 pages)
- A71F+ (18 pages)
- CLARITY VG150M (2 pages)
- EF70 (16 pages)
- Optiquest Q201WB (2 pages)
- G773 (32 pages)
- A91f+ (19 pages)
- G225F (20 pages)
- P75F+B (2 pages)
- E50B (2 pages)
- E70f+ (18 pages)
- VX2640W (26 pages)
- Optiquest Q2161WB (21 pages)
- E90f+ (19 pages)
- OPTIQUEST Q2205WB (23 pages)
- LCD DISPLAY VA1616W (25 pages)
- VX2753MH-LED VS13918 (25 pages)
- E90FB (18 pages)
- FuHzion VX2265wm (2 pages)
- Optiquest Z50 (18 pages)
- VX2258WM (25 pages)
- VX2450wm-LED (27 pages)