Precision Flight Aileron Potentiometer User Manual
Page 4
Determining the potentiometer you have:
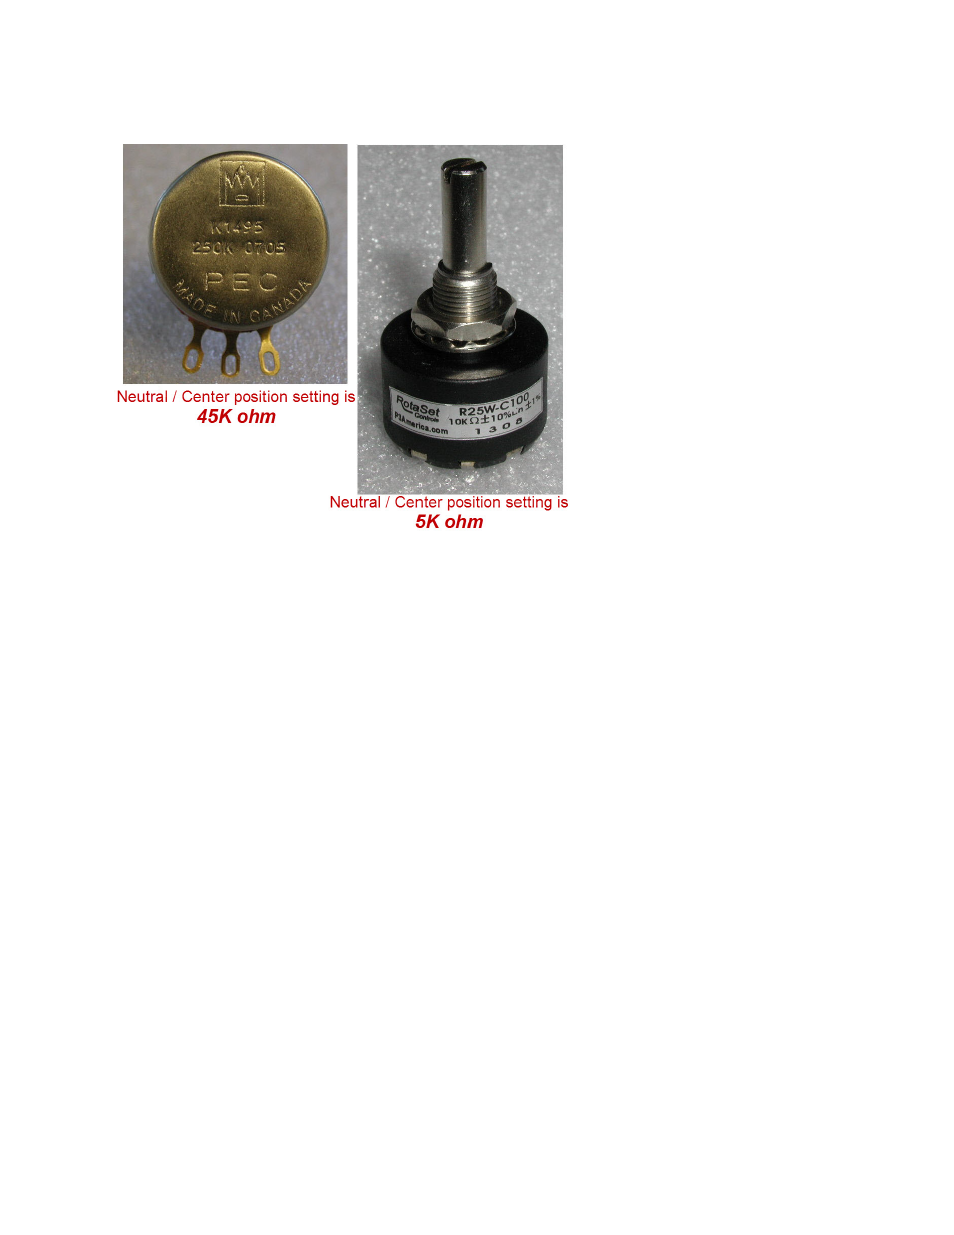
13. Using the reference picture below you will either have the 250K potentiometer (left) or 10K
potentiometer (right). Also note the center position value setting.
For the 250K ohm potentiometer:
14. Using the probe of a multi-meter take a reading from the same 2 pins used in the old potentiometer.
15. Turn the potentiometer shaft until you get 45K Ohm on your meter.
For the 10K ohm potentiometer:
16. Using the probe of a multi-meter take a reading from the center pin and one of the outside pins
17. Turn the potentiometer shaft until you get 5K Ohm on your meter.
Reinstallation:
18. Install the potentiometer on the U-Bracket
19. Install the assembly in the pulley and secure with the U-Bracket screws. Do not install set screw yet.
20. Tighten the potentiometer nut on the U-bracket. Pins should point up.
21. Install and tighten the set screw.
22. Using a multi-meter, recheck the potentiometer shaft is still set to 45K Ohm if using the 250K ohm or 5k
ohm if using the 10K ohm potentiometer . If you need to make a small adjustment you can loosen the
potentiometer nut and turn the potentiometer body until you get the proper reading.
23. Retighten the nut.
24. Reconnect wires to the potentiometer.