Important information, Important, Operating instructions – Euro-Pro EP91W User Manual
Page 4
Congratulations! As the owner of a new Food Processor, you are about to use a very
versatile and powerful kitchen appliance that will quickly become an indispensable
item in your kitchen. EURO-PRO products are engineered to meet the highest
quality standards and are designed to offer the ultimate in ease of operation and
convenience.
IMPORTANT INFORMATION
Please read all the following instructions carefully.
IMPORTANT
For your protection, the Food Processor has a been fitted with a safety interlock
switch. The unit cannot run unless the food processor lid is locked in place. Never
attempt to defeat the food processor lid interlock.
2
OPERATING INSTRUCTIONS
Whipping Attachment (Optional)
CAUTION: Make sure that the unit is
unplugged from the power source and
the speed control dial is in the “OFF”
position before inserting or removing
attachments.
1. Fit the processor bowl and spindle as
described previously on page 4.
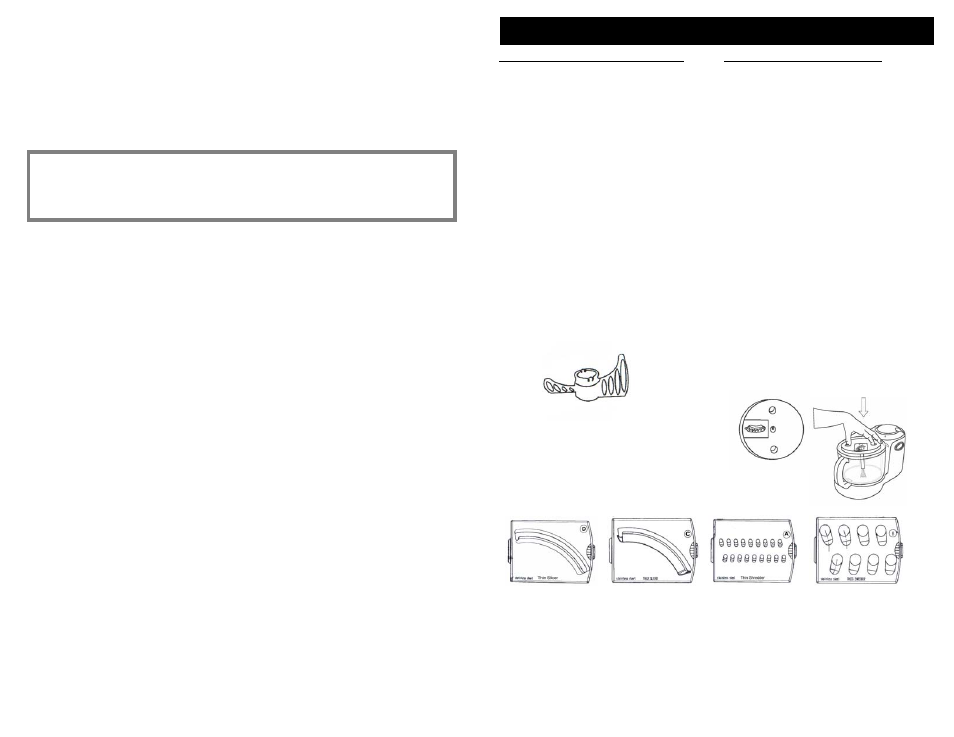
2. Fit the whipping attachment over the
spindle and press firmly into place.
(Fig. 13)
3. Place the ingredients into the bowl.
4. Fit the lid and click into place as
described in the “Setting Up” section
(page 4).
5. Plug in the food processor.
6. Turn the food processor on selecting
high speed.
7. Recommended speed for whipping
is high.
8. Remove the whipping attachment from
the bowl before removing the whipped
ingredients.
FOR SAFETY, ALWAYS LEAVE THE
PUSHER IN PLACE WHILE OPERATING
THE PROCESSOR.
French Fry Blade Assembly
CAUTION: Make sure that the unit is
unplugged from the power source and
the speed control dial is in the “OFF”
position before inserting or removing
attachments.
Note: The French Fry Blade is already
assembled to the blade holder. Do not
try to remove it. (fig. 14)
1. Fit the processor bowl and spindle
as detailed previously.
2. Using the finger holes in the french fry
blade holder, fit it over the spindle and
press firmly into place as indicated.
(fig. 15)
WARNING: USE EXTREME
CAUTION WHEN HANDLING
BLADES. BLADES ARE SHARP.
4. Fit the lid and click into place as
indicated in Setting Up section
(page 4).
5. Plug in the processor.
6. WARNING: USE THE FOOD
PUSHER TO ADD FOOD INTO THE
PROCESSOR BOWL THROUGH
THE FEEDER TUBE.
Do not overload the bowl. In one
operation, you can process a
maximum 6 cups (1500 ml) of food.
Fig. 14
Fig. 15
Processing Examples
For thin slicing:
-
Recommended speed level is High
(Cucumbers, raw potatoes, lettuce, carrots)
For coarse slicing:
- Recommended speed level is High
(Cabbage, carrots, onions)
For fine shredding:
- Recommended speed level is High
(Carrots, cucumbers, cabbage)
For coarse shredding: - Recommended speed level is High
(Lettuce, carrots, apples)
7
THIN SLICING
THICK SLICING
FINE SHREDDING
COARSE SHREDDING
Fig. 13