Assembling your cordless sweeper, Before you start – Euro-Pro UV610 User Manual
Page 4
ASSEMBLING YOUR CORDLESS SWEEPER
Before you start:
Your Cordless Sweeper will require very little assembly. You should remove it
from the carton and familiarize yourself with all the components listed per the
exploded view drawing (pg.2) This will help you in the assembly and operation of
your cordless sweeper
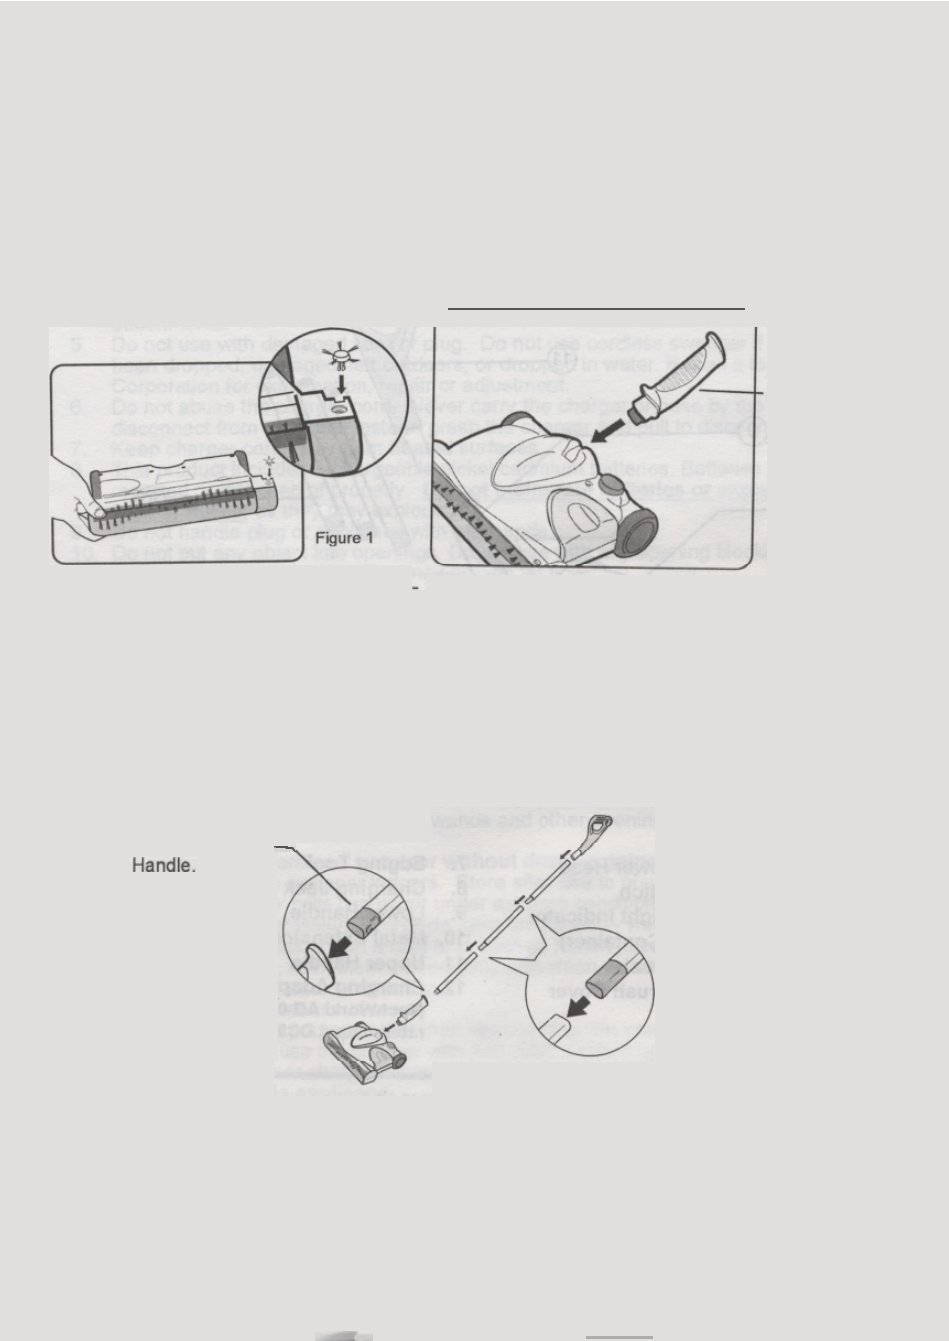
I. Insert the Edging Tool into the “square” hole under the bottom of the sweeper power
head. Gently but firmly push until the edging tool locks into place.(See fig. 1)
2. Insert the lower handle - small end
in place.(Fig. 2)
Lower Handle
Figure 2
into the sweeper power head. Push until firmly
3. fissemble the metal extension handles by pushing the plastic insert into the mating
metal tube. Push until only small portion of insert is visible or you cannot press any
farther into the tubing. Push the handle assembly into the upper handle.(Fig. 3)
NOTE: One metal extension tube has a different plastic insert. This tube should
be on the bottom of the handle.
Insert the handle assembly into the lower handle so that the “tab’ on the plastic
insert snaps into the open slot on the
lower handle. (Fig.
3a)
Insert Into Lower
Figure 3a
Figure 3
4.
Place the handle into the upward storage position.
5. Plug the charging adapter into the sweeper power head charging jack. Plug
the charging adapter cord into a standard electrical outlet (lZOV--,60Hz.)