Sealey DAS151 User Manual
Page 2
Features variable speed control ranging from 4000 to 7000rpm. Rotating dust
extraction port. Alloy bevel gear head with composite motor housing. Supplied
with Ø150mm hook-and-loop backing pad and side handle.
2.2. Specification: DAS151
Power . . . . . . . . . . . . . . . . . . . 750W
No load speed . . . . 4000 - 7000rpm
Orbit size . . . . . . . . . . . . . . . 3.5mm
Pad . . . . . . . . . . . . . . . . . . Ø150mm
Weight . . . . . . . . . . . . . . . . . .2.9 kg
Vibration . . . . . . . . . . . . . . .4.46m/s²
Sound power level . . . . . . . . 94.8dB
2. INTRODUCTION & SPECIFICATIONS
WARNING! Disconnect sander from power supply before changing
accessories, servicing or performing maintenance. Replace or repair any
damaged parts. Use genuine parts only, unauthorised parts may be
dangerous and will invalidate the warranty.
4.1. After each 50 hours use (or as required), remove dust by blowing air
through the side vents and around the pad bearing. Regular periodic
cleaning will prolong the life of the sander.
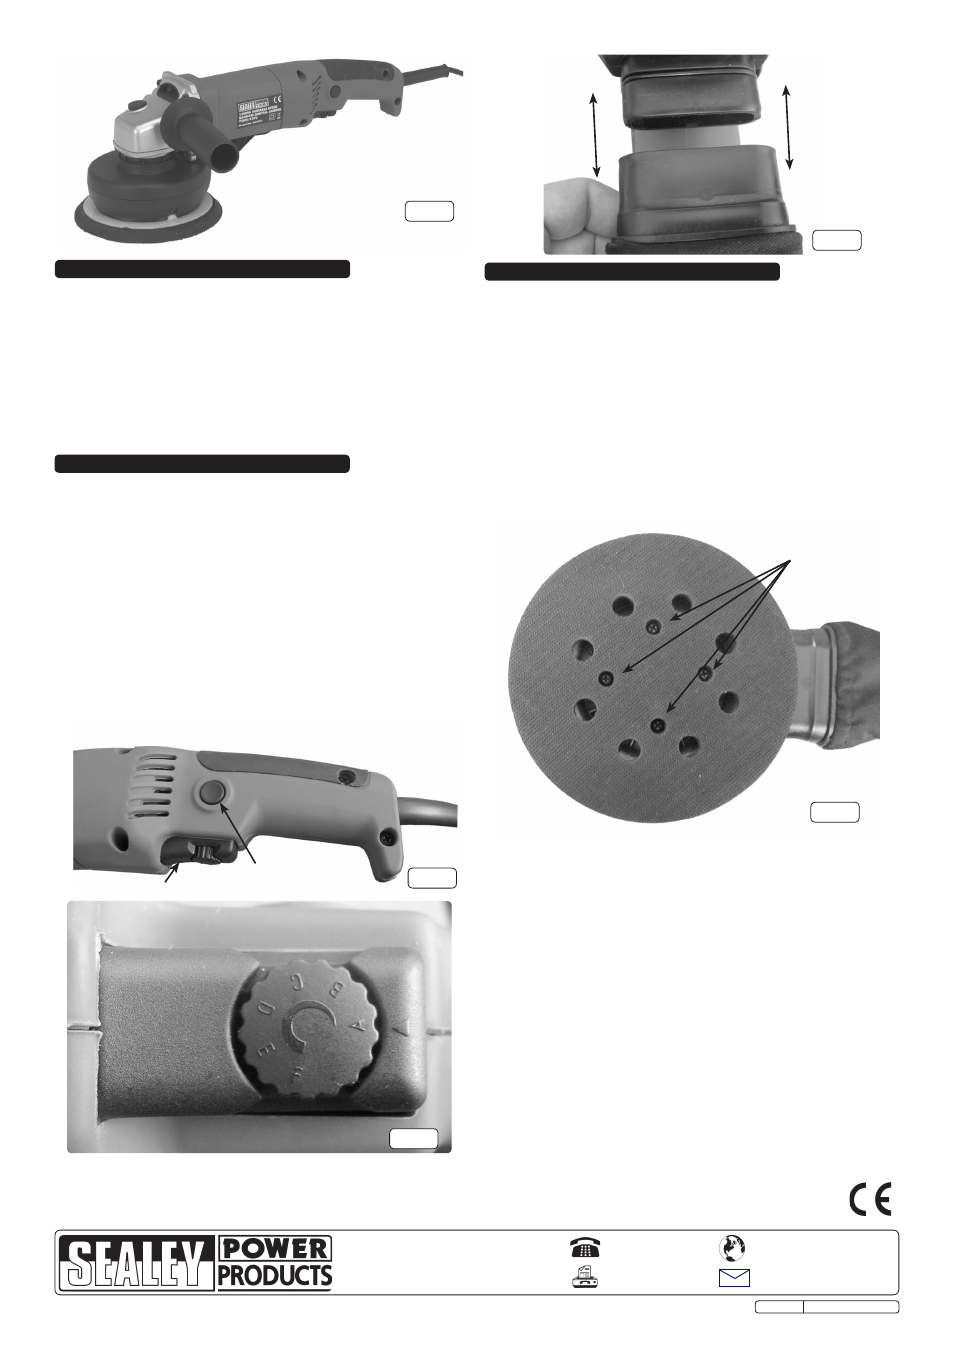
4.2. Change pads when required. ensure pad and disc RPM ratings are equal
to, or exceed the machine rating. If the disc becomes unbalanced, it will
cause the bearings to wear. To change the backing pad remove the four
screws and washers (A) shown in fig.5, replace the pad and secure.
4.3. When not in use store in a safe, dry, childproof location.
4.4. All other service and maintenance must be carried out by an authorised
Sealey dealer.
3. OPERATING INSTRUCTIONS
4. MAINTENANCE
WARNING! Before use, ensure that you have read and understood
Section 1 Safety Instructions.
3.1. Attach the correctly rated sanding disc (not supplied) to the sanding pad.
3.2. Plug the sander into the mains power supply.
3.3. Grip the side handle and turn on by pressing the trigger (fig 2.1). Pressing
in the button (fig 2.2) will hold the trigger and allow for continuous running.
3.4. To release the switch and stop the sander, depress the trigger - it will
spring to the Off position.
3.5. The speed of the sander can be adjusted using the variable speed dial
within the trigger, turn the dial clockwise to increase the speed or
anti-clockwise to reduce the speed (fig.3).
3.6. Check that the unit is working correctly before use.
3.7. The dust collection bag will need to be emptied on a regular basis.
disconnect from the power supply and hold the sander in a vertical
position, gently pull off the dust bag (fig.4) and empty in to a suitable
container. Refit the dust bag onto the sander, ensuring that it is pushed
fully home to create a good seal.
Note: The sander is designed for dry use only. DO NOT use with water or any
other liquids.
fig.2
2
1
fig.3
fig.1
fig.4
fig.5
A
NOTE: It is our policy to continually improve products and as such we reserve the right to alter data, specifications and component parts without prior notice.
IMPORTANT: No liability is accepted for incorrect use of this product.
WARRANTY: Guarantee is 12 months from purchase date, proof of which will be required for any claim.
INFORMATION: For a copy of our latest catalogue and promotions call us on 01284 757525 and leave your full name and address, including postcode.
01284 757500
01284 703534
Sole UK Distributor, Sealey Group,
Kempson Way, Suffolk Business Park
,
Bury St. edmunds, Suffolk,
IP32 7AR
www.sealey.co.uk
Web
Original Language Version
dAS151 Issue: 2 - 18/02/10