Technical specification, Model: s0758, Introduction – Sealey S0758 User Manual
Page 2: Content & assembly, Fig.2 fig.3, Fig.1, Spindle locking button
3. TEChNICAL SpECIFICATION
DO NOT operate spindle lock button while pad is rotating.
DO NOT operate power control while spindle lock is operating.
DO NOT allow untrained persons to operate the sander/polisher.
DO NOT operate the sander/polisher when you are tired or under the influence of alcohol, drugs or intoxicating medication.
DO NOT use the sander/polisher where there are flammable liquids, solids or gases such as paint solvents, etc.
DO NOT leave the sander/polisher operating unattended.
DO NOT carry the sander/polisher with your finger on the power switch.
DO NOT pull the cord to remove the plug from the power supply.
Use a qualified person to lubricate and maintain the sander/polisher.
When not in use unplug from the mains power supply and store in a safe, dry, childproof area.
Model: S0758
Nominal Power Rating
1200Watts
No Load Speed Range 1000 - 3300rpm
Pad Size
180mm
Sound Level
Spindle
Supply Lead
Vibration Level
90.1dB Power - 85.1dB Pressure
MI4
2mtr
5.1m/s²
2. INTRODUCTION
Features variable speed control giving a range suitable for both sanding and polishing. Speeds from 660 to 3000rpm. Alloy bevel gear head with
composite motor housing. D-handle is reversible for left or right hand use. Spindle lock for easy pad removal. Safety button to prevent accidental
start-up. Supplied with Ø180mm hook-and-loop backing pad, polishing bonnet, spare brushes and hex key.
4. CONTENT & ASSEMBLY
4.1.
Content
4.1.1. Check the contents of the carton. If any item is missing or damaged contact
your supplier immediately.
Fig.1.1. polisher Unit, 2. D handle, 3. pad. polishing Mop, Spare Brushes and Allen Key.
4.2.
Assembly
WArnIng! Ensure unit is not plugged into mains before attempting any assembly.
4.2.1. Attach the D-handle using the two Allen Bolts (fig.1.4). Note: The handle is reversible to suit the application and/or operator.
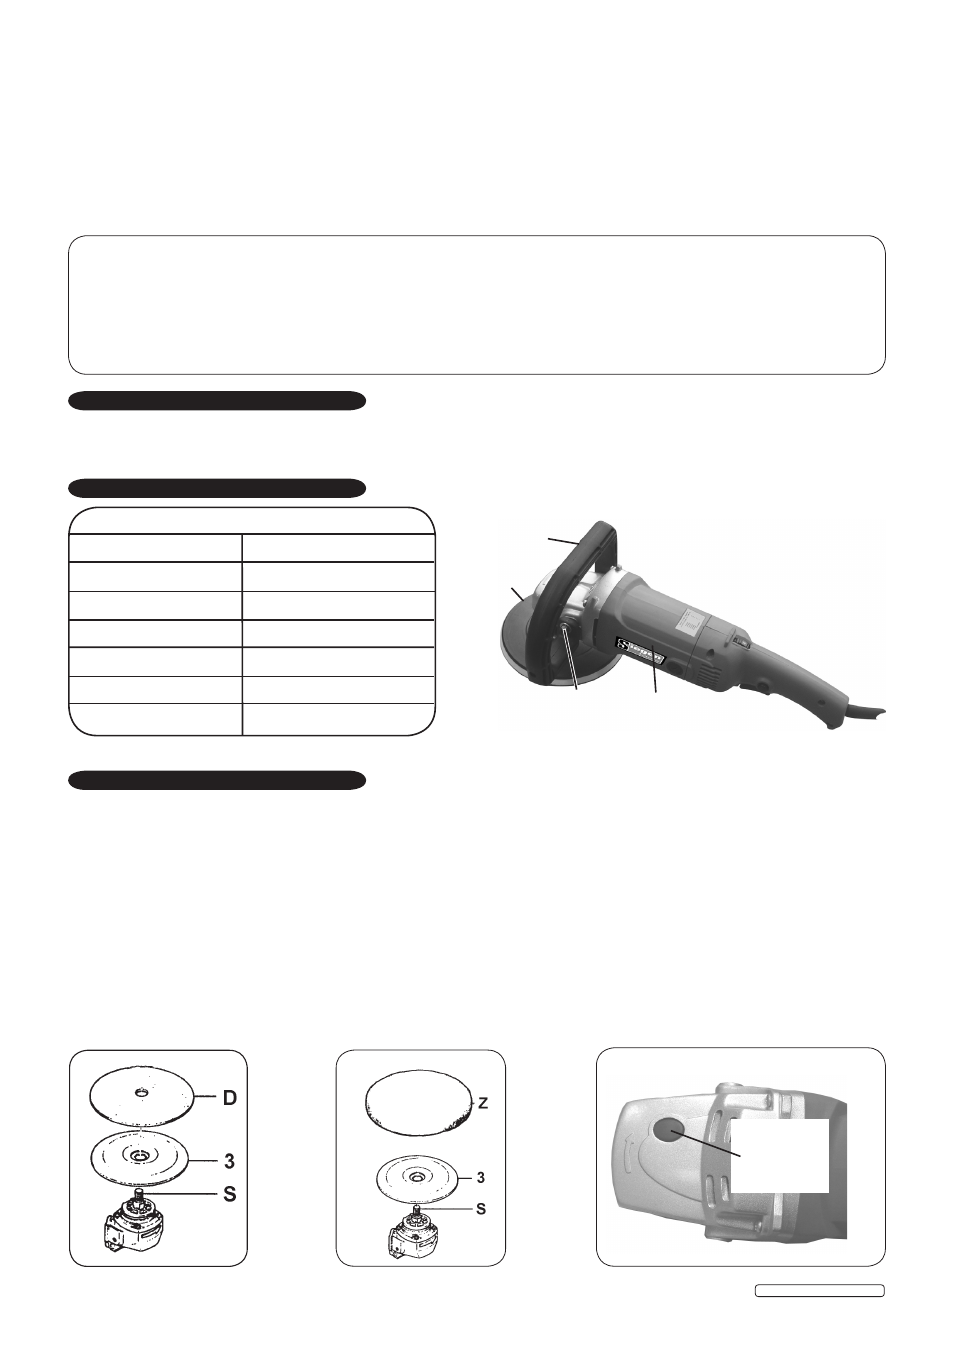
4.2.2. To attach a sanding disc:
Spin rubber pad (fig 2.3) on spindle (S), tighten/loosen by hand whilst holding the spindle steady with locking button (fig.4). Follow with
sand paper disc (D).
4.2.3. To fit a polishing bonnet:
Fit rubber pad (fig 3.3) on spindle (S), tighten/loosen by hand whilst holding the shaft steady with locking button (fig.4). Neatly fit the
polishing bonnet (Z) over the secured rubber pad.
fig.2
fig.3
fig.4
lEAD PAInT WArnIng! Paint once contained lead as a traditional ingredient. Contact with the dust from the removal of such paint is toxic and must therefore be avoided. The
following action must be taken before using machine as a sander:
1.
User must determine potential hazard relating to age of paint to be removed. (Modern paints do not have lead content).
2.
DANGER! Keep all persons and pets away from the working area. The following are particularly vulnerable to the effects of lead paint dust:
Expectant women, babies and children.
3.
We recommend personal protection by using the following safety items:
A) Paint Spray respirator. b) PE Coated Hooded Coverall. C) latex gloves.
4.
Take adequate measures to contain paint dust, flakes and scrapings. Wear safety equipment, as in (3) above, and thoroughly clean all areas when task is complete.
5.
Ensure the paint waste is disposed of in sealed bags or containers according to local regulations.
fig.1
1
4
2
3
SpINDLE
LOCKING
BUTTON
Original Language Version
S0758 Issue: 2 - 19/10/09