Fig.b, Fig.a, Plastic welding tool – Sealey HS102 User Manual
Page 3: Care & maintenance 7. other tasks
The gun may also be used for the following:
Removing self-adhesive stickers and trim
Loosening rusted or over-tightened nuts and metal screws
Thawing frozen pipes, frozen doors, padlocks, etc.
Defrosting ice-compartments
Fast drying of paint or varnish
Highlighting natural woodgrain before staining, or varnishing
Softening old putty
Drying wet timber prior to repairs or finishing
Shrinking PVC shrink-wrap sheeting
Shrinking polyvinyl wire joints
Soldering
Sterilisation (500°C)
Removing candle wax and restoring candles
Binding of engine parts
Repair of tarpaulin or PVC
Joining garden hose
Liquifying pewter, tar, bitumen or wax
Model making
Moulding PVC, Copper, Plexiglass into shape
Plumbing tasks
Roofing repairs
Applying veneer strips
Control of garden path weeds
Waxing and de-waxing skis
Chemistry: use as a bunsen-burner and more.
Important: Safety is a key principle when endeavouring to use the gun for different tasks. When approaching a new task, consider
the potential dangers that may arise, take any necessary precautions, and practice before attempting the job.
HS102 may be adjusted for use as a Plastic Welding Tool (welding kits available as described in part 3 - included with HS102K).
5.1.
Testing materials to be welded: Most adhesion failures are due to the incorrect matching of materials. The welding rod
therefore must be of the same material as the item to be welded. For instance, most car body parts are made of ABS material.
Some manufacturers however, use different plastics in their products. To test, snip off a piece of material from the work to be welded
and proceed as follows:
5.1.1.
Set light to the sample with a naked flame. If the flame gives off black smoke it is (almost) certain to be ABS.
5.1.2.
By sample, take a strip of material from an unobtrusive part of the component and use it as your welding rod.
5.1.3.
If in doubt, contact the item manufacturer.
5. PLASTIC WELDING TOOL
5.2.
Welding the material:
5.2.1.
Remove any paint or other covering from the entire adjoining surface areas of the pieces
to be welded.
5.2.2.
Cut a chamfer on adjoining pieces to form a groove that can be filled with weld.
5.2.3.
Using the hot air gun (without any welding rod loaded) thoroughly pre-heat both surfaces to
be welded (they should be soft but not tacky).
5.2.4.
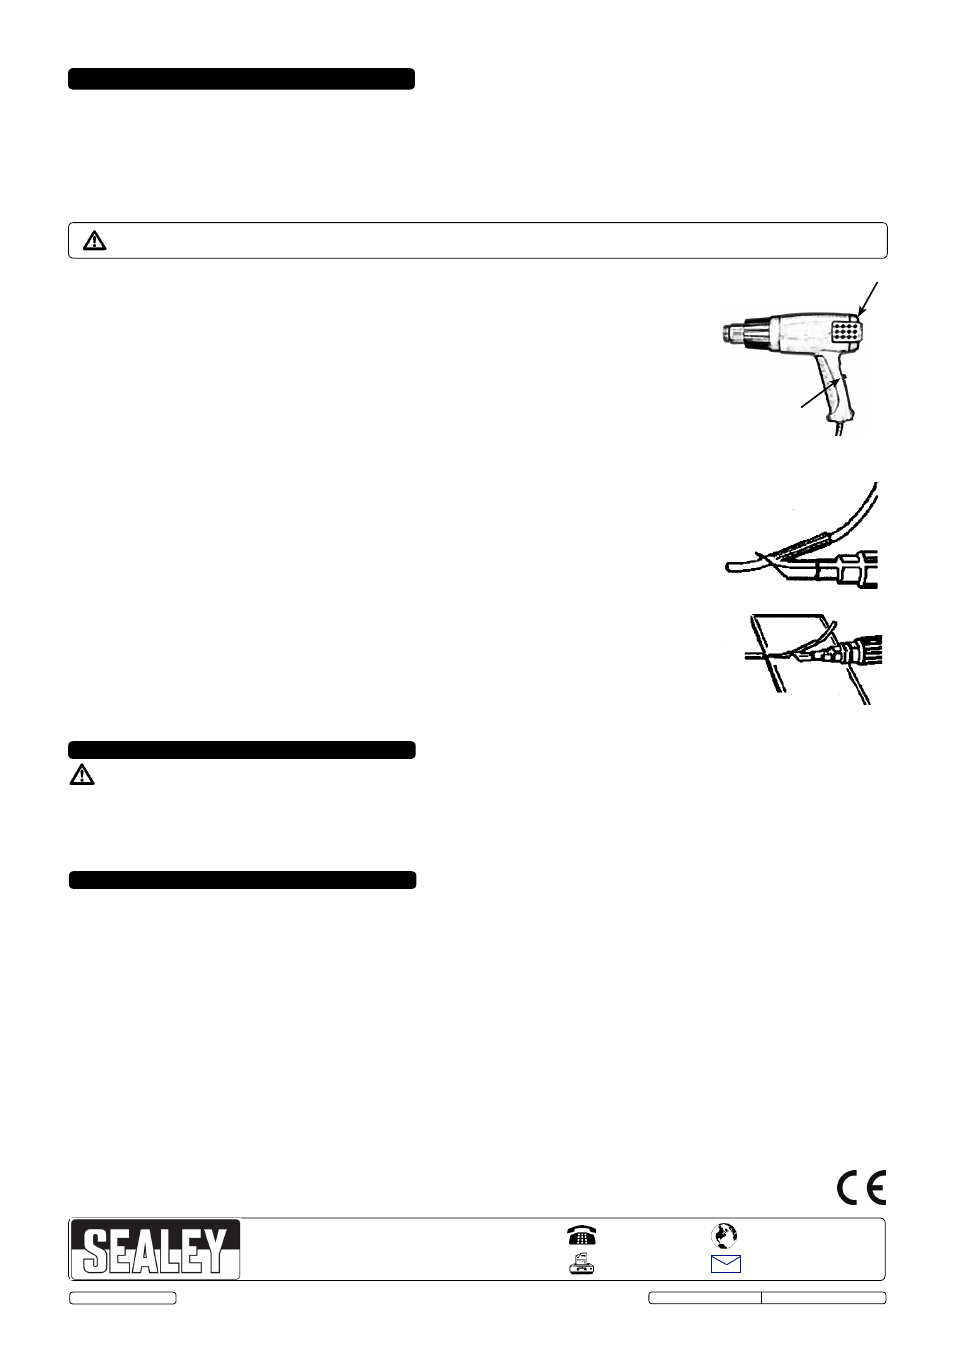
Fit the 9mm reduction nozzle to the gun and the welding nozzle to the reduction nozzle.
5.2.5.
Select a low to medium heat by turning the temperature regulator at rear of the gun (fig A).
Experience will determine the setting, but we suggest position 6 which gives 330-340°C as
a starting position for most commonly used plastics.
5.2.6.
Select the fan speed setting on the hot air gun according to the size and thickness of material
being welded (i.e. Thin = Two, Thick = Three).
5.2.7.
Now position the nozzle over the material to be welded and feed the welding rod through the
slot at the same time moving the gun along the groove at a speed according to the melt/
adhesion rate (fig B).
5.2.8.
A good connection is made when a small dome forms (a trial is always recommended using
an odd piece of material). With practice, a good flat weld can be achieved by applying
pressure on the nozzle as the rod is drawn along. A roller is available as an optional extra.
5.2.9.
Overlapping materials can be removed with a sharp knife.
5.3.
Welding problem checklist. If a weld fails ask yourself the following questions:
5.3.1.
Do the materials match?
5.3.2.
Are both surfaces clean?
5.3.3.
Are surfaces chamfered?
5.3.4.
Have surfaces been pre-heated correctly?
5.3.5.
Did the welding rod melt to the correct consistency?
5.4.
Important notes.
5.4.1.
To weld over cracks in the material, drill approximately 1/16” diameter holes at each end
of the crack to prevent running during welding and sanding.
5.4.2.
Handling the welding nozzles - The nozzle becomes very hot and should only be removed
with pliers or allowed to cool if removing by hand.
FIG.B
Fan speed
switch
Insert welding rod
through the upper
tube of the welding
nozzle
Draw the welding head
with the rod along the join.
DANGER: Step 5.1.1 must be performed in a well ventilated area (out of doors if possible). Never perform task in a domestic
building. Safeguard fire. Wear safety gloves and face mask.
DO NOT inhale smoke.
6.1.
Keep the air intake and outlet openings clean and free from dirt and peelings.
6.2.
Only use a damp cloth and mild household cleaning agent to wipe the gun clean.
DO NOT use turpentine, paint thinner,
gasoline, or similar substance to clean the gun.
6.3.
Check the gun, power lead and nozzles for damage before storage.
6.4.
Store the gun in a safe, dry, childproof location.
6. CARE & MAINTENANCE
7. OTHER TASKS
Unplug gun from power supply and allow to cool before performing any maintenance.
FIG.A
Temperature regulator
NOTE: It is our policy to continually improve products and as such we reserve the right to alter data, specifications and component parts without prior notice.
IMPORTANT: No liability is accepted for incorrect use of this product.
WARRANTY: Guarantee is 12 months from purchase date, proof of which will be required for any claim.
INFORMATION: For a copy of our latest catalogue and promotions call us on 01284 757525 and leave your full name and address, including postcode.
01284 757500
01284 703534
Sole UK Distributor, Sealey Group,
Kempson Way, Suffolk Business Park
,
Bury St. Edmunds, Suffolk,
IP32 7AR
www.sealey.co.uk
Web
HS102.V2 & HS102K.V2 Issue No.3 (SP) 10/12/13
Original Language Version
© Jack Sealey Limited