Fig.1 fig.2, Maintenance – Sealey CP2400 User Manual
Page 3
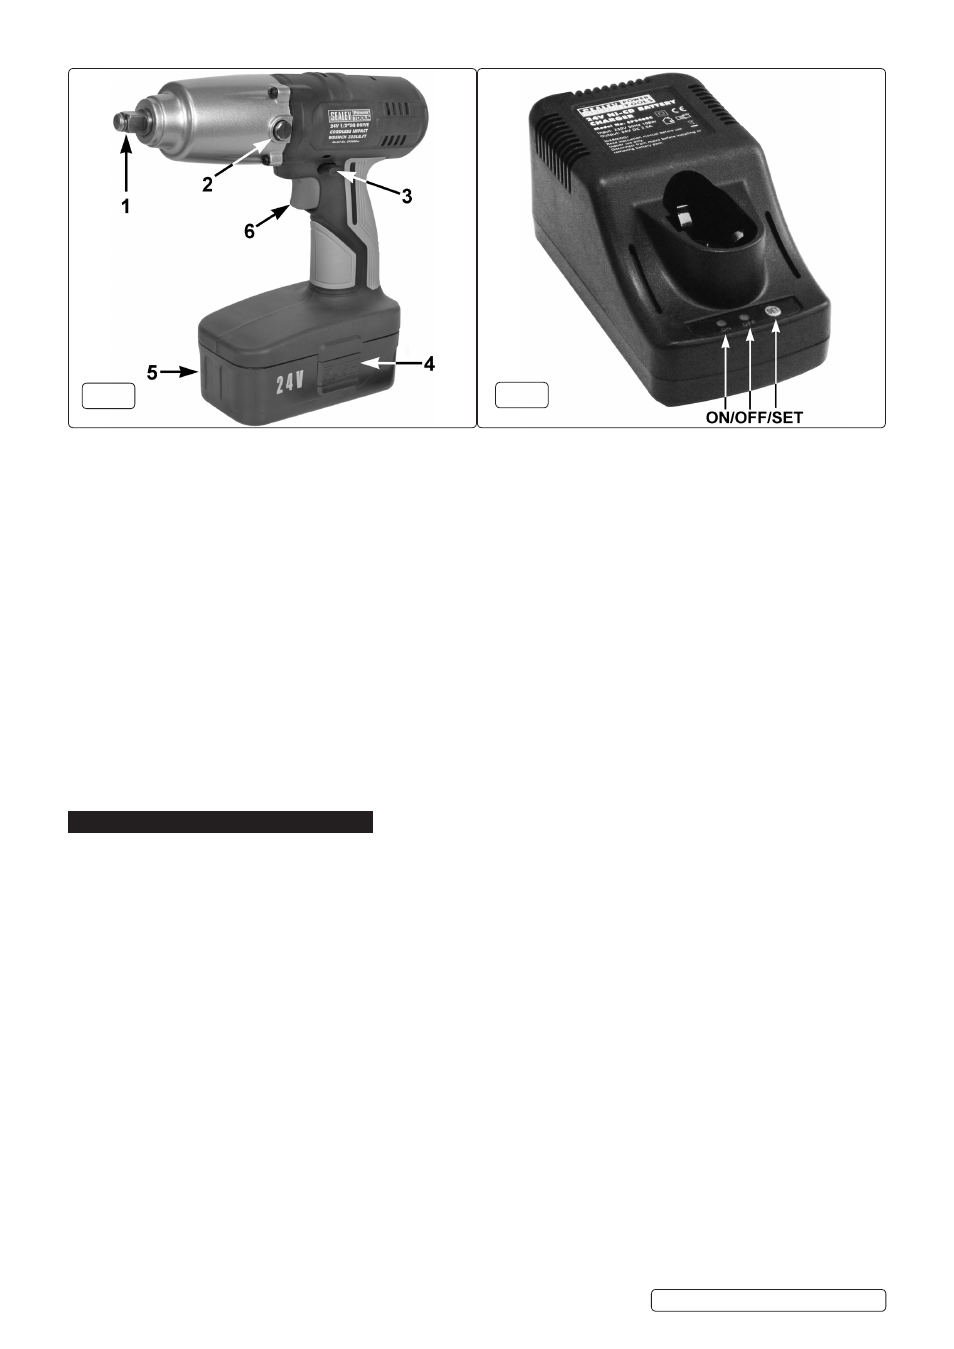
fig.1
fig.2
NOTE: The battery pack is designed so that it will only enter the charger unit the correct way. When placed in the charger, a very
slight downward pressure will seat the pack firmly into the power terminals.
4.1.4. Switch on main supply to charger and the Green LED (fig.2) will light. Press “SET” to begin charging and the Red LED will light.
4.1.5. When the fast charge is complete the red LED will go out and the green LED will light to indicate trickle charging. The battery pack is
now ready for use.
Note: When new, the battery pack will have been shipped in a low charge state. It will take longer to charge initially, and several
subsequent charges may also take a little longer than when the battery pack reaches its optimum performance. Normal charging time
is approximately 1 hour.
4.1.6. After removing the battery, disconnect the charger from the mains supply and store it in the carry case.
R
WARNING! Ensure that you read, understand and apply the safety instructions before use.
4.2. USING THE WRENCH
4.2.1. Use only impact sockets which are specifically designed for use with an impact wrench. The use of normal chrome vanadium sockets
is dangerous, since these are more brittle and are liable to shatter.
4.2.2. Fit the socket to the wrench by snapping it onto the square drive (fig.1.1).
4.2.3. Fit the battery pack to the wrench by aligning the tongue on the battery with the groove in the housing and slide it into place. Ensure
that the battery pack is firmly located, you will hear an audible click when it has locked into position.
4.2.4. Select the required direction of rotation. To change direction, push switch (fig.1.3) to the left or right. Familiarise yourself with this
operation before use.
DO NOT attempt to change the direction of rotation whilst the trigger (fig.1.6) is depressed.
4.2.5. When the wrench is not in use, use the same switch to lock off the trigger by placing the switch in the middle position.
4.2.6. When tightening, release the trigger as soon as the impact sound is heard. Take care not to over-torque small fixings.
Note: On critical fixings, final tightening should be carried out using a torque wrench, setting it according to the product or the vehicle
manufacturer’s specifications.
5. MAINTENANCE
5.1. CLEANING
5.1.1. Keep the outer case of the wrench clean and free from grease.
DO NOT wash with water or use solvents or abrasives. Use a damp
cloth.
5.1.2. For any other service or maintenance, contact your authorised service agent.
5.2. LUBRICATION
If the wrench has not been used for some time, remove the lubrication screw (fig.1.2) and inject grease into the impact mechanism,
DO NOT overfill - a small amount each time should be sufficient.
CP2400.V4 | Issue 2(L) 15/04/15
Original Language Version
© Jack Sealey Limited