Fig.1 fig.2, Installation 7. operation, Positioning the alarm – Sealey SCMA1 User Manual
Page 2
6. INSTALLATION
7. OPERATION
fig.1
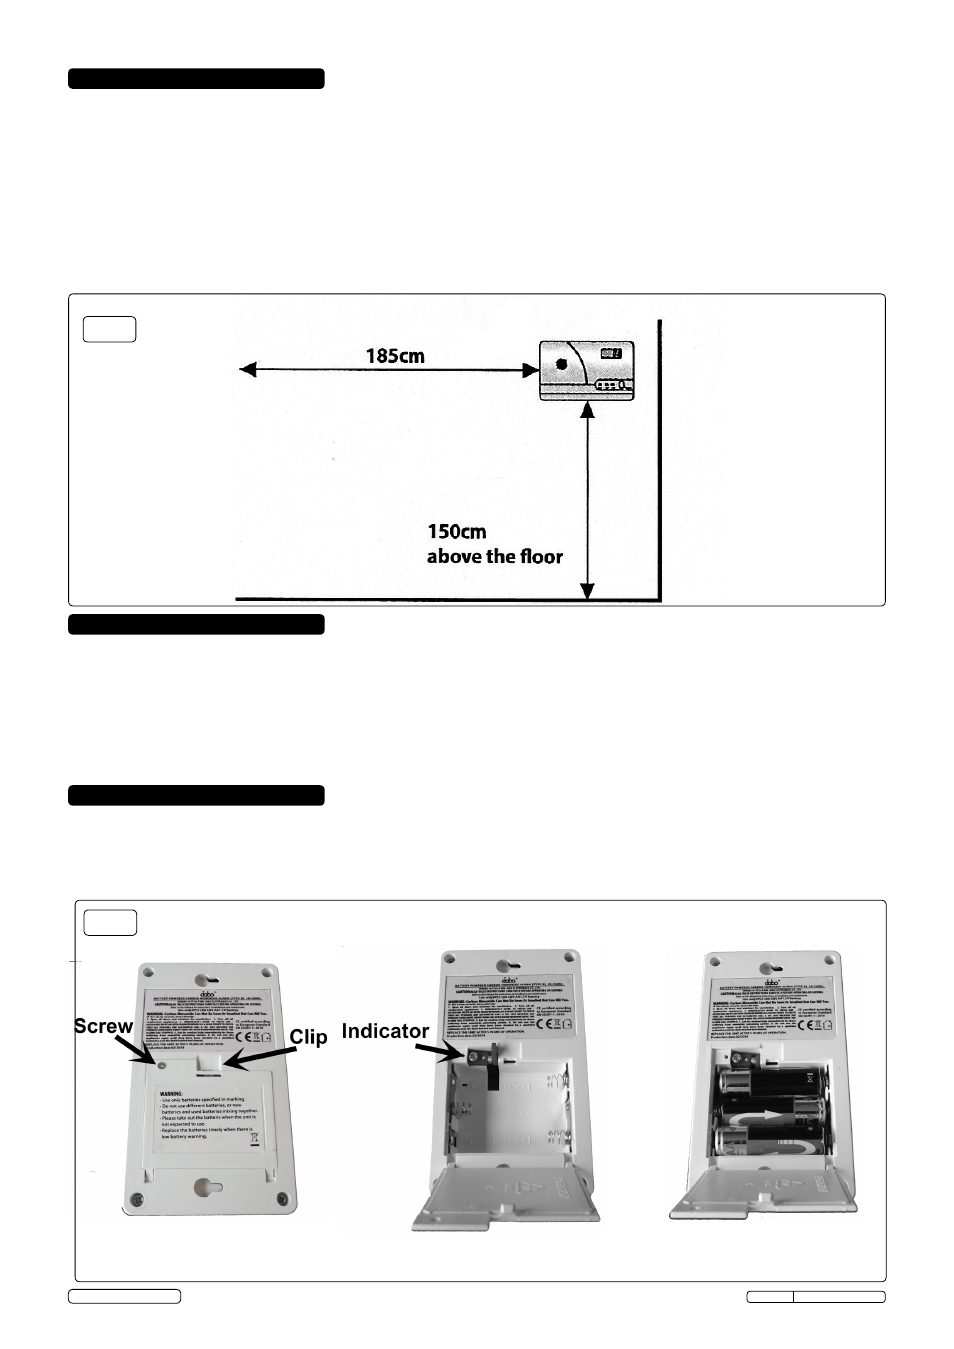
fig.2
5. POSITIONING THE ALARM
5.1.
Carbon Monoxide has a similar density to warm air and to ensure that the most effective use is made of the detector, it should be fitted
at least 1.5 metres (5 feet) above floor level and at least 1.85 metres (6 feet) from the appliance. See fig.1.
5.2.
Areas to be avoided include the following:
• situations where the temperature may fall below -10°C or rise above 40°C.
• in a damp or humid area.
• any area where high levels of dusty, dirty or greasy emissions could contaminate or clog the sensor.
• behind curtains or furniture.
• in the path of air discharged from a furnace, air conditioning vent or ceiling fan.
• outside the building.
• directly above a sink or cooker.
p
WARNING: This carbon monoxide alarm is designed for indoor use only. DO NOT expose to rain or moisture. It will not protect against
the risk of carbon monoxide poisoning when the battery has drained.
DO NOT open up or tamper with the alarm as this could cause a
malfunction.
6.1.
This carbon monoxide alarm is powered by battery and requires no additional wiring. It can either be installed on a wall, using the fixings
provided, or on a table top.
6.2.
Wall Mounted Installation
6.2.1. Establish the mounting location see 5.1.and ensure there is no electrical wiring or pipework in the area adjacent to the mounting
surface.
6.2.2. Mark the two mounting hole locations and drill holes.
6.2.3. Screw the screws into the drilled holes and keep the screws out by 4mm. Hang unit on wall.
6.3.
Table Top Installation
6.3.1. Place alarm on a table top so that users can see the LEDs clearly.
7.1.
Install Batteries (Refer to fig.2)
7.1.1. The alarm is powered by 3x LR6 size AA 1.5V batteries.
7.1.2. Undo the screw and release the clip to open the battery compartment door on the rear of the detector.
7.1.3. Make sure the batteries are inserted the correct way round (see the polarity diagrams in the bottom of the compartment).
7.1.4. The red plastic indicator has to fit under the battery, the door will not shut if this is not done.
SCMA1 Issue: 1 - 30/05/14
Original Language Version
© Jack Sealey Limited