Technical data, Installation – Electrolux ECP21104W User Manual
Page 5
Important! Never use sharp metal tools to scrape
off frost as you could damage the appliance. Do
not use a mechanical device or any artificial means
to speed up the thawing process other than those
recommended by the manufacturer. A
temperature rise of the frozen food packs, during
defrosting, may shorten their safe storage life.
Technical data
Dimensions
Height × Width × Depth (mm):
Further technical information are situ-
ated in the rating plate on the external
right side of the appliance.
876 Ч 795 Ч 665
Rising Time
26 hours
Installation
Positioning
This appliance can be installed in a garage or cellar,
but for optimum performance install the appliance
at a location where the ambient temperature cor-
responds to the climate class indicated on the rat-
ing plate of the appliance:
Climate
class
Ambient temperature
SN
+10°C to + 32°C
N
+16°C to + 32°C
ST
+16°C to + 38°C
T
+16°C to + 43°C
Ventilation requirements
1. Put the freezer in horizontal position on a firm
surface. The cabinet must be on all four feet.
2. Make sure that the clearance between the ap-
pliance and rear wall is 5 cm.
3. Make sure that the clearance between the ap-
pliance and the sides is 5 cm.
The airflow behind the appliance must be suffi-
cient.
Electrical Connection
Caution! Any electrical work required to
install this appliance should be carried out by
a qualified electrician or competent person.
Warning! This appliance must be earthed.
The manufacturer declines any liability should
these safety measures not be observed.
1
2
3
4
5
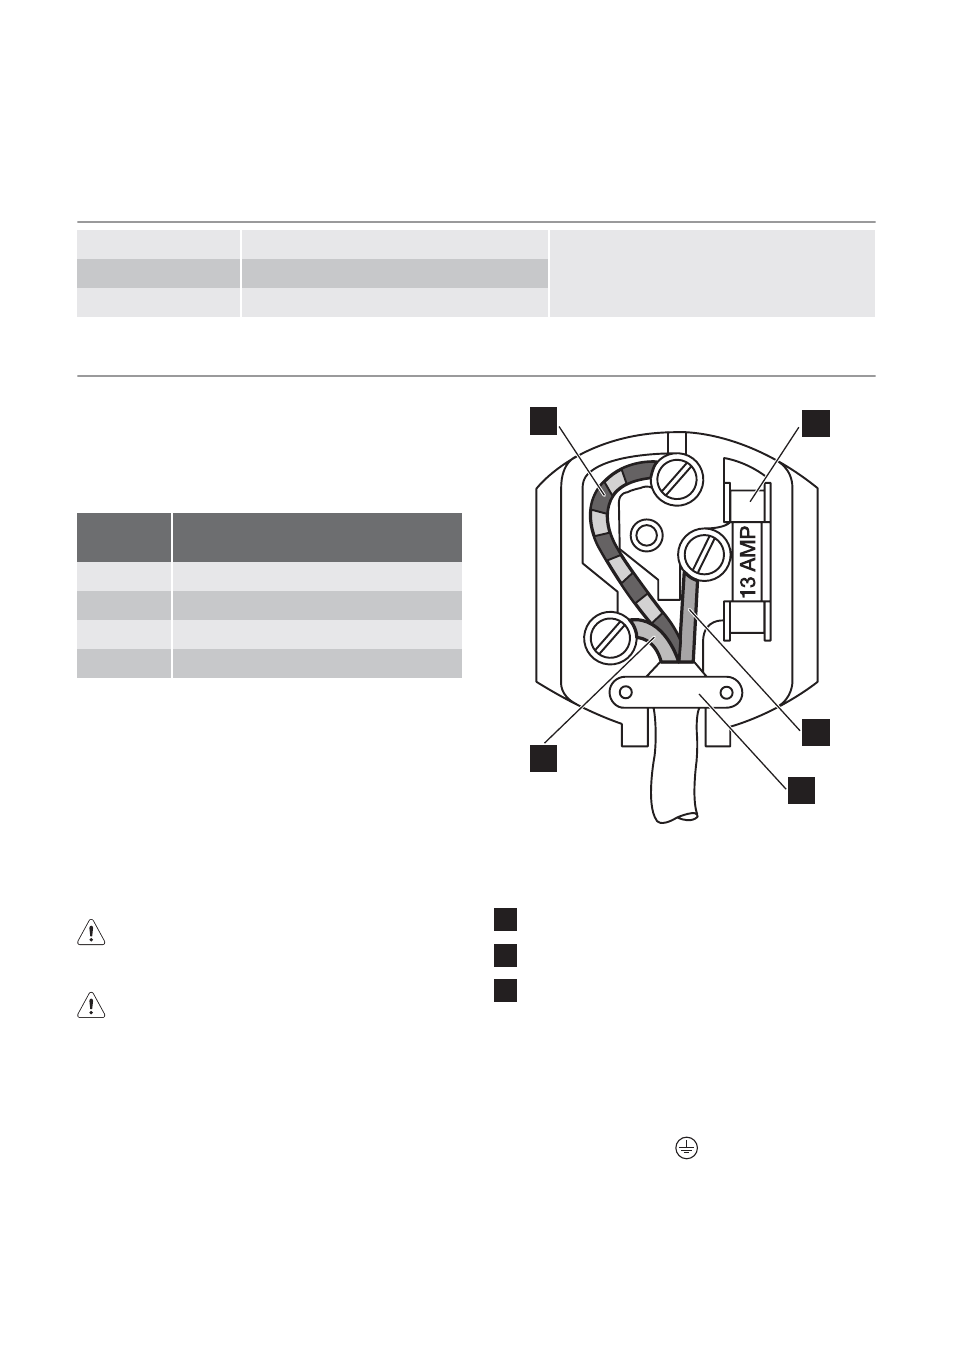
Important! The wires in the mains lead are
coloured in accordance with the following code:
1
Green and Yellow:
Earth
3
Brown:
Live
5
Blue:
Neutral
As the colours of the wires in the mains lead of this
appliance may not correspond with the coloured
markings identifying the terminals in your plug,
proceed as follows:
1. Connect the wire coloured green and yellow to
the terminal marked either with the letter “E“ or
by the earth symbol
or coloured green and
yellow.
2. Connect the wire coloured blue to the terminal
either marked with the letter “N“ or coloured
black.
3. Connect the wire coloured brown to the termi-
nal either marked with the “L“ or coloured red.
electrolux 5