Kcl80-300181-p8, Lacey – Kichler 300181 User Manual
Page 9
8
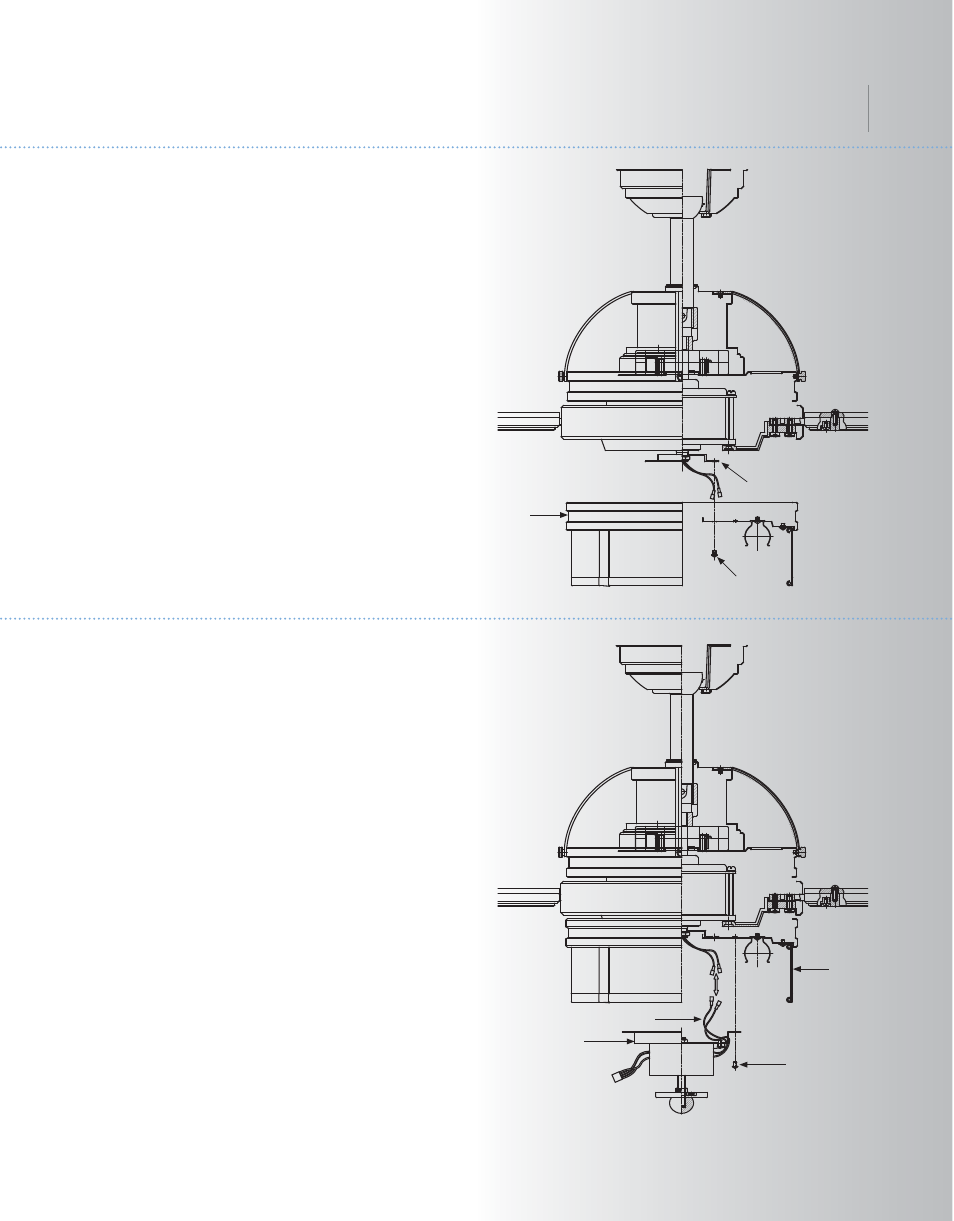
Fig. 15
10. INSTALLING THE LIGHT PLATE
Step 1. Loosen the two screws on the
mounting ring attached to the motor shaft and
"remove" and save the third screw. (Fig. 15)
Step 2. Place the key hole slots on the light
plate over the two screws previously loosened
on the mounting ring.
Turn the light plate until is locks in place at the
narrow section of the key hole slots.
Tighten both key hole screws and replace the
third screw previously removed and tighten
securely.
Fig. 16
11. INSTALLING THE LAMP BALLAST
ASSEMBLY
NOTE: Before continuing installation, confirm
that the power is still turned off at the main
circuit breaker or by removing the correct
fuse. Turning the power off using a wall
switch is not sufficient to prevent electrical
shock.
Step 1. Loosen two of the mounting screws
on the Light Fixture Plate and remove the
third. (Fig. 16)
Step 2. Hold the Lamp Ballast Assembly close
to the light fixture and connect the white wires
from the Ballast and the fan by pushing the
connectors together. Follow the same
procedure with the black wires. (Fig. 16)
Step 3. Tuck the connections neatly into the
light fixture. Place the key holes on the Lamp
Ballast Assembly over the 2 screws previously
loosened from the light plate, turn the Lamp
Ballast Assembly until it locks in place at the
narrow section of the key holes. Secure by
tightening the 2 screws previously loosened
and the one previously removed. (Fig. 16)
Light
plate
Screws
Mounting ring
Lamp ballast
assembly
Screws
Light
plate
Wire connectors
Lacey
TM