Kcl107-300148-p8, Logan – Kichler 300148 User Manual
Page 9
8
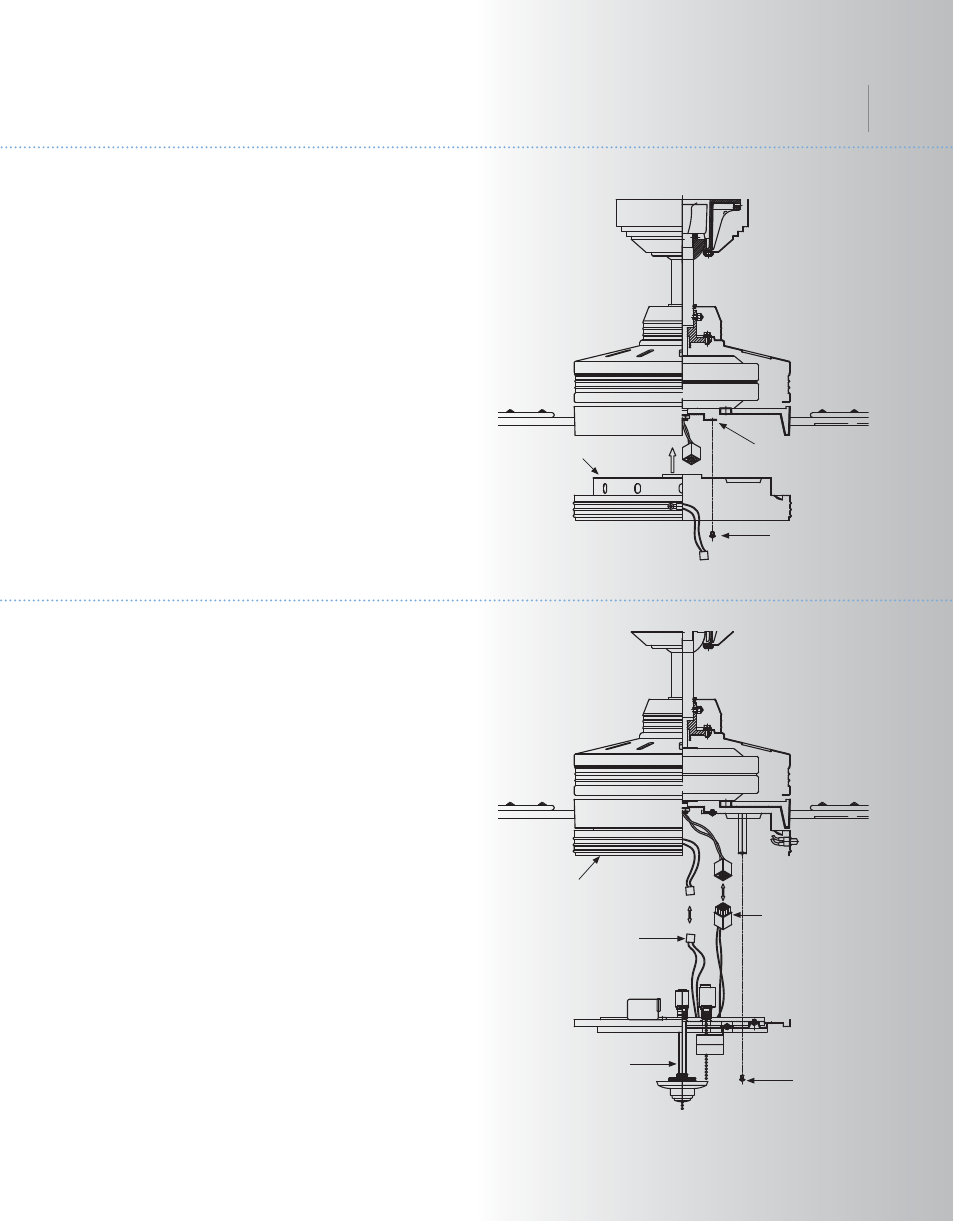
Fig. 15
Fig. 16
Light plate
Screws
Mounting ring
Socket plate assembly
Screws
Light plate
9P wire connectors
4P wire connectors
Logan
TM
10. INSTALLING THE LIGHT PLATE
11. INSTALLING THE SOCKET PLATE
ASSEMBLY
Step 1. Loosen the two screws on the
mounting ring attached to the motor shaft and
"remove" and save the third screw. (Fig. 15)
Step 2. Place the key hole slots on the light
plate over the two screws previously loosened
on the mounting ring.
Turn the light plate until is locks in place at the
narrow section of the key hole slots.
Tighten both key hole screws and replace the
third screw previously removed and tighten
securely.
Step 1. Loosen the two mounting screws on
the inside of the light plate then remove and
save the third screw.
Step 2. While holding the socket plate
assembly under your ceiling fan, push the nine
pin square wire connectors together. One from
the fan and one from the socket plate
assembly. Follow the same procedure with the
four pin square wire connectors. (Fig. 16)
NOTE: These connectors are color coded and
will ONLY engage when the colored strips are
matched (aligned).
Step 3. Tuck the connections neatly into the
light plate. Place the key holes on the socket
plate assembly over the 2 screws previously
loosened from the light plate, turn the socket
plate until it locks in place at the narrow
section of the key holes. Secure by tightening
all three screws. (Fig. 16)