Al390kcl+1l-339211 p4, Sutter place, Select – Kichler 339211 User Manual
Page 5: Hanging the fan standard ceiling installation
4
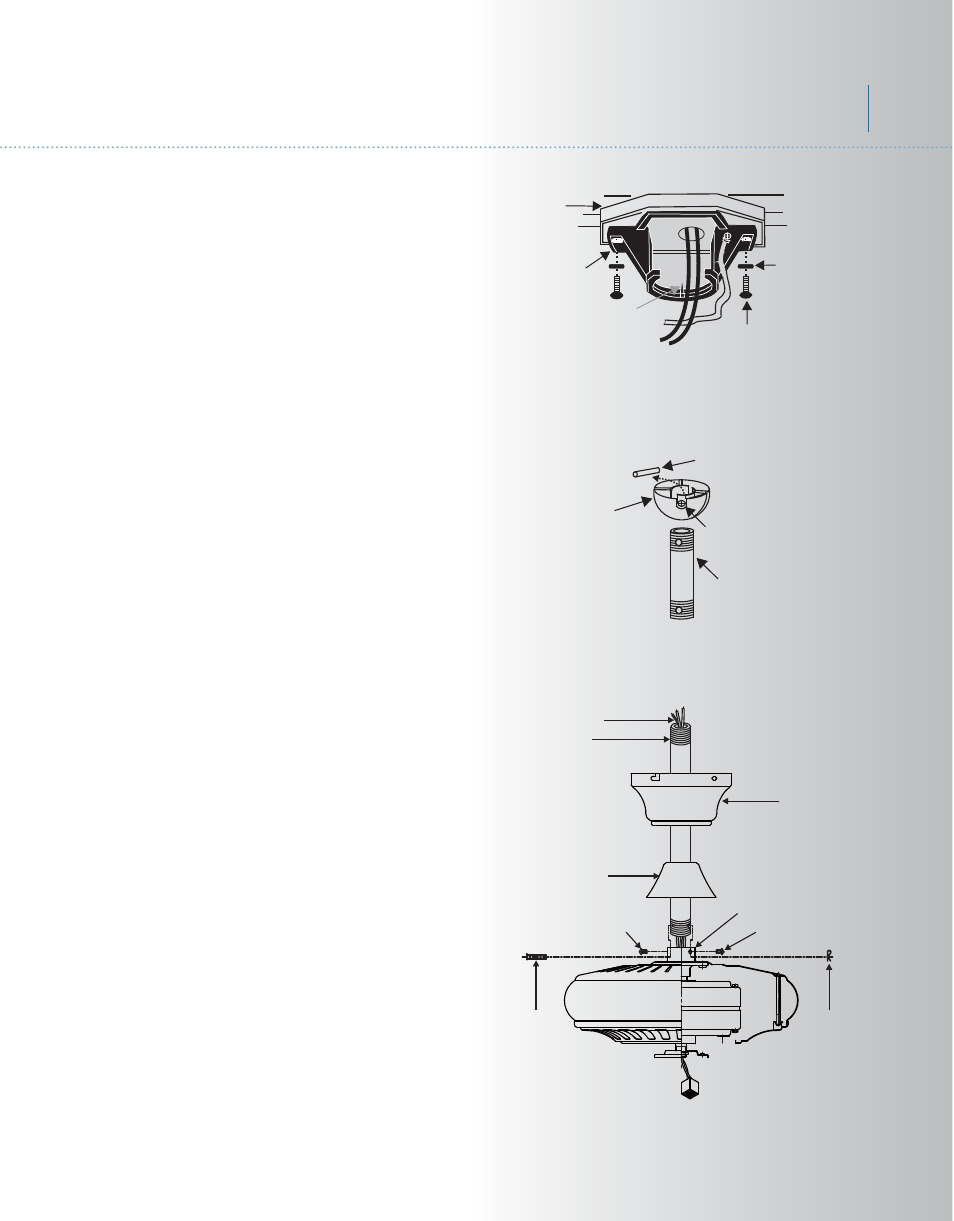
Fig. 7
Fig. 6
Mounting screws
(supplied with
electrical box)
Hook
Ceiling
mounting
bracket
UL Listed
outlet box
120V Wires
Washers
Fig. 5
Supply wires
Downrod
Retaining pin
Hitch pin
Set screws
Coupling
Set screws
Canopy
Coupling cover
NOTE: This ceiling fan is supplied with two
types of hanging assemblies; a downrod and
canopy mounting system and a "close to
ceiling" Canopy ONLY system. The "close-to-
ceiling" installation is recommended in rooms
with less than 8-foot ceilings or in areas where
additional space is desired from the floor to the
fan blades. Once you have selected which
mounting system you will use, proceed with
the following instructions. Where necessary,
each section of the instructions will note the
different procedures to follow for the two types
of mounting.
REMEMBER to turn off the power before you
begin.
To properly install your ceiling fan, follow the
steps below.
Step 1. Pass the 120 volt supply wires from
the ceiling outlet box through the center of the
ceiling mounting bracket. (Fig. 5)
Step 2. Attach the ceiling mounting bracket to
the outlet box using the screws and washers
included with the outlet box. (Fig. 5)
Step 1. Remove the hanger ball from the
downrod assembly by loosening the set screw,
removing the cross pin and sliding the ball off
the rod. (Fig. 6)
Step 2. Loosen the two set screws and
remove the hitch pin and retaining clip from
the coupling on top of the motor assembly.
(Fig. 7)
Step 3. Carefully feed the electrical lead wires
from the fan up through the downrod. Thread
the downrod into the coupling until the Hitch
pin holes are aligned.
Next, replace the hitch pin and retaining clip.
Tighten both set screws. (Fig. 7)
5. HANGING THE FAN
STANDARD CEILING INSTALLATION
Downrod
Cross pin
Hanger
ball
Set screw
Sutter Place
TM
Select