Euro-Pro SHARK TRAILBLAZER EP825 User Manual
Page 2
Warning:
Always disconnect from power source when servicing or
cleaning the unit. Failure to do so could result in electrical
shock or personal injury from cleaner suddenly starting.
Warning:
Always disconnect from power source when servicing or
cleaning the unit. Failure to do so could result in electrical
shock or personal injury from cleaner suddenly starting.
Changing the Head Light Bulb:
Changing the Power Nozzle
Belt:
A) Occasionally the power nozzle
drive belt will require changing,
the frequency will depend upon
the amount of use your vacuum
sees.
B) Turn unit “Off” and unplug from
wall outlet.
C) Use a Phillips screwdriver and
remove the two screws from the
back of the motorized power
head cover. (Fig. 1)
D) Remove the two screws from
the bottom of the motorized
power head. (Fig. 2)
E) If the belt has broken, remove
any loose pieces before replacing.
F) Grasp the beater bar at either
end and lift straight up.
G) Place one end of new belt over
motor shaft and the other on
the round pulley end of the
beater bar. (Fig. 3)
H) Align the rubber supports at the
ends of the beater bar, with the
slots in the motorized power
head. Push into place. Ensure
that the cut-outs on the rubber
supports face upwards.
I) Replace the two screws from
the bottom of the motorized
power head and then replace
the cover. Then replace the two
screws from the back side of the
motorized power head.
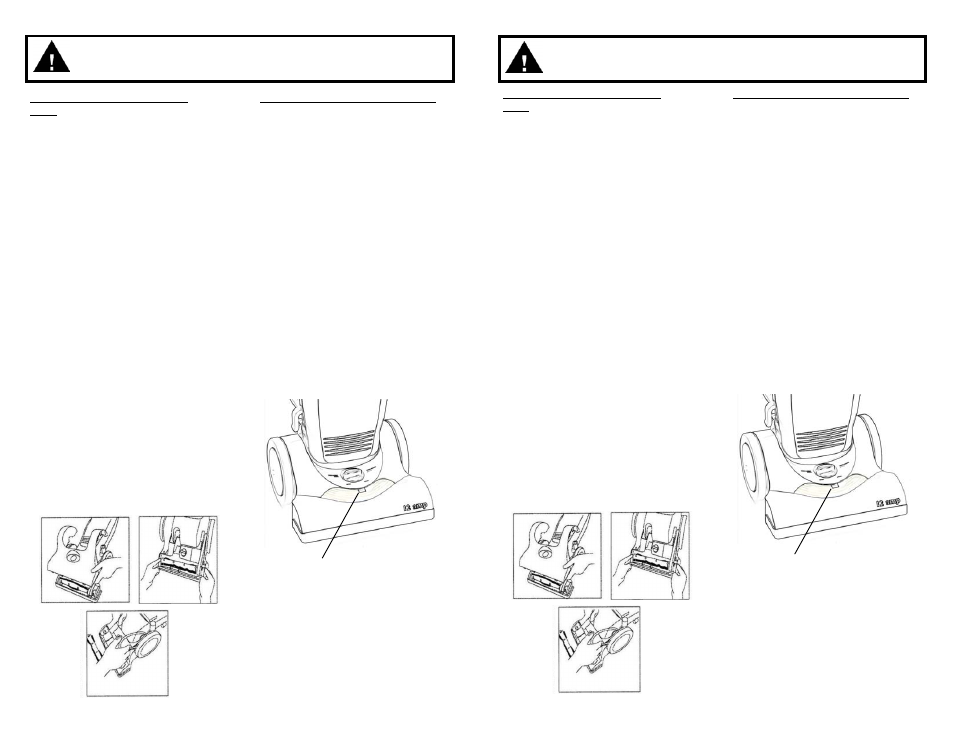
A) Turn unit “Off” and unplug from
wall outlet.
B) Insert the edge of a flat edge
screw driver into the locking tab
on the headlight lens and pull the
handle of the screw driver
towards you. Do NOT push with
the blade of the screw driver
against the lens because it might
cause it to break.
C) Remove the lens. (Fig. 4)
D) Remove the light bulbs by pulling
them out carefully.
E) Push the new light bulbs in and
replace the lens cover.
F) Make sure that it snaps in place.
Note: Always replace the light bulb with
the same or smaller wattage size (12V
4W) to prevent damage to the
surrounding parts.
Note: Always replace the light bulb with
the same or smaller wattage size (12V
4W) to prevent damage to the
surrounding parts.
Lens locking tab
Fig. 4
Lens locking tab
Fig. 4
Fig. 1
Fig. 2
Fig. 1
Fig. 2
Fig. 3
Fig. 3