Euro-Pro EP700 User Manual
Page 6
3. Changing the Power Nozzle Belt:
A) Occasionally the power nozzle drive belt will require
changing, the frequency will depend upon the amount
of use your vacuum sees.
B) Turn unit “Off” and unplug from wall outlet. Lower
handle until it is flat on the floor. Turn unit over so that
power nozzle base faces up.
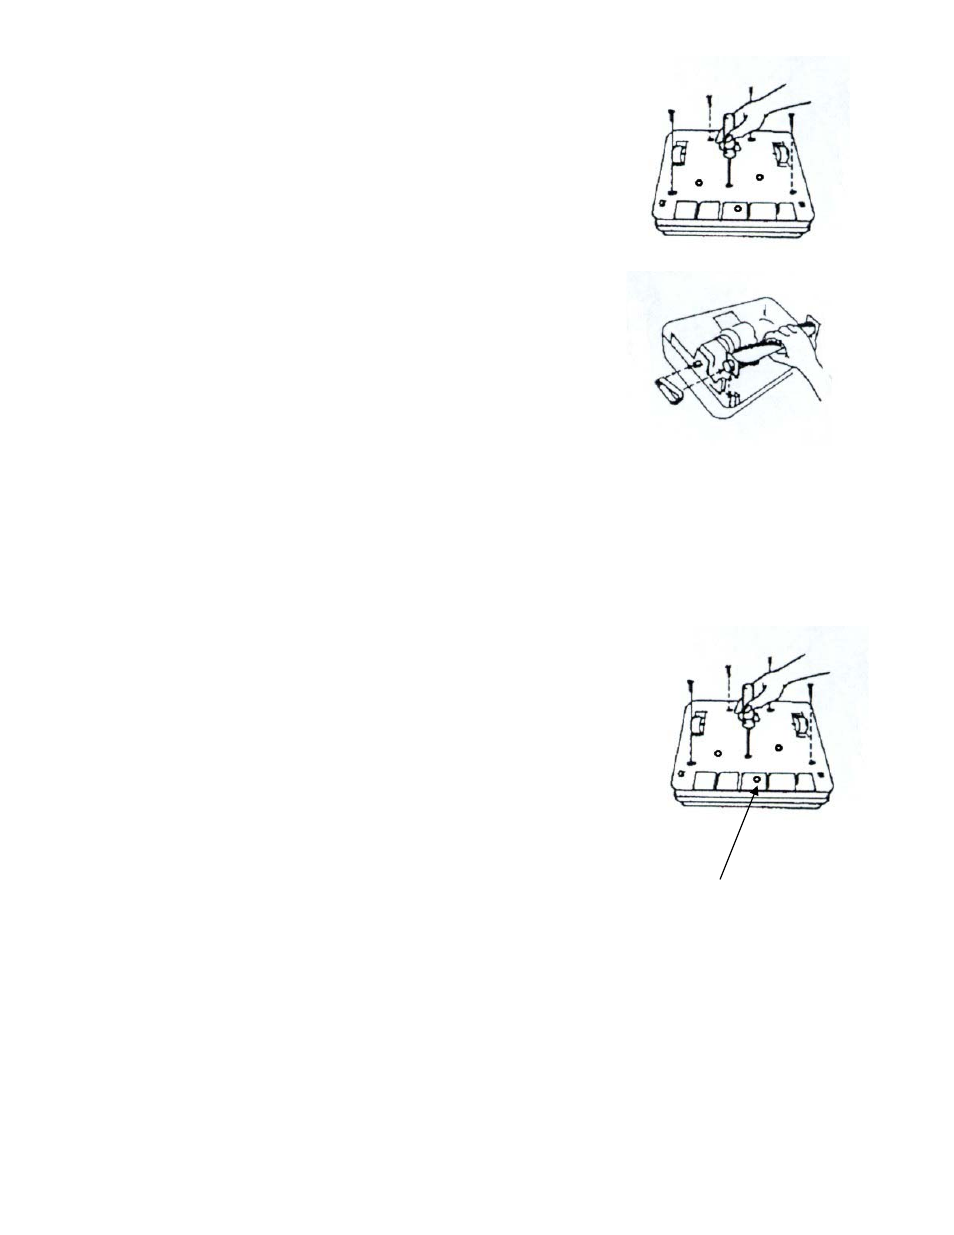
C) Use a Phillips screwdriver and remove all seven (7)
screws from the power nozzle base.
D) Lift off power nozzle base being careful not to remove
the bumper.
E) If the belt has broken, remove any loose pieces before
replacing.
F) Grasp the beater bar at either end and lift straight up.
G) Place one end of new belt over motor shaft and the
other on the round pulley end of the beater bar.
H) Align the rubber supports at the ends of the beater
bar, with the slots in the power nozzle. Push into
place. Ensure that the cut-outs on the rubber supports
face upwards.
I)
Re-install the power nozzle base and seven (7)
screws.
4. Changing the Power Nozzle Light:
Should the long life power nozzle bulbs burn out, they can
be changed in the following manner:
A) Unplug unit from wall outlet.
B) Remove power nozzle base (follow instructions for
changing the drive belt). Do not remove the drive belt
or beater bar when only changing the light bulbs.
C) Once the power nozzle base has been removed,
remove the Phillips screw at the center of the base
adjacent to the beater bar.
D) The light housing on the power nozzle top cover may
now be removed allowing access to the light bulbs.
E) Pull the burnt bulb out of socket and replace in the
same manner with a new bulb.
F) Reassemble unit by reversing steps B, C & D being
careful not to pinch internal wiring and ensure that the
light lens is correctly seated.
Screw for light
4