Servicing the engine oil, Maintenance – Exmark Quest 4500-450 User Manual
Page 31
Maintenance
3. Remove the foam sleeve from the element.
4. Gently tap the pleated side of the paper element
to dislodge dirt. Do Not wash the paper element
or use pressurized air, as this will damage the
element. Replace a dirty, bent, or damaged
element. Handle new elements carefully; Do Not
use if the rubber seal or foam sleeve is damaged.
5. Wash the foam sleeve in warm water and allow to
dry. Reinstall over the paper element.
6. Clean all air cleaner components of any
accumulated dirt or foreign material. Prevent any
dirt from entering the carburetor.
7. Install the air cleaner element with the pleated
side “out” and seat the rubber seal onto the edges
of the air cleaner base.
8. Reinstall the air cleaner cover and secure with
the knobs.
Servicing the Engine Oil
Checking the Oil Level
Service Interval: Before each use or daily
1. Park the machine on a level surface, disengage
the blade control switch, stop the engine, engage
parking brake, and remove the key.
2. Make sure the engine is stopped, level, and is cool
so the oil has had time to drain into the sump.
3. To keep dirt, grass clippings, etc., out of
the engine, clean the area around the oil fill
cap/dipstick before removing it.
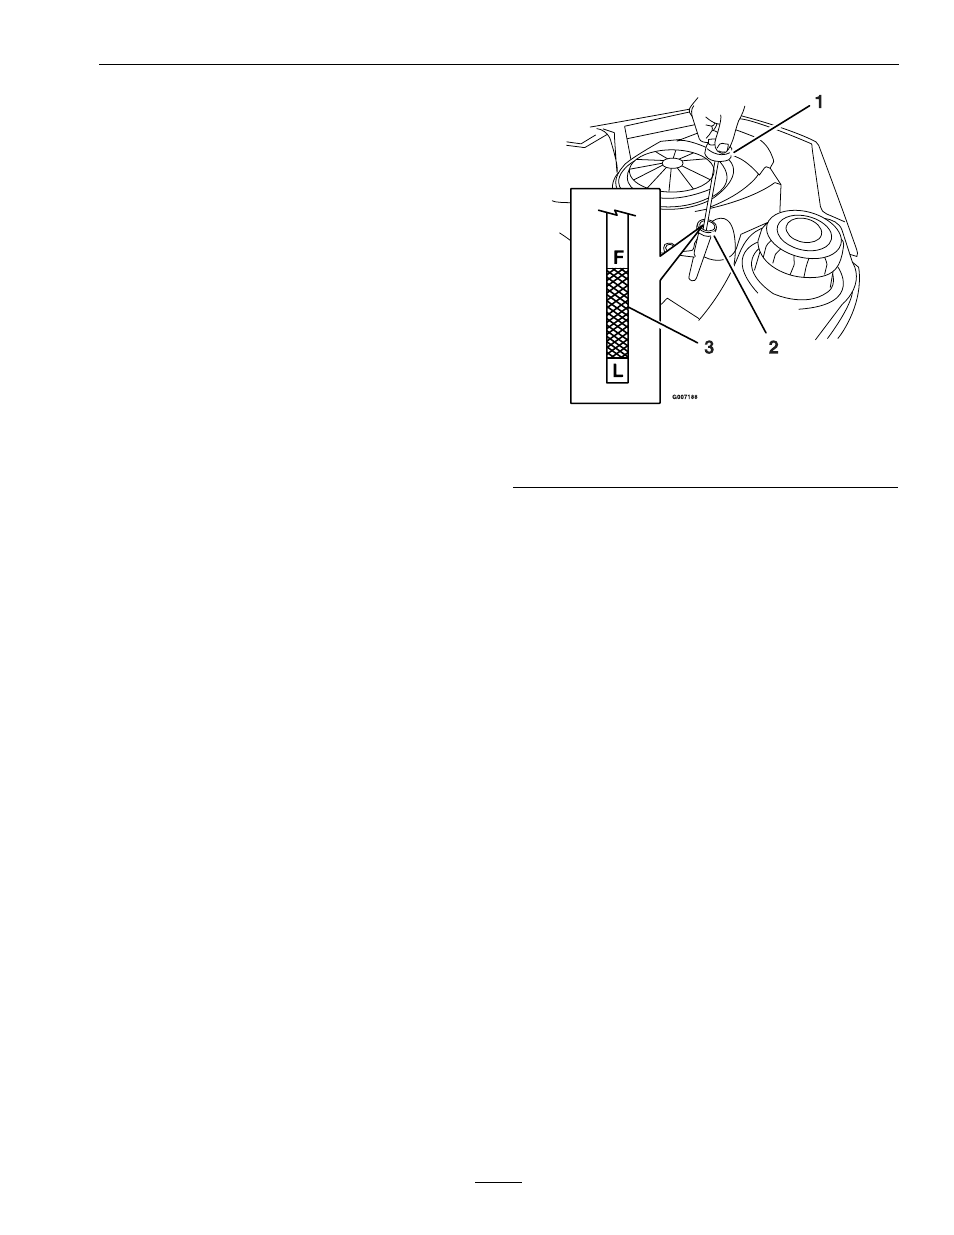
4. Pull and remove the oil fill cap/dipstick; wipe oil
off. Reinsert the dipstick and push firmly into
place (Figure 20).
Figure 20
1.
Oil dipstick
3.
Oil level
2.
Filler tube
5. Remove the dipstick and check the oil level.
The oil level should be up to, but not over, the
“F” mark on the dipstick.
6. If the level is low, add oil of the proper type, up to
the “F” mark on the dipstick. Always check the
level with the dipstick before adding more oil.
Note: To prevent extensive engine wear or
damage, always maintain the proper oil level in
the crankcase. Never operate the engine with the
oil level below the “L” mark or over the “F” mark
on the dipstick.
Changing the Oil and Filter
Service Interval: After the first 5 hours
Every 100 hours/Yearly
(whichever comes first)
thereafter.
Change the oil and filter while the engine is still
warm. The oil will flow more freely and carry away
more impurities. Make sure the engine is level when
filling, checking, or changing the oil.
1. Start the engine and let it run until warm. This
warms the oil so it drains better.
2. Disengage the blade control switch and move the
motion controls outward to the neutral position
and engage parking brake.
31