Echo BLADE CONVERSION KIT 261 User Manual
Page 2
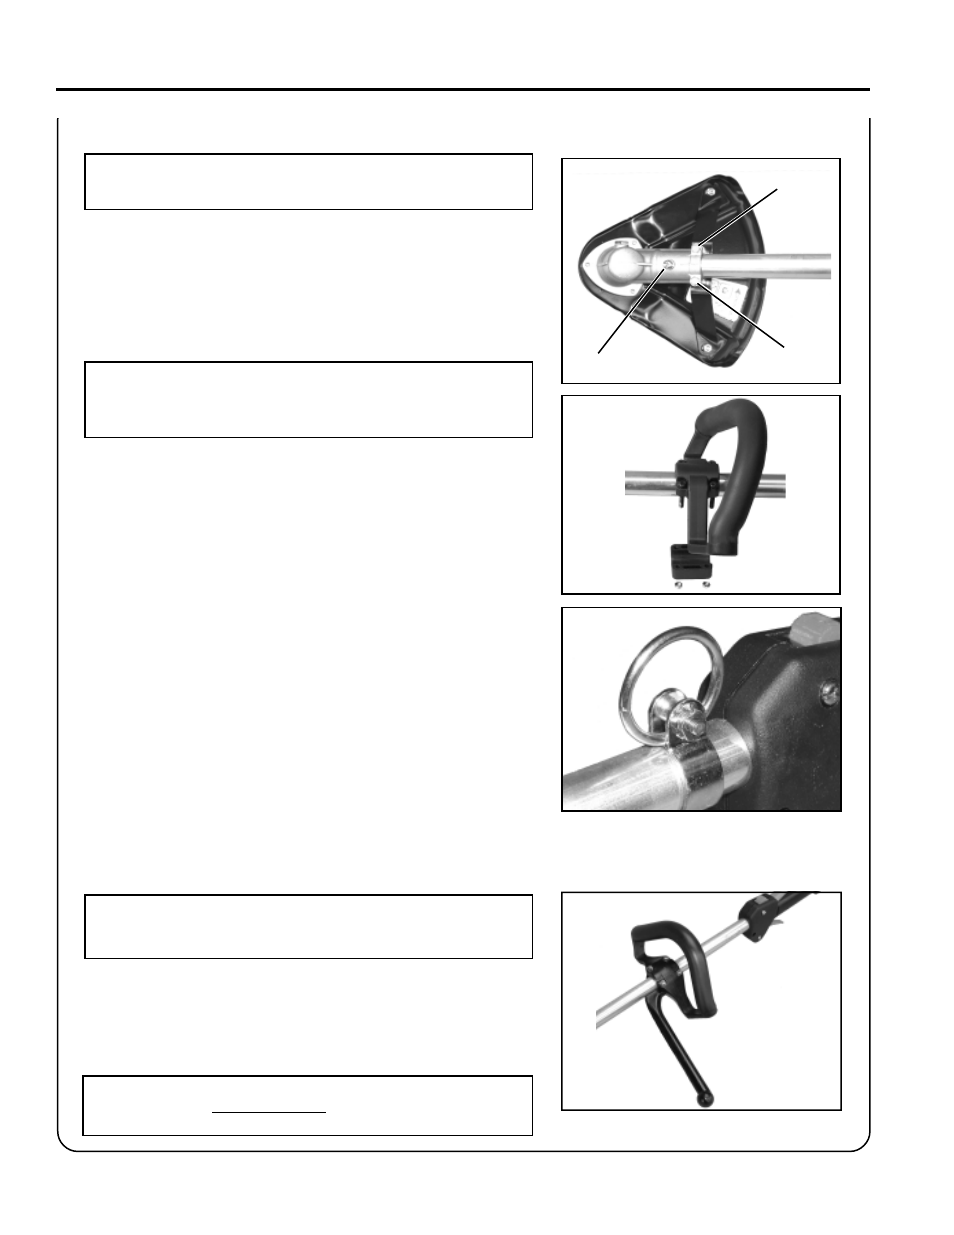
INSTALL
HARNESS
CLAMP
NOTE
Some models require installation of harness clamp. If your unit does
not have a clamp follow these directions.
1. Remove shield and gear housing as an assembly.
a.
Loosen two (2) screws (A) that clamp the gear housing to the
shaft.
b.
Remove locating screw (B) found at the top of the gear
housing.
c.
Pull shield and gear housing assembly from the
drive shaft assembly.
NOTE
Prevent the flexible drive cable from sliding from the drive shaft
housing. If cable does slide free, clean dirt from cable and re-
lubricate with lithium based grease prior to re-assembly.
2. Remove front handle.
a.
Remove four (4) screws and nuts and back plate from
handle.
b.
Remove handle.
3. Install clamp.
a.
Slightly spread clamp and carefully slide up drive shaft.
b.
Install harness ring using spacer and 5 x 18 mm bolt.
c.
Put on harness and attach unit to harness. Slide harness clamp
up or down until unit balances with head approximately 50-75
mm (2 -3 in.) from the ground.
d.
Tighten harness clamp screw.
INSTALL
SHIELD
AND
GEAR
HOUSING
ASSEMBLY
1. Push gearbox assembly on end of drive shaft taking care to engage
the drive cable with the gear housing.
2. Locate the gear housing on the drive shaft and install the locating
screw (B).
3. Tighten the two (2) side clamping screws (A).
INSTALL
HANDLE
/
BARRIER
BAR
NOTE
The Barrier Bar is required when using blades. Units equipped with
U-Handles do not require installation of the Barrier Bar.
1. Position front handle on shaft and install Barrier Bar using four (4)
screws and nuts.
2.
Position handle for comfortable operation, and tighten screws
securely.
NOTE
The Barrier Bar is NOT A HANDLE and should not be gripped
when using or carrying the unit.
2
A
A
B