T v setup, Setup menu – Curtis LCDVD322A User Manual
Page 25
T V SETUP
SETUP MENU
Setup
Setup
12
6
Tim e
Picture
Audio
Clock
Phase
Auto
Move
Adjust
Exit
MENU
50
50
50
100
H - pos
V - pos
Setup
12
6
Tim e
Picture
Audio
Clock
Phase
Auto
Move
Adjust
Exit
MENU
50
50
50
100
H - pos
V - pos
Setup
12
6
Tim e
Picture
Audio
Clock
Phase
Auto
Move
Adjust
Exit
MENU
50
50
50
100
H - pos
V - pos
Setup
12
6
Tim e
Picture
Audio
Clock
Phase
Auto
Move Next
Exit
MENU
50
50
50
100
H - pos
V - pos
Lock
12
6
Time
Channel
Menu Language
Transparency
Zoom Mode
Noise Reduction
Advance
Close Caption
XVS
Restore Default
English
Move Select Exit
MENU
Picture
Off
Normal
Off
Setup
Audio
On
12
6
Time
Menu Language
Transparency
Zoom Mode
Noise Reduction
Advance
Close Caption
XVS
Restore Default
English
Move Select Exit
MENU
Picture
Off
Normal
Off
Setup
Audio
On
Setup
12
6
Tim e
Picture
Audio
Clock
Phase
Auto
Move
Adjust
Exit
MENU
50
50
50
100
H - pos
V - pos
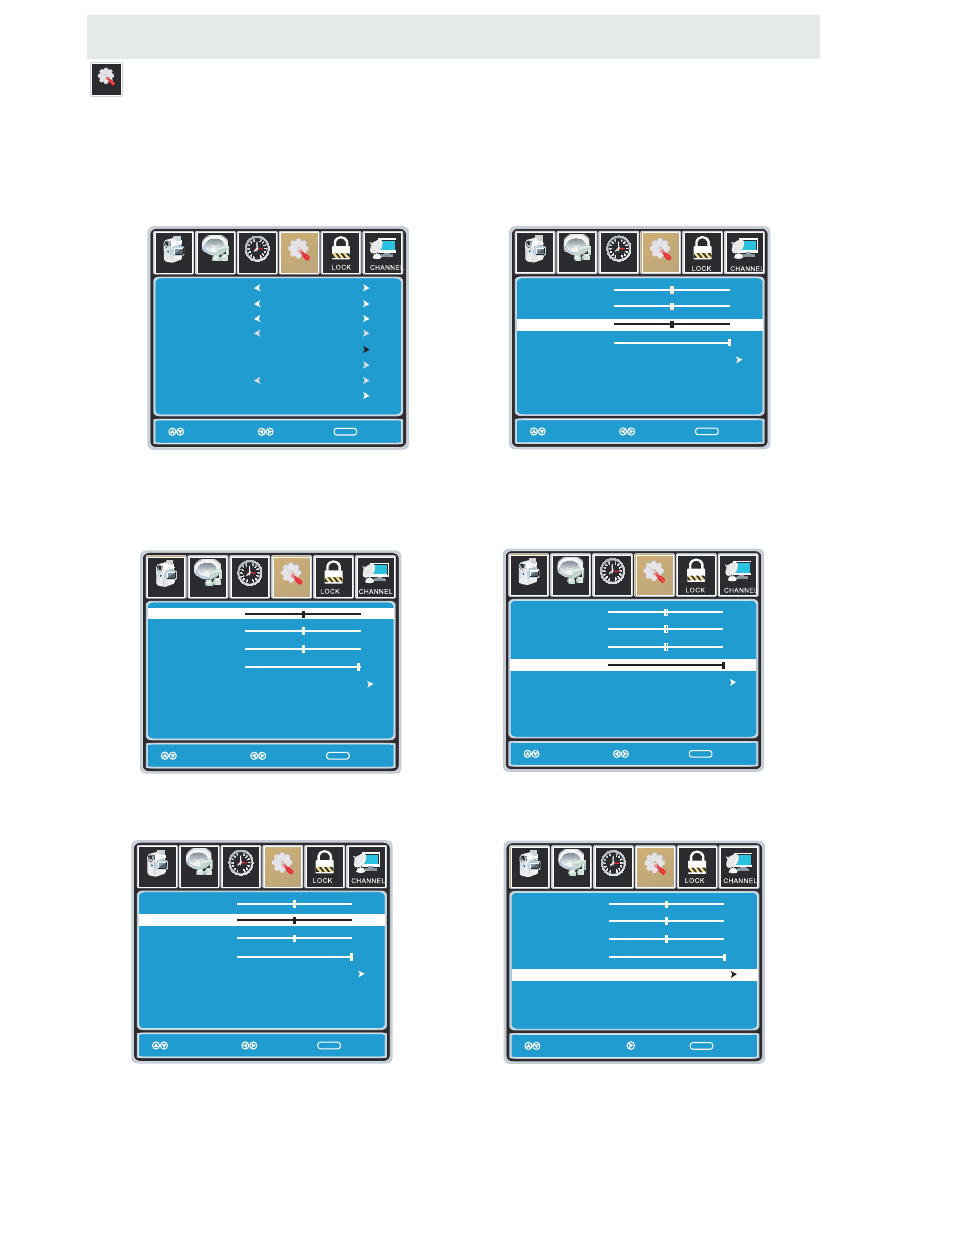
In the SETUP menu you may adjust the position of images displayed on screen once you connect
an input signal from your PC. Recommended resolution is 1366 x 768.
If your PC system uses a standard signal mode, the screen will adjust automatically.
Connect an optional 3.5mm audio cable for stereo sound.
How to Navigate:
After connecting to a PC, press the SOURCE button and highlight VGA, then press the ENTER
button.
Press the MENU button on the remote control
and navigate using the ◄►
b
uttons to select
SETUP. Press the ▼
b
utton to highlight
Advanced, then press the ►button to select
from the following options.
Use the ▼
b
utton to highlight Clock.
Navigate using the ◄►
b
uttons to control the
width of the image.
Use the ▼
b
utton to highlight H-POS.
Navigate using the ◄►
b
ut tons to adjust the
position of images displayed from side to side.
Use the ▼
b
utton to highlight Phase.
Navigate using the ◄►
b
uttons to improve focus
and image stability.
Use the ▼
b
utton to highlight V-POS.
Navigate using the ◄►
b
uttons to adjust the
position of images displayed up and down.
Use the ▼
b
utton to highlight AUTO.
Press the ►
b
utton to automatically adjust the
display to the best setting.
22