Elecom BT-UD1 User Manual
Page 2
-2-
Installation
This procedure explains how to install the utility software, connect the BT-UD1 to a com-
puter and have it detected by the computer.
Log in with administrator authorization.
Load the installation disc into the CD-ROM drive.
The setup program starts up automatically.
If the setup program does not start up automatically, click on “ファイル名を指定して
実行”. Then, on the “ファイル名を指定して実行”window, input “D:¥setup.exe” in the
input box and click on
. (1-1)
The “D” is the CD-ROM drive of your computer. Normally, the D drive is used.
Select “日本語” from the drop-down list and click
. (1-2)
Click on
. (1-3)
If you agree with the License Agreement, select “使用許諾契約の条項に同意しま
す”, and click on
. (1-4)
Check the installation location and click on
. (1-5)
Check the installation location and click on
. (1-6)
Installation of the utility software starts.
In some computer environments, the following window appears several
times during the installation process. (1-7)
In such case, click on
to proceed with installation.
Check the installation location and click on
. (1-8)
Click on
. (1-9)
The computer restarts itself.
After the computer starts back up, the utility software window appears.
Remove the cap from the BT-UD1. (1-10)
Connect the BT-UD1 to a USB port on the computer. (1-11)
Connect the BT-UD1 correctly without getting the connector upside-down.
The computer automatically detects the BT-UD1.
When the BT-UD1 is detected by the computer, the initial settings window of the utility
software appears.
Depending on the computer environment, either the “Bluetoothへようこ
そ” or the “新しいハードウェアの検索ウィザード” window appears. In such
case, perform the operations of the “Bluetoothへようこそ” window in step
12 first. After completing the initial settings for the utility software, proceed
to the operations of the “新しいハードウェアの検索ウィザード” window in
step 14.
Select the “Bluetoothへようこそ” window, and input the device name and device
type. (1-12)
For the device name, input the detected name of the BT-UD1 that appears on the computer.
For the device type, select a type that matches the computer.
Click on
.
The “Bluetoothへようこそ” window closes and the utility software window returns. This
completes the initial settings of the utility software.
In some computer environments, the “新しいハードウェアの検索ウィザード” window
does not appear in step 14. In such case, BT-UD1 installation is complete. To use the
utility software, connect to another Bluetooth device.
Select the “新しいハードウェアの検索ウィザード” window and click on
.
(1-13)
The “新しいハードウェアの検索ウィザード” window closes.
A confirmation message appears asking if it is OK to restart the computer. Click
on
. (1-14)
The computer restarts itself and, once restarted, the BT-UD1 can be used.
Using the BT-UD1
Once installed, the BT-UD1 can be used by simply connecting it.
Pairing to Other Bluetooth Devices
To communicate with other Bluetooth devices such as our BT-MH1 headset, the BT-UD1
must pair with that device.
The BT-UD1 can be paired with other Bluetooth devices by holding it close
to the other device.
Open the utility software.
The utility software opens when the computer starts up. If it doesn’t, either double-click
on the icon on the desktop or double-click on the icon in the task tray.
Desktop icon
Task tray icon
Set the other Bluetooth device to the pairing mode.
• For pairing mode procedures, see the instruction manual of the other device.
• If using the BT-MH1, pressing and holding the ID setting button of the BT-MH1
for 6 sec or longer starts alternately flashing the LED of the BT-MH1 red and
blue colors, and engages the pairing mode.
Click on the red ball at the center of the utility software. (2-1)
The computer starts searching for Bluetooth devices. When it locates the BT-UD1, an
icon of it appears in the window and the BT-UD1’s name is acquired and displayed.
Right-click on the Bluetooth device to pair with and select “ペアデバイス” from
the menu that appears. (2-2)
A window for inputting the passkey appears.
Input the passkey of the Bluetooth device to pair with. (2-3)
• For the passkey, see the instruction manual of the other device.
• The passkey of the BT-MH1 is “0000”.
This pairs the devices. Paired devices appear in the window with a line connecting them
to the red ball at the center of the utility software window. (2-4)
When paired, the icon of the device in the task tray changes color.
If the BT-UD1 is not connected to the computer: Gray
If the BT-UD1 is connected to the computer: Blue
If the BT-UD1 is connected to and paired with the computer: Green
Disconnecting the BT-UD1
Check the BT-UD1 is not communicating before disconnecting it from the USB port on
the computer.
When the BT-UD1 is disconnected, Bluetooth communications automatically end. Quit
any applications such as audio chatting before disconnecting the BT-UD1.
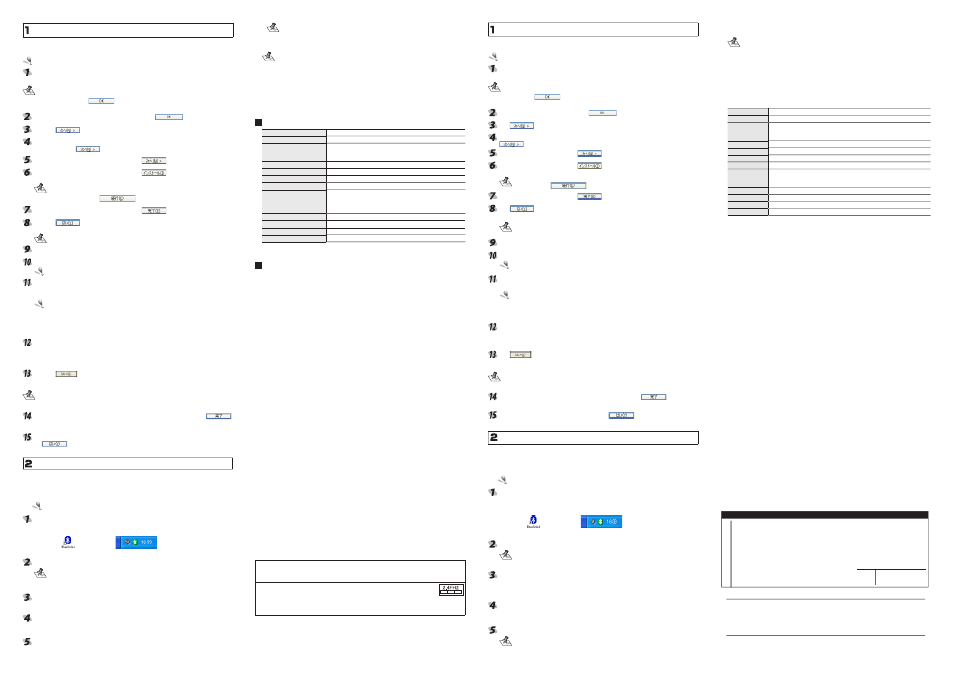
Specifications
Outer dimensions
Approx. W18.0 x D49.4 x H7.6 mm
Weight
Approx. 6.3 g
Transmission
GFSK for 1Mbps
p/4-DQPSK for 2Mbps
8-DPSK-for 3Mbps
Frequency range
2.4 - 2.4835 GHz
Electromagnetic wave reach Approx. 10 m (Varies according to environment.)
Power supply
USB DC5V
Security
PIN、Encryption Key
BT Profiles supported
Under IVT software:PAN, DNP, SPP, NAP, FTP, Information
Synchronization Service, OBEX-Object Push Service, Printer
Service, HID, FAX Service, BIP, AV, Headset (Attached software
is used)
Operating environment
PC/AT compatible with USB1.1 or USB2.0 port as standard equipment
Supported OS
Windows
®
2000/XP
Applicable standard
Bluetooth Ver.1.2
Working temperature
5 - 40°C (non-condensing)
* Company names, trademarks and logos appearing in this publication are the
trademarks or registered trademarks of their respective owners.
Support
ELECOM does not provide user support outside of Japan.
ELECOM does not provide user support for non-Japanese OS.
ELECOM does not respond to inquiries regarding this English manual.
(中文)
■前言
非常感謝您購買藍芽連接器BT-UD1。
本快速設定指南將針對關於如何能立刻使用本產品之基本設定進行解說。
■產品包裝內容確認
產品包裝裡面包含下列物品。
‧BT-UD1 ……………………… 1個
‧快速設定指南(本書) …… 1份
■使用安全注意事項
● 在安裝或是取下本產品時請務必遵循電腦主機以及周邊設備製造商的注意事項。
● 切勿擅自進行分解、改造、修理本產品。
這是導致火災或者觸電、故障的原因。若因擅自進行分解、改造或修理本產品造成火災、
觸電或故障,本公司將不負保固之責任。
● 切勿在使用水或者充滿溼氣的場所上使用本產品以及安裝有本產品的電腦主機。
以免導致火災或者觸電、故障等狀況。
● 在安裝或是取下本產品時,在碰觸本產品前請將手碰觸金屬製物品(像是鐵桌、門的把手
等)來進行去除靜電動作。靜電是導致本產品損壞的原因。
● 請顧客切勿自行進行產品的分解、修理、改造。
● 若發覺本產品有異常狀況之發生,請立刻停止使用,並與購入店家或者是本公司的客戶服
務諮詢中心進行洽詢。
■使用時注意事項
● 在安裝或是取下本產品時請務必遵循電腦主機以及周邊設備製造商的注意事項。
● 對於使用本產品以及軟體所發生之損壞或者資料流失等的損害,本公司將一概不負其責任。
● 使用本產品請直接連接到電腦上使用,請勿透過USB集線器;並且請連接到固定的USB連
接埠上使用,不要任意連接不同的USB連接埠。
● 請勿在充滿溼氣或者是塵埃的場所使用本產品。
● 請勿使本產品受到強烈的衝擊。
● 進行維護時請使用柔軟的乾布輕輕的進行擦拭。請勿使用石油醚、去光液、酒精等
■關於藍芽的注意事項
● 並非所有具藍芽無線功能的產品皆可與本產品做連線配對使用,欲與其他具藍芽無線功能
產品做配對使用前請先確認其他藍芽無線產品的使用手冊以便了解相容配對運作條件及方
法。
● 本產品是依據藍芽1.2規格所製。與使用藍芽Ver.1.0B規格的藍芽無線技術機器是沒有相容
性的。
● 在無線網路設備多、微波爐等會發出無線電波機器多或者無線網路環境複雜的場所,有可
能會發生頻繁的斷線、通信速度極端的變慢、發生錯誤等的情形。
本機器所使用的週波數範圍為2.4GHz區域。該週波數在微波爐產業、科學醫療機器或像其
他同種類的無線電電台、工場生產線上所使用有執照的無線電基地台或不需要執照的特定
小型無線電電台、業餘無線電電台等亦被使用。
1. 在使用本機器之前請確認在附近是否有「其他的無線電電台」被使用著。
2. 萬一本機器與「其他的無線電電台」之間發生電波干擾的場合,請立刻將
本機器所使用的無線頻道進行變更或者是改變使用場所,亦或停止機器的
運用(將電波的發射停止)。
3. 如果發生了非其他電波干擾等困擾的情形請洽詢技術支援中心。
進行安裝
進行解說公用程式的安裝以及將本產品連接到電腦上將辨識出來的步驟。
請用具有 Administrator 使用權限的帳戶來登入。
將安裝光碟放入光碟機上。
設定程式將會自動啟動。
設定程式如果沒有自動啟動時,請從
「スタートメニュー」上選擇「ファイル名を指
定して実行…」,在「ファイル名を指定して実行」畫面上的輸入欄裡鍵入[D:¥setup.
exe]然後按下
按鈕。(1-1)
[D] 記號請更改為所使用電腦的光碟機號碼。通常為 D。
從下拉式選單上選擇「日本語」然後按下
按鈕。(1-2)
按下
按鈕。(1-3)
如果同意使用條件時請選擇「使用許諾契約の条項に同意します」的選項按鈕然後按下
按鈕。(1-4)
確認所要進行安裝的場所然後按下
按鈕。(1-5
確認所要進行安裝的場所然後按下
按鈕。(1-6)
將會開始進行安裝公用程式。
按照所使用的環境之不同可能會出現數次下面所示的畫面。(1-7)
在此場合請按下
按鈕來繼續進行安裝。
確認所要進行安裝的場所然後按下
按鈕。(1-8)
按下
按鈕。(1-9)
電腦將會重新開機。
電腦重新開機後將會顯示出公用程式的畫面。
將本產品的蓋子取下。(1-10)
將本產品接到電腦的 USB 埠上。(1-11)
請正確的進行連接,勿將 USB 接頭的方向上下顛倒。
自動辨識出本產品。
同時,當電腦自動辨識出本產品的同時,公用程式的期始設定畫面也會顯示出來。
按照所使用的環境之不同,會有同時出現「
Bluetooth へようこそ」以及「新しい
ハードウェアの検出ウィザード」兩個畫面的情形。在此時情形下時請先進行步
驟 12 的「
Bluetooth へようこそ」之畫面操作。
在完成公用程式的期始設定後,再接著進行步驟 14 的「
新しいハードウェアの検
出ウィザード」之操作。
選擇公用程式的期始設定「
Bluetooth へようこそ」之畫面,輸入「デバイス名」以及「デ
バイスタイプ」。(1-12)
「
デバイス名」所指的是要顯示在對象機器上面的本產品之識別名稱。
「
デバイスタイプ」請選擇相應於所使用的電腦種類。
按下
按鈕。
關閉「
Bluetooth へようこそ」畫面,回到公用程式畫面。
如此即可完成公用程式的期始設定。
按照所使用的環境之不同會有出現步驟 14 的「
新しいハードウェアの検出ウィザー
ド」畫面之場合。在此場合表示本產品的安裝已經完成。
可以利用公用程式來進行其他藍芽機器的連接。
選擇「
新しいハードウェアの検出ウィザード」畫面,然後按下
按鈕。(1-13)
將「
新しいハードウェアの検出ウィザード」關閉。
接下來會出現是否重新進行開機的畫面。請按下
按鈕。(1-14)
電腦會重新啟動,本產品成為可以使用的狀態。
要使用 BT-UD1 時
將本產品進行安裝後,只要將本產品連接上就可以進行使用。
■與其他的藍芽機器進行配套時
要與本公司的耳機組BT-MH1等其他的藍芽機器進行通訊時,請將所要進行使用的機器設
定在配套的狀態下。
請將對象側機器放在接近本產品的地方之後然後再進行配套處理。
顯示出公用程式。
公用程式會在電腦啟動時顯示出來。
公用程式如果沒有顯示出來之場合,請滑鼠雙響顯示在桌面上的圖示或者是雙響任務欄
上的圖示。
桌面上的圖示
任務欄上的圖示
將要進行配套的其他的藍芽機器設為配套模式。
‧ 有關於如何將對象機器設為配套模式的步驟請閱讀對象機器的使用說明書。
‧ 要使用 BT-MH1 的場合持續按住 ID 設定按鈕 6 秒以上的話,LED 會紅‧藍交
替的進行閃爍而進入配套模式。
按下顯示在公用程式中央的紅球。(2-1)
將會進行藍芽機器的搜尋。
尋找到藍芽機器的話則會顯示出偵測到的畫面,接著會顯示出進行取得藍芽機器名稱的
畫面。
在想要進行配套的藍芽機器上按下滑鼠右鍵,從所顯示出來的清單上選擇「
ペアデバイ
ス」。(2-2)
接下來會顯示出輸入密碼的畫面。
輸入要進行配套的藍芽機器的密碼。(2-3)
‧關於要輸入的密碼請閱讀對象機器的使用說明書。
‧使用 BT-MH1 的場合其密碼為「0000」
。
如此即可完成配套。
完成配套的機器其會與公用程式畫面中央顯示的紅球用線連接著來進行顯示。(2-4)
可以進行配套的話,任務欄上所顯示的圖示顏色會產生變化。
本產品與電腦沒有進行連接時:灰色
本產品與電腦有進行連接時:藍色
本產品與電腦有進行連接,且為配套狀態時:綠色
■取下 BT-UD1 時
請確認本產品不是處於通信狀態。將本產品從電腦的USB埠上取下。
將BT-UD1取下的話利用藍芽的通訊也會自動的結束。
請在取下時將交談等結束掉,使之處於非使用的狀態。
■規格
外型尺寸
約 寬度 18.0× 長度 49.4mm× 高度 7.6mm
重量
約 6.3g
傳送方式
GFSK for 1Mbps
p/4-DQPSK for 2Mbps
8-DSK-for 3Mbps
週波數範圍
2.4GHz~2.4835GHz
電波傳送距離
約 10m(按照使用環境不同而有所差異)
電源
USB DC5V
保全方式
PIN、Encryption Key
相容設定
Under IVT software:PAN、DNP、SPP、NAP、FTP、Information
Synchronization Service、OBEX-Object Push Service、Printer Service、HID、
FAX Service、BIP、AV、Headset(使用附屬軟體時)
運作環境
備有 USB1.1 或是 USB2.0 連接埠的 PC/AT 相容機
相容 OS
Windows
®2000 / XP
適用規格
藍芽 Ver.1.2
運作溫度
5℃ ~40℃(無冷凝)
※ 所揭載的公司名稱、商標、標章為各公司所有的商標以及註冊商標。
■ 有關於技術支援
在日本以外使用時恕無法進行技術支援。
使用日文以外的OS無法進行技術支援。
恕無法接受本中文使用手冊的諮詢。
Bluetooth アダプタ BT-UD1
クイックセットアップガイド
発行 エレコム株式会社
2005 年 11 月 18 日 第 1 版
©
2005 ELECOM Corporation. All rights reserved.
保 証 書 【
BT-UD1
】
店名 住所 TEL
担当者名
販
売
店
保証期間 お買い上げ年月日
6ヶ月
年 月 日