Yaskawa GPD 315/V74X User Manual
Page 2
Yaskawa Electric America, Inc – www.drives.com
IG.V74X.01, Page 2 of 4
Date: 07/01/04, Rev: 04-07
Extension Ring Option Kit
GPD 315/V74X
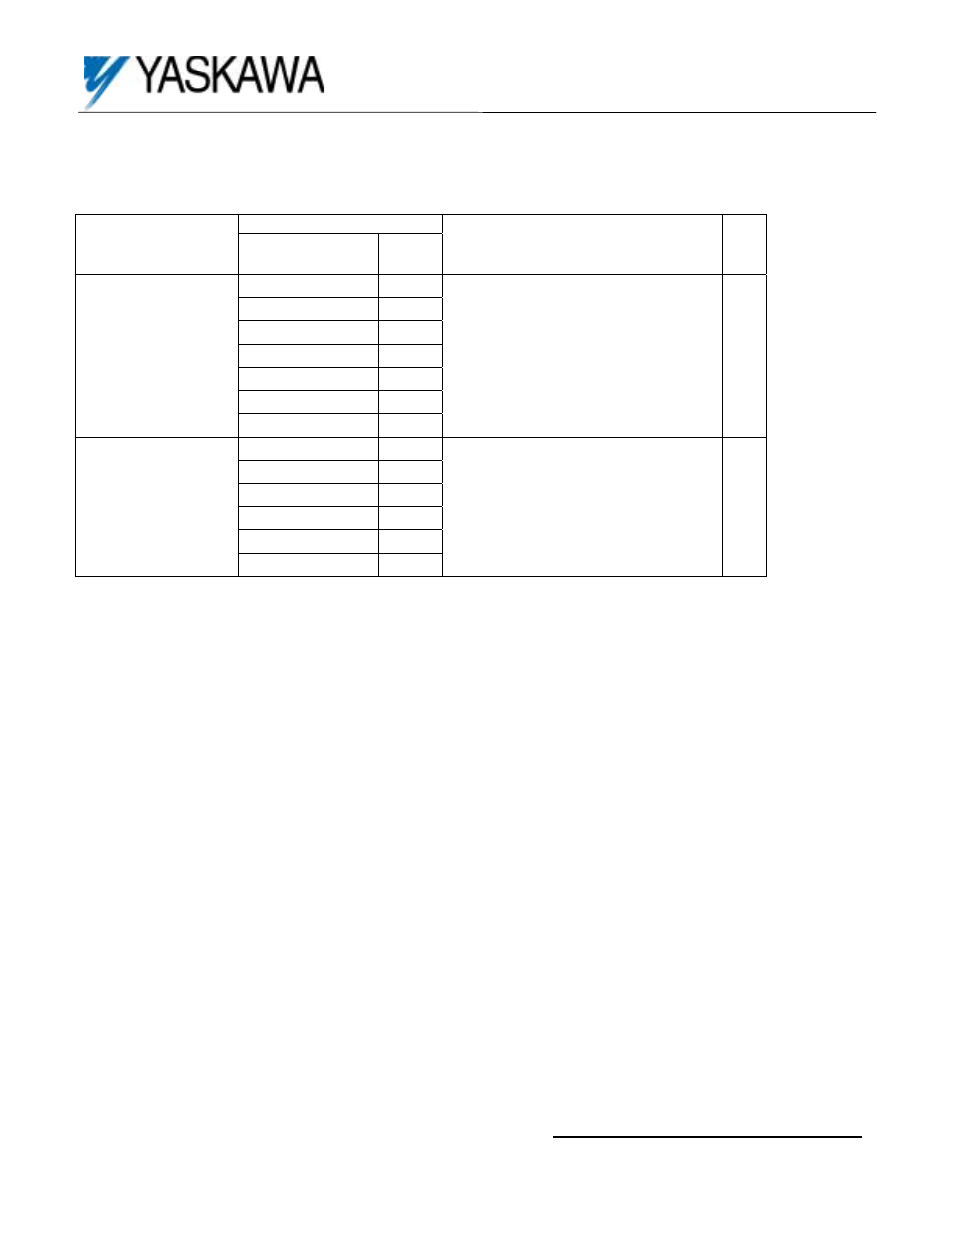
Ring Collar Kit Part Numbers
Applicable Drive Models
Extension Ring Kit
Part No.
CIMR-V7CU
""""
HP
Parts Included
Qty
20P1 0.13
20P2 0.25
20P4 0.5
20P7 1.0
40P2 2.0
40P4 3.0
UUX000060
40P7 5.0
Extension Ring
Screws (M4 x 70 SW)
O-Rings
1
4
4
21P5 0.25
22P2 0.5
23P7 1.0
41P5 3.0
42P2 4.0
UUX000061
43P7 5.0
Extension Ring
Screws (M4 x 70 SW)
O-Rings
1
4
4
Ring Collar Kit Installation
(1) Turn OFF the power supply to the Drive
Refer to Figure 1 – Removal of components
(2) Remove the screw-hole caps located at each corner of the face cover of the drive.
(3) Loosen the screws located at each corner of the face cover of the drive. O-rings on the backside of the face
cover will not allow the screws to be completely removed.
(4) Partially lift the face cover off the drive. An internal, operator cable connects the face cover to the Drive.
Disconnect the cable at either or both ends of the cable.
(5) Remove the face cover completely and retain in a safe place prior to installation in step (7).
Refer to Figure 2 – Assembly of components
(6) Unpack and verify the contents of the plastic bag included with the plastic extension ring. Quantity (4)
extended length screws and quantity (4) O-rings are included.
(7) Retrieve the face cover from step (5) and observe the existing screw and O-ring arrangement.
(8) Remove the existing screw and O-rings. Replace them in same manner with the new extended screws and
new O-rings.
(9) Place the extension ring on the Drive such that the rubber gasket is facing toward the heat sink. The extension
ring may appear to have a loose fit. A watertight seal is created after the face cover screws are tightened.
(10) Re-attach the operator cable removed in step (4) between the Drive face cover and connector CN1 of the
installed option card.
(11) Place the face cover on the extension ring.
(12) Tighten each of the screws to a torque of 10 lb!in (1.13 N!m). This creates a watertight seal.
(13) Replace the plastic, screw-hole caps.