Lubricate grease fittings check condition of belt, Lubricate grease fittings, Check condition of belt – Exmark Lazer XP User Manual
Page 19: Maintenance
Maintenance
Lubricate Grease Fittings
Note: See chart for service intervals.
1. Stop engine, wait for all moving parts to stop, and
remove key. Engage parking brake.
2. Lubricate fittings with NGLI grade #2
multi-purpose gun grease.
Refer to the following chart for fitting locations
and lubrication schedule.
Lubrication Chart
Fitting
Locations
Initial
Pumps
Number of
Places
Service
Interval
1. Idler
Bushings
1–2
1
25 Hours
Check Condition of Belt
Service Interval: Every 50 hours
All Units
1. Stop engine, wait for all moving parts to stop, and
remove key. Engage parking brake.
2. Inspect the belt for damage or wear. Replace belt
with one of the following:
Deck
Part No.
52 inch–All
1–653438
60 inch Lazer Z, XS, XP
SN 599,999 and Lower and
All Lazer AS
103-0866
72 inch All SN 599,999
and Lower
103-0867
60 inch Triton
109-1242
66 inch Triton
103-0867
72 inch Triton
109-1244
For 52 inch Units Only-Belt Replacement
Procedure:
1. Remove the blower from the deck.
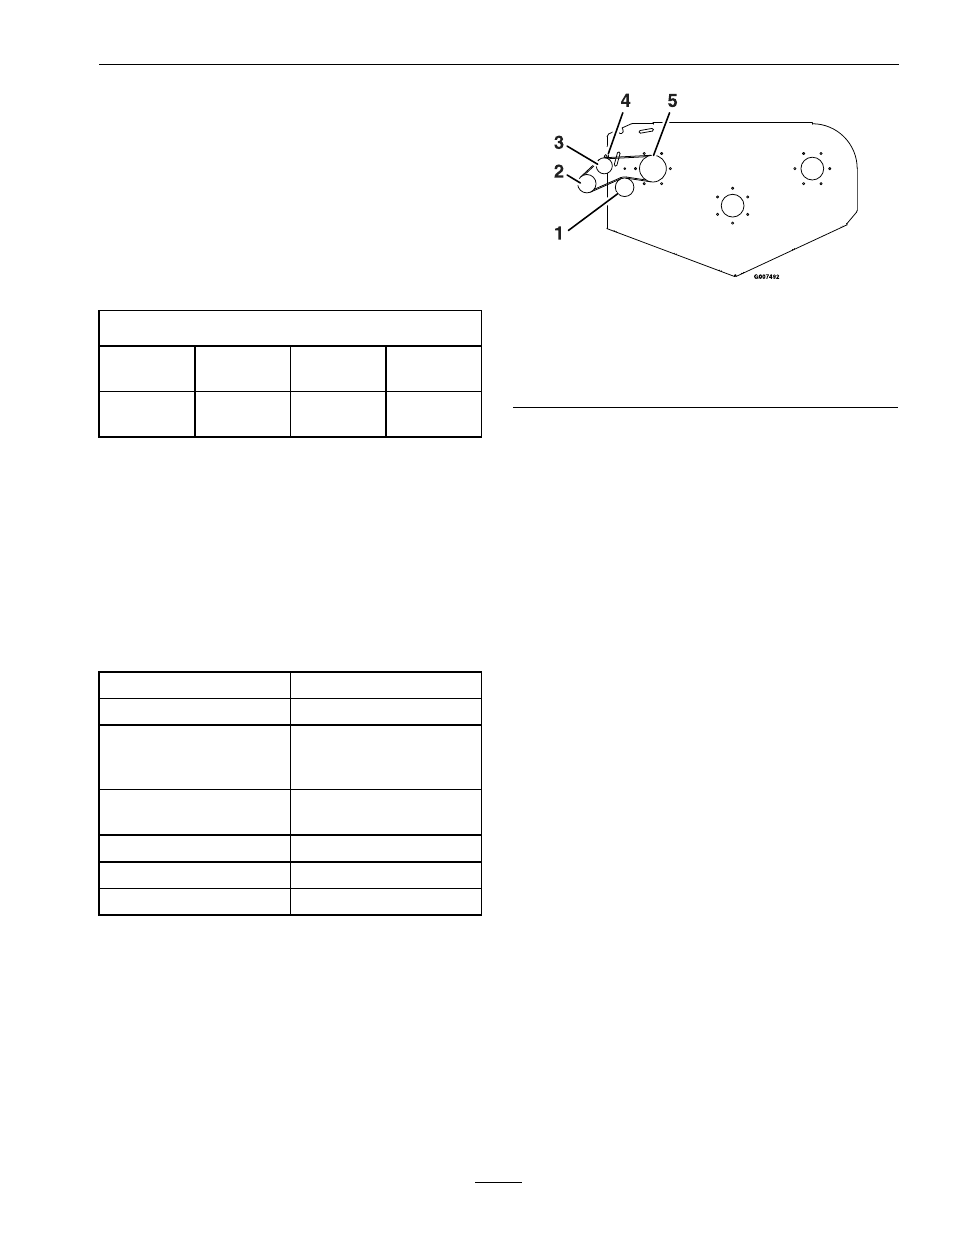
2. Remove the belt guide on the blower (see
Figure 9).
Figure 9
View From Top of Blower
1.
Spring loaded idler
4.
Belt guide
2.
Impeller sheave
5.
Deck sheave (reference)
3.
Fixed idler
3. Remove the old belt.
4. Install the new belt onto the blower assembly as
shown in Figure 9.
5. Reinstall the belt guide removed in step 2.
6. Reinstall the blower onto the deck.
For 52 inch Units Only-Inspect Belt Position on
the Idler Arm:
The idler arm may become bent during use or
transport. A bent idler arm could cause the belt to
jump off of the idler and be damaged.
1. Make sure the belt cover is installed and run the
blower for one to two minutes.
2. Shut off the deck drive, stop engine, wait
for all moving parts to stop and remove key.
Engage parking brake. Remove the belt cover
and check to make sure that the belt is riding near
the center of the flat idler on the idler arm.
3. If the belt is not riding near the center of the
idler, remove the blower, and bend the idler arm
slightly.
4. Reinstall the blower and belt cover and repeat
steps 1 through 3 until the belt is positioned near
the center of the idler.
19