Record and play 8. for more information, Record and play, Create a playlist 7. monitor – Grass Valley K2 Summit Client Quick Start Nov.23 2009 User Manual
Page 2
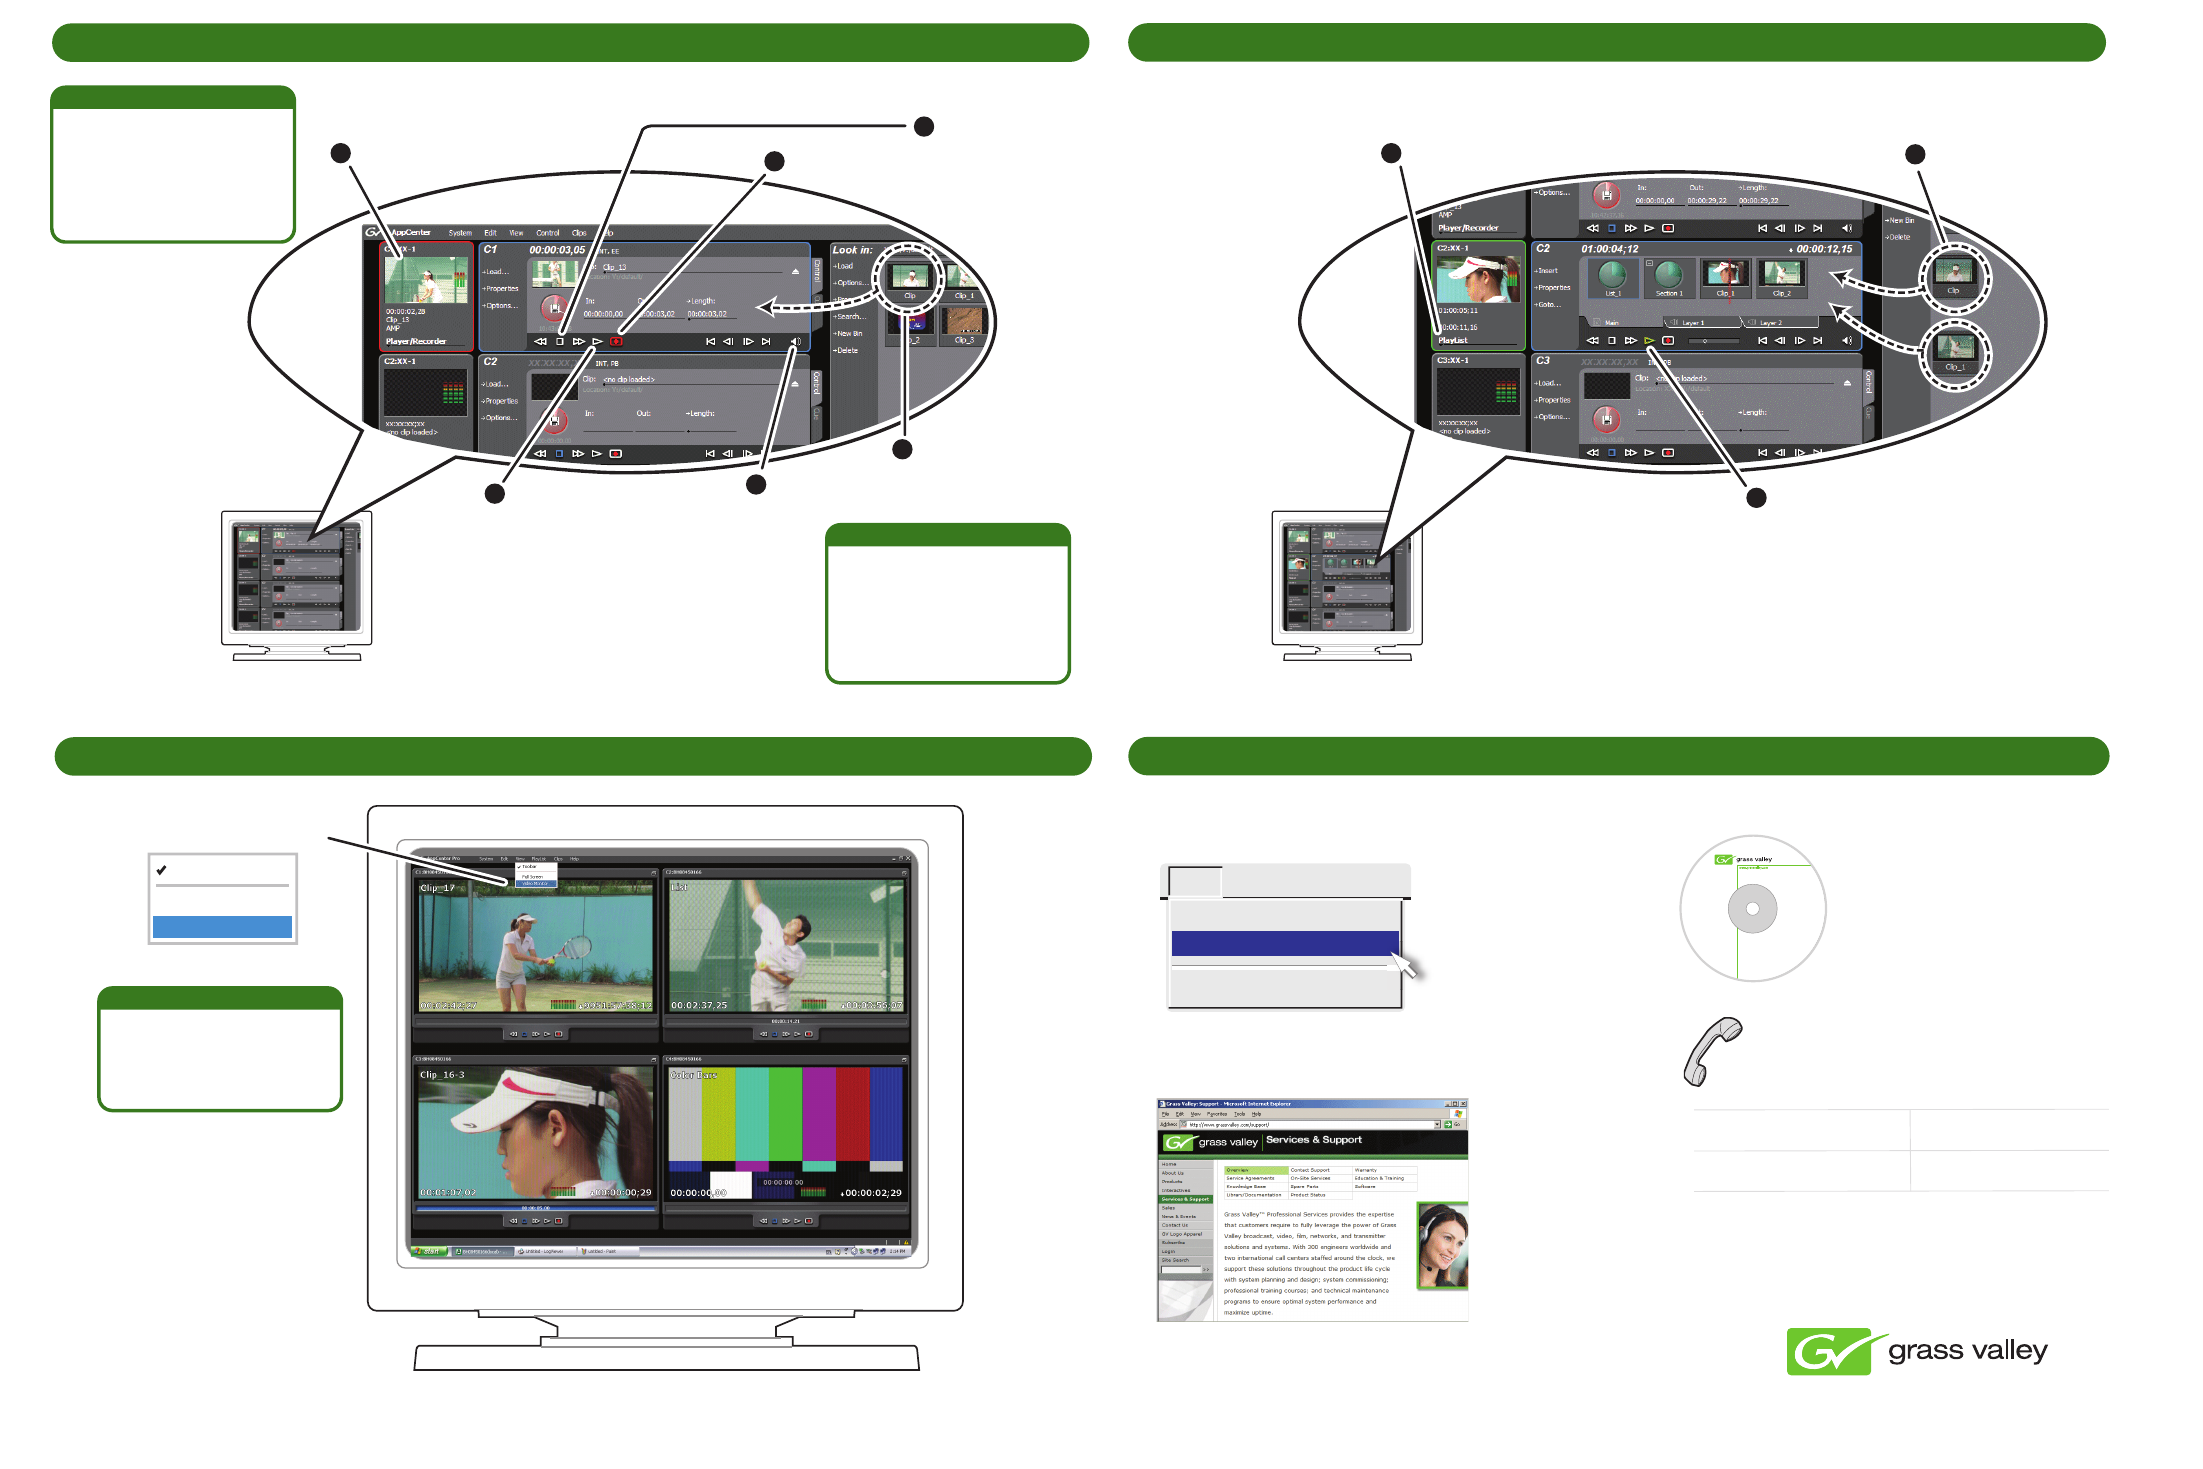
5. Record and play
8. For more information...
1
Select a channel
3
Stop record
4
Drag a clip into the
channel
2
Begin record
A channel becomes an input
channel when you begin
recording. The same channel
becomes an output channel
when you load a clip for
playout.
Bi-directional channels
Help
System Status
About AppCenter
AppCenter Help Topics
In AppCenter, click Help | AppCenter Help Topics and
read the complete documentation for operating and
configuring K2 Summit Production Client channels.
Find the complete documentation set for K2 products
on the Documentation CD:
Go to http:www.grassvalley.com/support and find
solutions to problems.
Use the following information to contact
product support by phone during business
hours. Afterhours phone support is available
for warranty and contract customers.
The VGA resolution must be
1024 x 768 x 32 or greater to
support live (moving) video
monitoring.
Video monitor support
8. Record and play
1
Select Playlist
3
Play the list
2
Drag clips into
the channel
6. Create a playlist
7. Monitor
Click View | Video Monitor
International
+800 80 80 20 20
(France)
+33 1 48 25 20 20
International
+800 547 8949
(United States, Canada)
+1 530 478 4148
Go to
http:www.grassvalley.com/support/contact/phone for
phone numbers to contact your local support center
directly during normal business hours.
Toolbar
Full Screen
Video Monitor
Copyright © Grass Valley, Inc. All rights reserved.
K2
Documentation
Version X.X
063-xxxx-xx
Xxx 200x
System Requirements:
Microsoft Windows and Internet
Explorer 5.5x or Netscape 4.7x
or later.
If this disc does not auto-start,
open the home.htm file on the
disc.
Copyright © Thomson Inc.
All rights reserved.
Refer to the AppCenter Help menu for complete information about playlist
functionality and other operations, such as editing subclips.
6
Play the clip
5
Adjust audio level
as needed
On the AppCenter menu, click
Control | Options. On the
Options dialog box click
Timecode and select the
timecode for recording and
display.
Timecode for Record
- User Guide
- System Guide
- Service Manual
- SAN Manual
- Cabling Guide
- RAID Instruction Manuals