Assembly, Installing the handle, Installing the fuel tank and the fuel line – Exmark M216KASPC User Manual
Page 10
6
Assembly
Note: Determine the left and right sides of the machine
from the normal operating position.
Installing the Handle
1. Mount the handle to the outside of the lawn mower
housing (using the bottom hole) with 2 cap screws
(5/16–18 x 1–1/4 in.), washers, and thin nylon insert
locknuts.
2. Secure the handle latches to the handle with 2 cap
screws (5/16–18 x 1-1/2 in.), washers, and nylon insert
locknuts (Fig. 1).
m-534
1
2
3
4
Figure 1
1.
Handle latch (2)
2.
Bag support rod
3.
Cap locknut (2)
4.
Handle
Note: You can adjust the handle height for comfortable
operation. Stand behind the handle to determine the
height. To adjust the handle height, position the cap
screws and the locknuts that secure the handle latches to
the handle into the other mounting holes in the latches.
3. Slide the bag support rod through the bottom mounting
holes in the handle and secure each end with a cap
locknut (Fig. 1).
4. Use a cable tie to secure the control cables to the left
handle below the bag support rod.
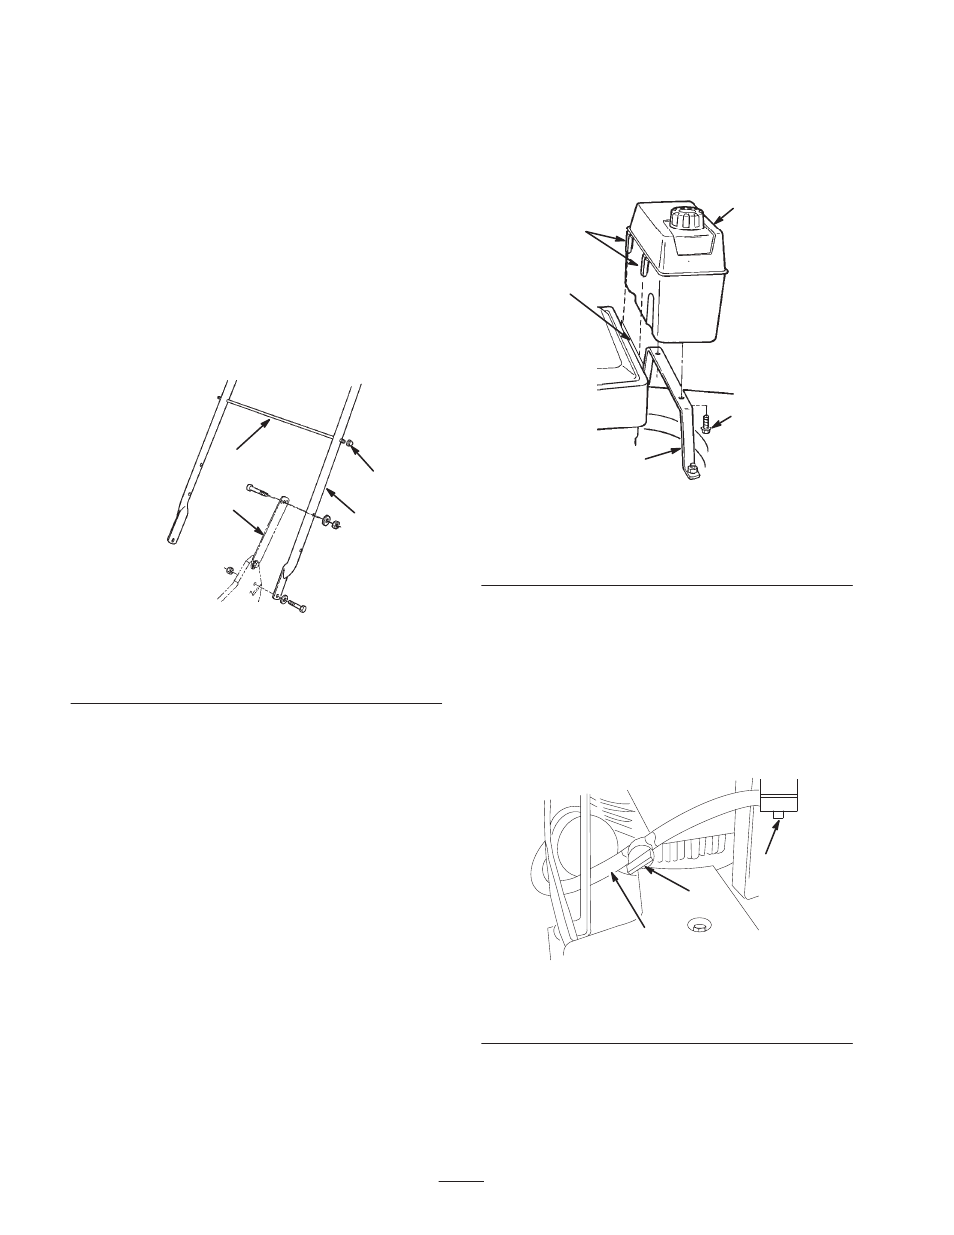
Installing the Fuel Tank and the
Fuel Line
1. Start the two self-tapping screws into the bottom of the
fuel tank and then remove the screws (Fig. 2).
530
3
4
5
1
2
Figure 2
1.
Tank base
2.
Fuel tank bracket
3.
Plastic clips
4.
Fuel tank
5.
Self-tapping screw (2)
2. Hook the plastic clips on the front of the fuel tank onto
the fuel tank bracket (Fig. 2).
3. Secure the fuel tank to the tank base with the two
self-tapping screws (Fig. 2). Do not overtighten the
screws.
4. Remove the red cap from the end of the fuel line and
from the end of the elbow fitting on the fuel tank
(Fig. 3).
m-7283
1
2
3
Figure 3
1.
Fuel line
2.
Elbow fitting
3.
Fuel valve
5. Slide the end of the fuel line onto the elbow fitting
(Fig. 3).
6. Secure the fuel line in place with the fuel line clamp
(Fig. 3).