Eneo EDC-IDFSW User Manual
Page 13
3
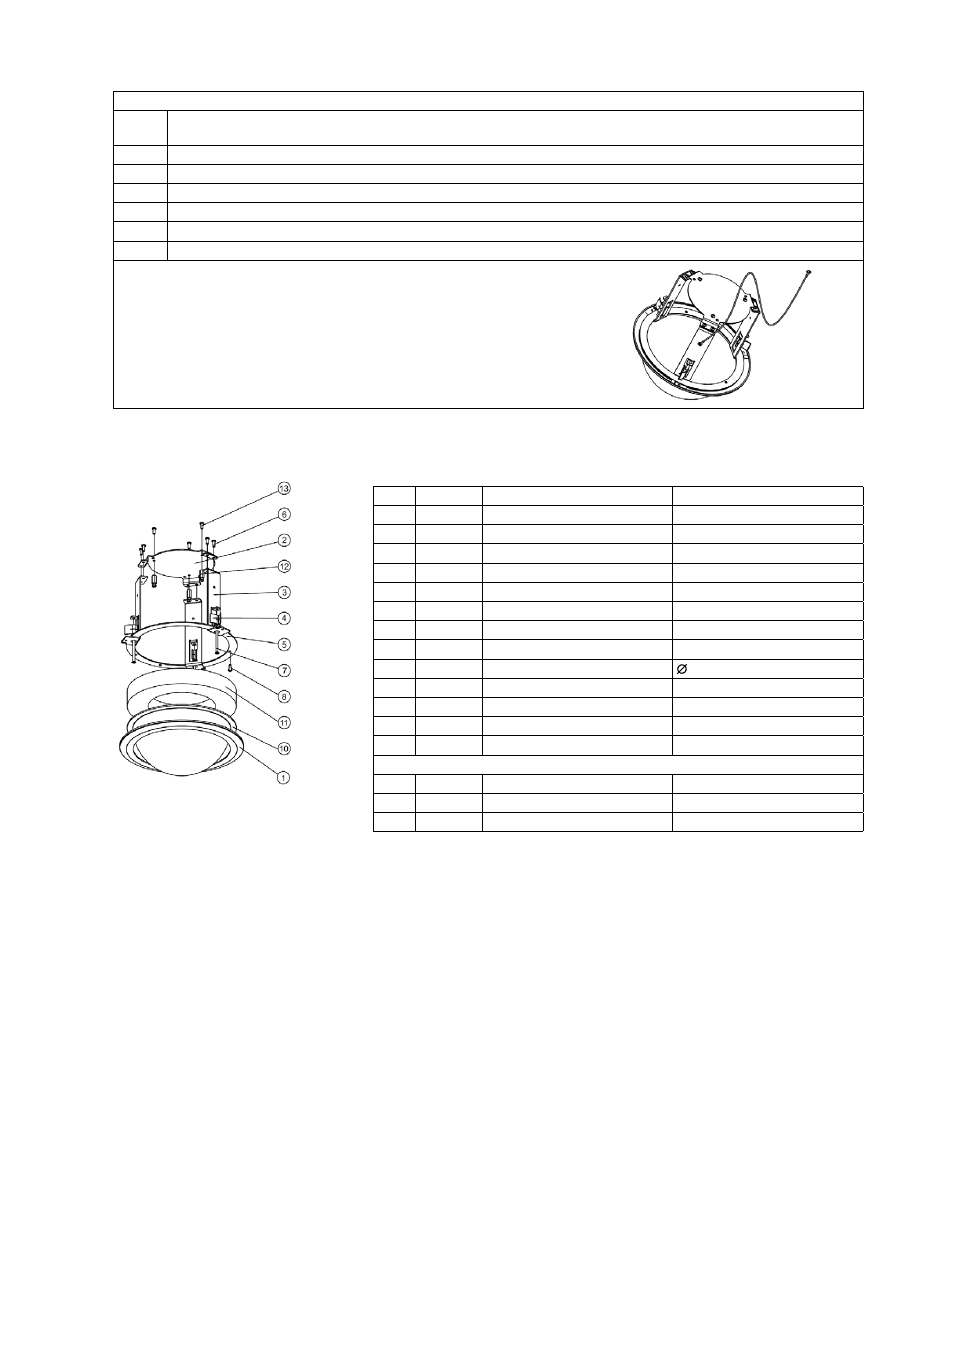
No.
Quantity
Component
Description
Trim ring
Plastic
Base bracket
Steel (EGI .6T)
3
3
Guide bracket
Steel (EGI .0T)
4
3
Lever clamp
Aluminium
5
Dome ring
Steel (EGI .6T)
6
6
Screws
Self tapping M4xmm
7
3
Screws
M4x55mm
8
Screws
M4x6mm
9
3
E-rings
4mm
0
Housing dome (tint)
Acrylic
Dust cover ring
Sponge
3
Spacer
M4x5mm
3
6
Screws
M3xmm
Accessories
Safety ring string
Self tapping () screws
M4xmm
3
Self tapping () screw
M4xmm
NOTE: The ceiling tile cannot be thicker than 2.4cm.
Step 1
Remove the ceiling tile from the ceiling. Draw a circle whose diameter is 84mm n the tile (you can use the carton with a hole).
Cut the circle out of the ceiling tile.
Step 2
To install the dome camera, fasten the dome mounting base to the base bracket using 3 screws.
Step 3
Insert the flush mount into the ceiling and turn the lever clamp to fasten the flush mount to the ceiling.
Step 4
It is recommended to remove window for improving picture quality.
Step 5
Join the dome camera to the dome mounting base.
Step 6
Insert dust cover ring inside guide bracket to prevent housing dome covering with dust.
Step 7
Fix the trim ring to the flush mount.
NOTE: To increase the safety, screw safety ring string to the guide bracket and the other side
of that to something which can prevent falling incidently.