Part names, Installation instructions – Eneo PXD-1080MIR D User Manual
Page 5
5
EN
Part names
3-Axis gimbal
Easy Adaptor
flat type
Ethernet & Power cable
OSD control joy stick
Focus / Zoom
Lens
Dome base
Dome cover
Bubble
Video Sub-out connector
IR LEDs
Light sensor
IP Reset
micro SD-Card slot
Bubble shield
Cooling fan
Option: Tilted Easy Adaptor
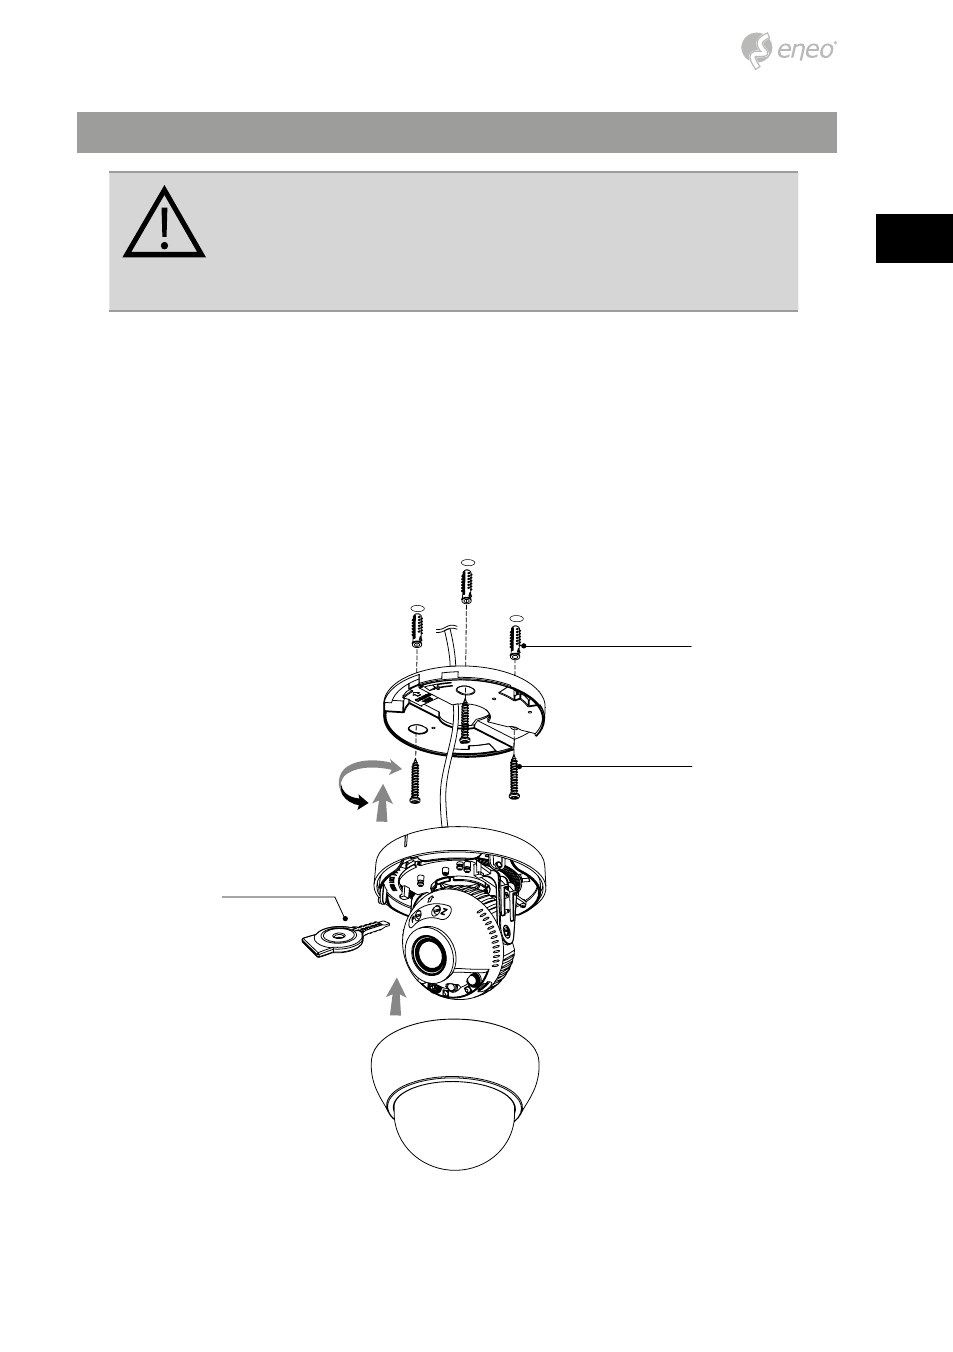
Installation instructions
CAUTION: The camera’s base should be attached to a structural
object, such as concrete, hard wood, wall stud or ceiling rafter
that supports the weight of the camera. If necessary use appro-
priate mounting material (e.g. anchors) instead of the material
enclosed with the camera.
1. Drill three holes for mounting on the ceiling or wall.
2. Attach the Easy Adaptors at the pre-drilled installation position and fix it by using
mounting screws.
3. Route the power/video cable to the connecting place.
4. Place the dome base assembly to the Easy Adaptor.
5. Adjust the camera’s viewing angle (Pan, Tilt, Rotation)
6. Tighten the set screw to fix a pan plate after the setting. Then remove the caution
sticker from the lens.
7. Assemble the dome cover to the dome base unit.
Plastic Anchor (6x30mm)
Open & Adjust
Driver
Mounting Screw (3.5x25mm)