Step 2: attach the mounting plate – ACTi Indoor Dome (D5xE5x) on Hard Ceiling User Manual
Page 4
Installation Guide
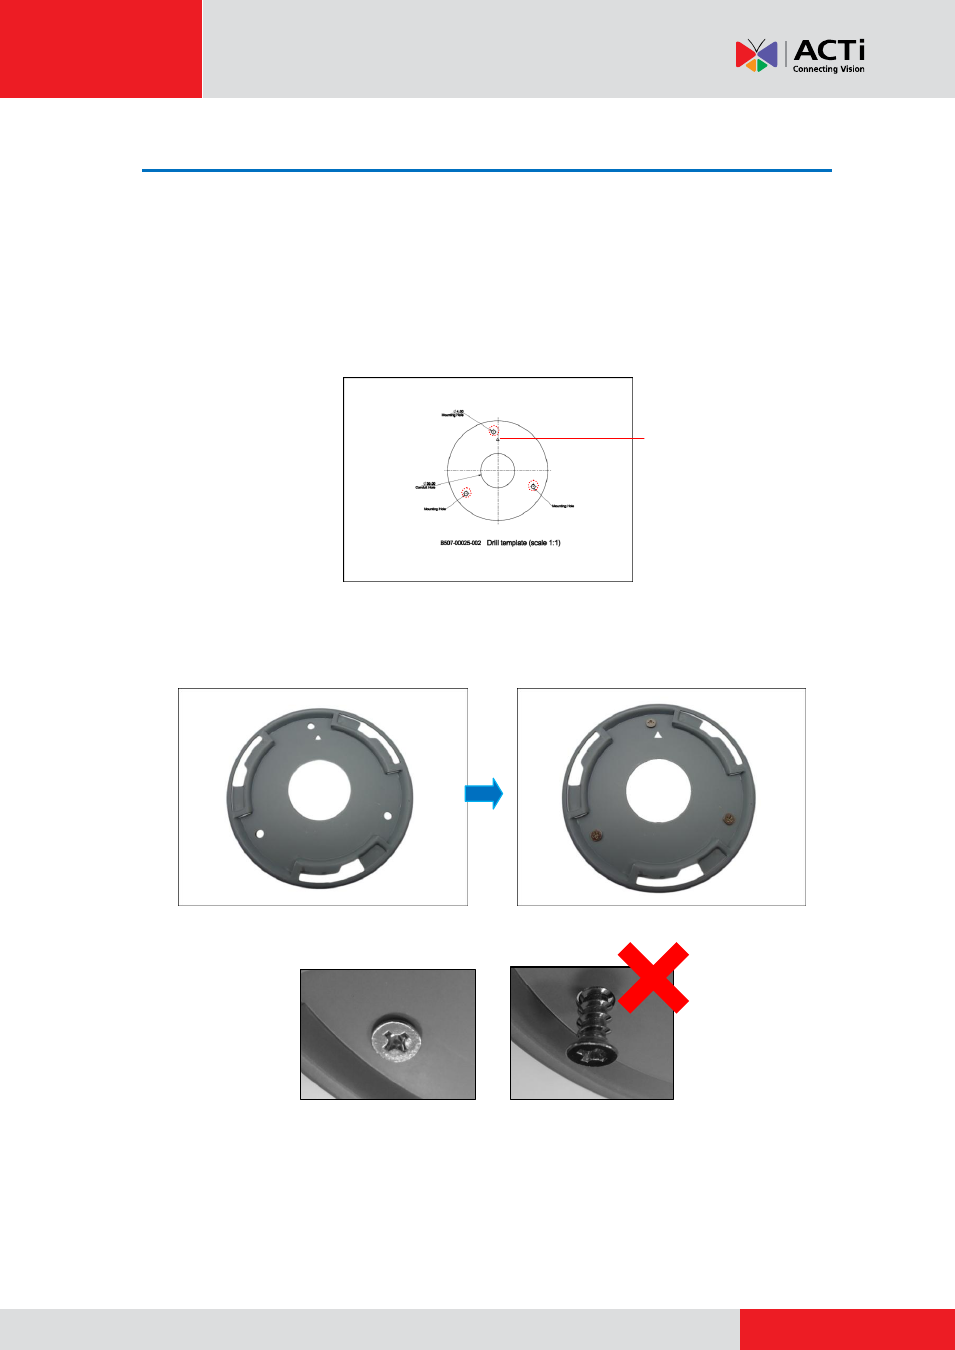
Step 2: Attach the Mounting Plate
NOTE:
Before installation, consider the camera viewing angle and logo placement. The arrow on
the drill template and mounting plate align with the direction of the camera logo. Rotate the drill
template as needed.
1.
Using the drill template or mounting plate, mark the holes on the surface. If necessary, drill
the three (3) screw holes and insert the plastic plugs.
2.
Attach the mounting plate on the surface using the three (3) supplied screws.
Note that the
direction of the arrow on the mounting plate aligns with the camera logo.
NOTE:
Make sure the screw is flat on the plate.
This arrow aligns with
the camera logo.
Rotate the template,
as needed.
See also other documents in the category ACTi Camcorders:
- ECD-1000 (2 pages)
- ECD-1000 V.1.02.09 (135 pages)
- Outdoor Mini Dome and Mini Fisheye Dome on Tilted Wall (40 pages)
- I912 (43 pages)
- PMON-2000 (2 pages)
- Indoor Box (B2xI2x) on Tilted Wall By Bracket (33 pages)
- Bullet Camera (B4xI4x) on Dropped Ceiling with Ceiling Bracket (52 pages)
- KCM-8211 (53 pages)
- V11 (2 pages)
- V32 (91 pages)
- V11 (20 pages)
- V24 (2 pages)
- V24 (32 pages)
- B87 (47 pages)
- E86 (47 pages)
- E223 (32 pages)
- V32 (2 pages)
- V32 (31 pages)
- B910 (48 pages)
- E913 (36 pages)
- Indoor PTZ on Dropped Ceiling (9 pages)
- E59 (31 pages)
- Indoor Hemispheric / Fisheye Dome on Dropped Ceiling (26 pages)
- E271 (42 pages)
- Outdoor Dome on Straight Wall with Accessory Sets of PMAX-0314 (65 pages)
- KCM-5211 (18 pages)
- KCM-5611 (27 pages)
- E69 (37 pages)
- Outdoor PTZ / Speed Dome (I9x) on Vertical Pole with Accessory Sets of PMAX-0305 (36 pages)
- Indoor Box Camera on Ceiling with Bracket (31 pages)
- Outdoor Dome (B8xI8x) on Dropped Ceiling with Gang Box Converter (35 pages)
- Indoor Box Camera with Outdoor Housing on Wall (44 pages)
- Outdoor Hemispheric / Fisheye Dome on Tilted Wall (27 pages)
- Outdoor Hemispheric / Fisheye Dome on Corner with Tilted Mount (PMAX-0310) (22 pages)
- KCM-7911 (32 pages)
- Outdoor Dome on Hard Ceiling (31 pages)
- Outdoor Dome on Hard Ceiling with Pendant Mount (77 pages)
- Outdoor Dome on Corner with Accessory Sets (51 pages)
- Outdoor Dome on Straight Wall with L-Bracket Wall Mount (33 pages)
- Outdoor Dome on Hard Ceiling with Flush Mount (34 pages)
- Indoor Mini Dome and Mini Fisheye Dome on Hard Ceiling with Gang Box (21 pages)
- Indoor Mini Dome and Mini Fisheye Dome on Hard Ceiling with Gang Box (21 pages)
- Indoor Mini Dome and Mini Fisheye Dome on Hard Ceiling (19 pages)
- Indoor Dome (B6x) on Hard Ceiling (25 pages)
- Indoor Dome on Dropped Ceiling (22 pages)