Front side right side, Back side left side – ACTi PMON-2000 User Manual
Page 2
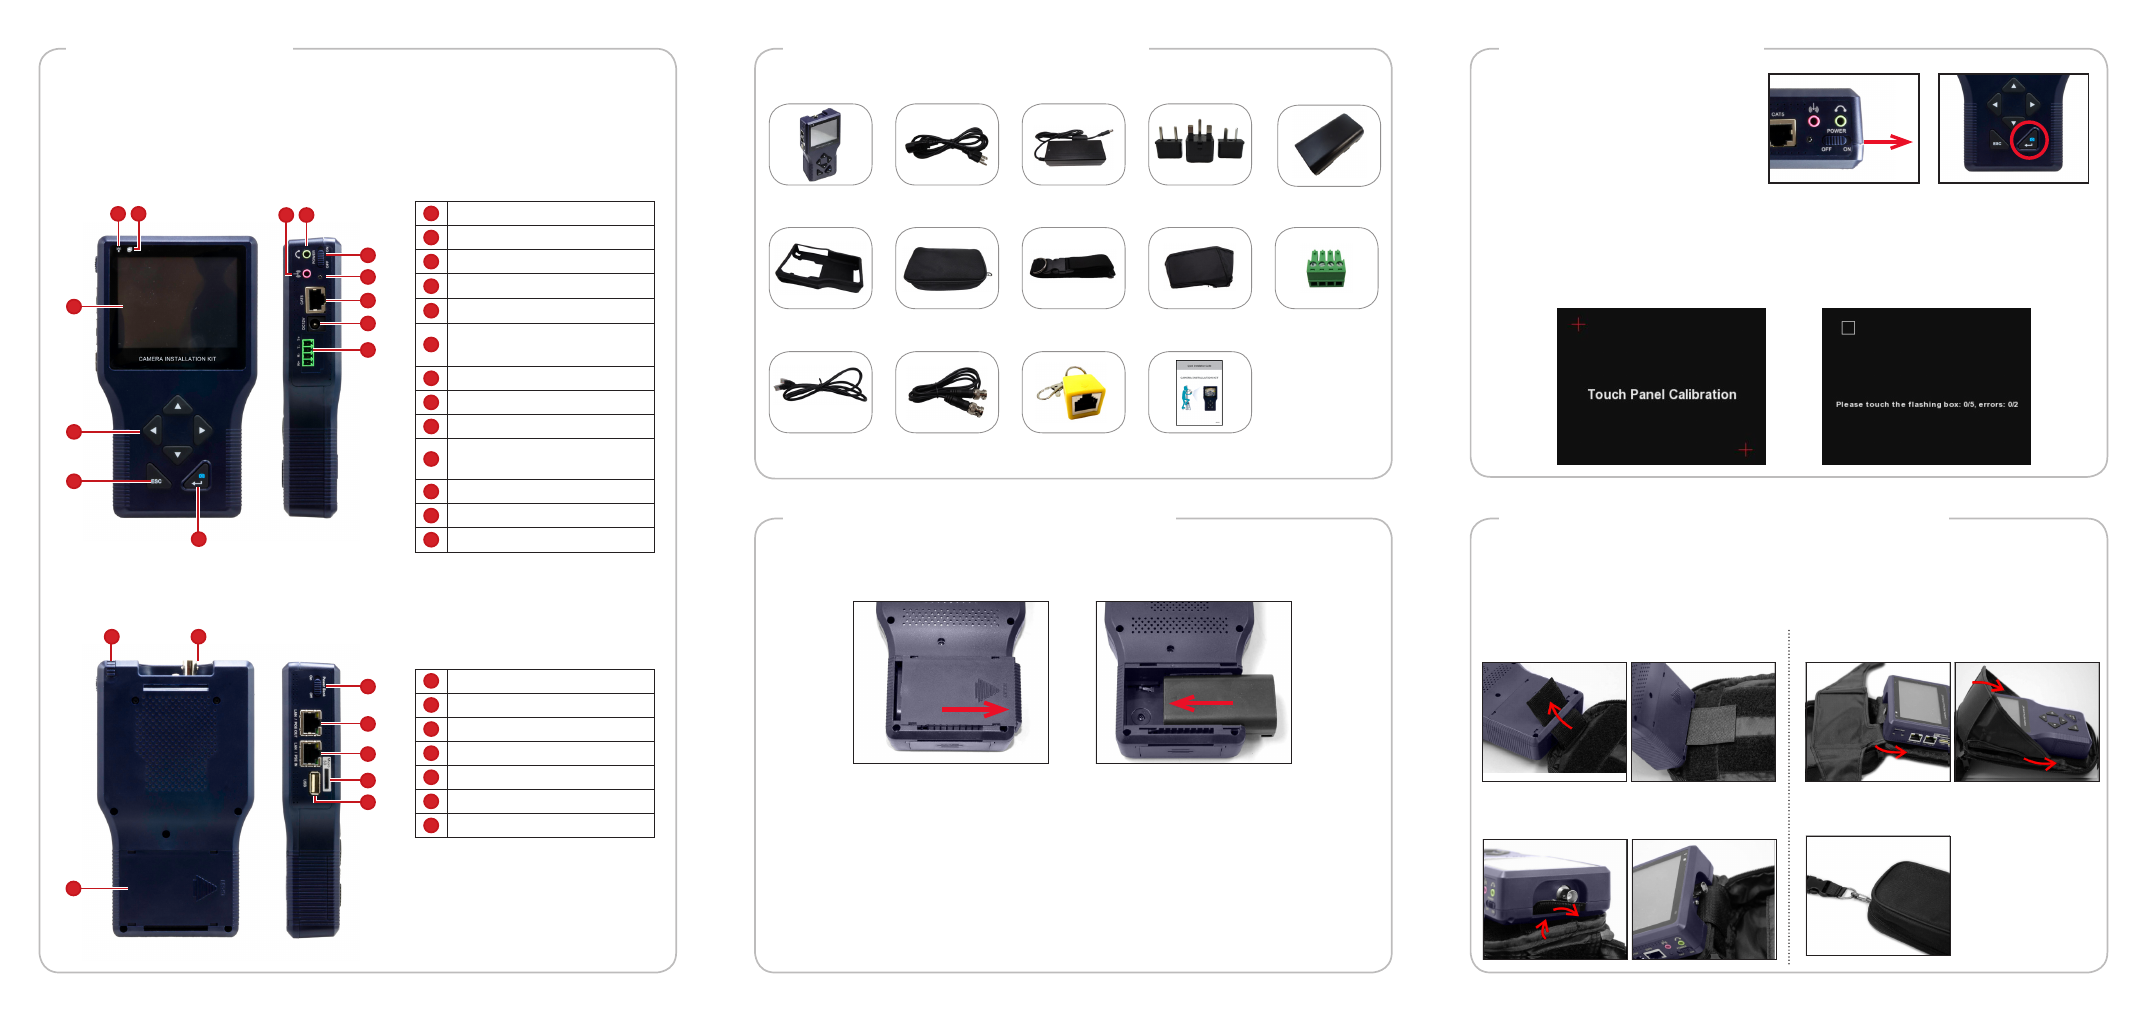
1. Switch the device power to ON.
2. Press and hold the Power
Key for at least 3 seconds.
For first-time use, the
Touch Calibration screen appears. Using the stylus, follow the
on-screen instructions to complete the calibration.
The Power Indicator LED lights up.
Note:
The boot up process may take a while to complete.
For protection and convenience of use, you may use the rubber casing for easy-grip
or the carrying bag to protect and carry the device wherever you go.
To place the device in the carrying bag, peform the following:
1
Power Indicator LED
2
Data Indicator LED
3
LCD Screen
4
Navigation Keys
5
ESC Key
6
Power / Snapshot /
Enter Key
7
Serial Port Connector
8
DC 12V Power Connector
9
Ethernet Cable Tester Port
10
Battery Charging
Indicator LED
11
Power Switch
12
Audio Output Jack
13
Audio Input Jack
Front Side
Right Side
3
6
2
4
5
9
8
7
1
10
11
12
13
Back Side
Left Side
14
15
16
20
21
19
18
17
14
Stylus
15
BNC Connector
16
Battery Compartment
17
USB Port
18
Memory Card Slot
19
LAN Port / PoE Output
21
LAN Port / PSE Input
This guide contains all the information you need to quickly setup the
Camera
Installation Kit. For detailed information on installations or operations, please refer to
the Product Manual downloadable from the website.
Check if the package comes with the following items:
Camera Installation
Kit
Power Cord
Power Adapter
Universal
Converter
Li-ion Battery
Rubber Case
Carrying Bag
Neck Strap
Sunshield
Terminal Block
Network Cable
BNC Cable
Ethernet
Terminal Block
1. Open the battery compartment cover.
2. Insert the battery.
Quick Installation
Guide
3. Close the battery compartment cover.
4. Connect the power cord and adapter to the device.
5. Plug the power adapter to a power outlet.
1. Insert the outer edge velcro through
the bottom slot of the device.
2. Insert the inner edge velcro through
the top slot of the device.
3. Attach the sunshield.
4. Close the bag and attach the neck
strap.
Notes:
•
Use only the power adapter that is bundled with the device or approved by the manufacturer.
•
When unplugging the power cord, pull on the plug head and not on the cable.
Device Overview
Step 1: Unpack the Device
Step 2: Charge the Battery
Step 3: Power On
Step 4: Prepare the Device Casing