Step 7: add cameras, Step 4: access the device, Ecd-1000 – ACTi ECD-1000 User Manual
Page 2: Step 6: change the ip address
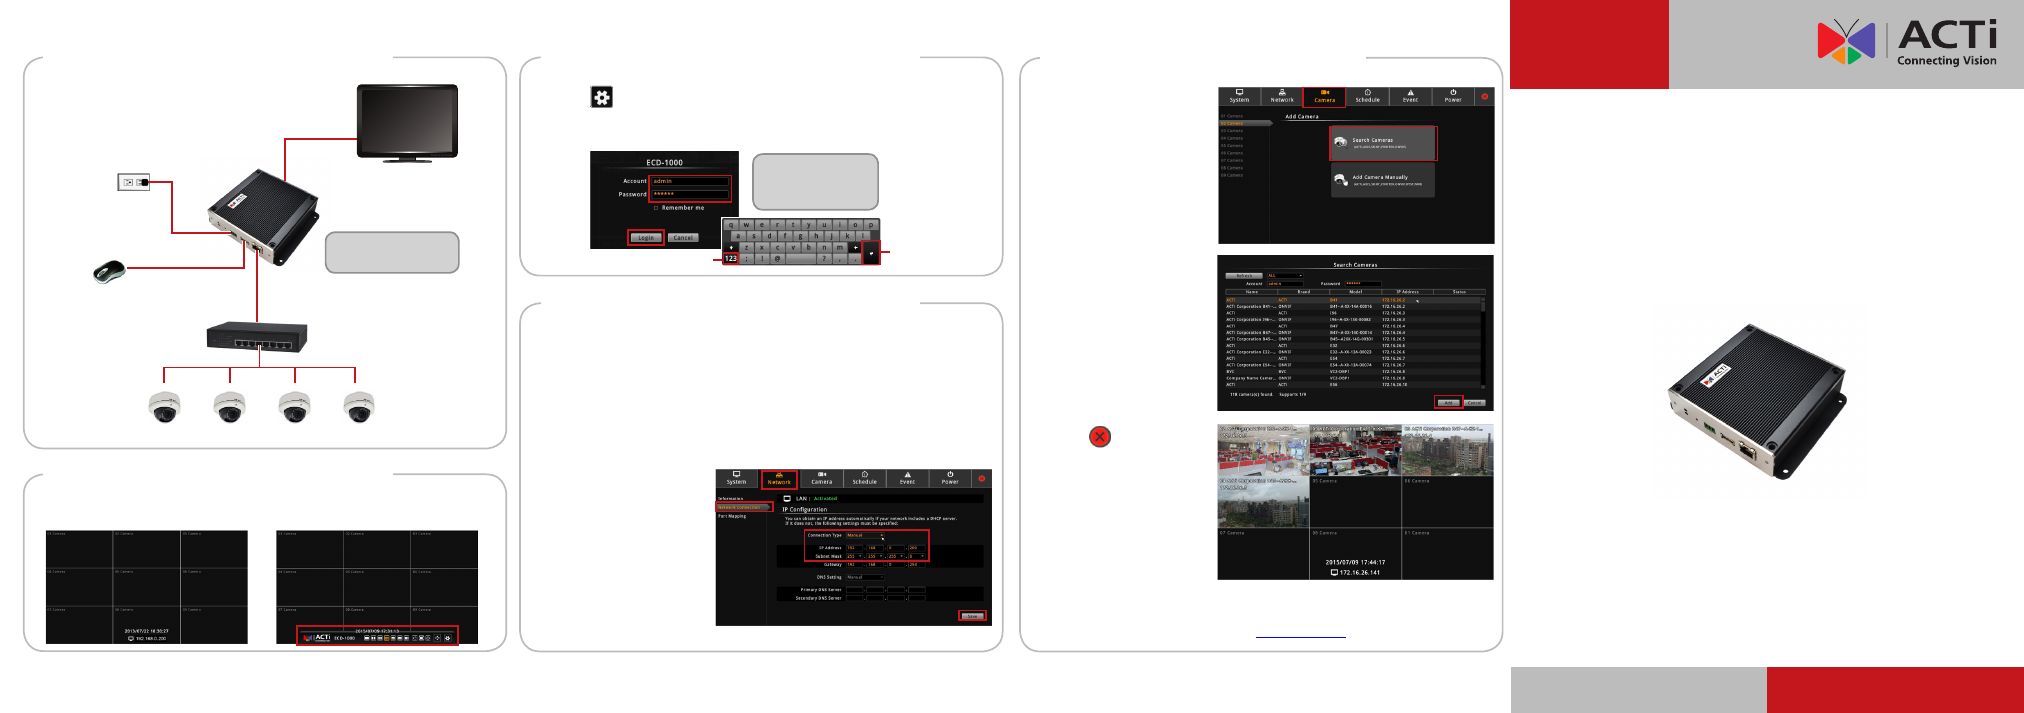
Step 7: Add Cameras
www.acti.com
Step 3: Connect the Device
Quick Installation Guide
Step 5: Login
192.168.0.100 192.168.0.101 192.168.0.102 192.168.0.103
Monitor
(HDMI or Analog)
Default IP Address:
192.168.0.
200
Power Source
(optional)
USB Mouse
Once all devices are connected, turn on the monitor to see the Live View
screen. Move the mouse over the IP address to display the main menu.
Default
Account:
admin
Password:
123456
Enter
Numeric Keypad
Step 4: Access the Device
1. Click
to access the
Setup page.
2. When prompted to login, enter the
Account and Password, then click
Login.
If your network has a DHCP server, the device will obtain the IP address
automatically by default. Skip to
Step 7: Add Cameras
.
If you want to assign a different static IP address, change the
IP address
manually.
1. On the
Setup page,
click
Camera > Search
Cameras.
2. Click one or more
cameras, then click
Add.
3. Click
to close the
Setup page. The Live
View screen appears
with the added cameras.
For more detailed instructions, please refer to the “Product Manual”
downloadable from the website (
www.acti.com
).
ECD-1000
NOTE:
A USB hub can be
used to connect more USB
devices such as a keyboard.
PoE Switch
The diagram below demonstrates a
connection setting example within a
local network.
V.2015.07.16
Step 6: Change the IP Address
1. Click
Network > Network Connection.
2. On
Connection Type, select Manual.
3. Set the
IP address
and
Subnet Mask.
4. Click
Save.