Sewing, Stitch length adjustment & reverse sewing, Work light – Euro-Pro DRESSMAKER 1104HV User Manual
Page 6
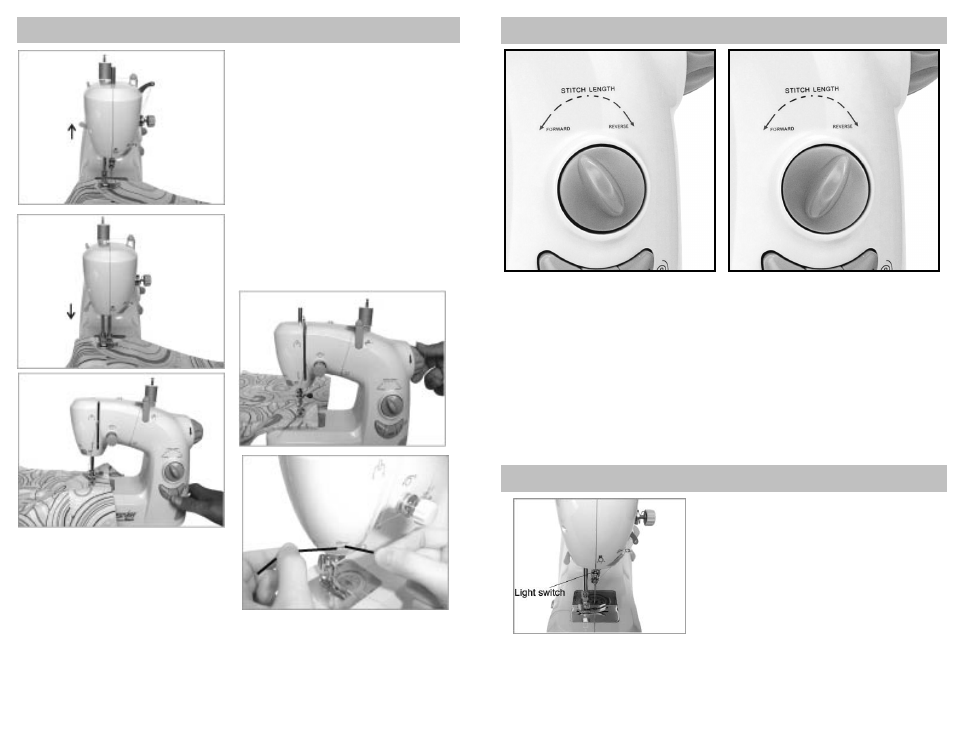
SEWING
1. Turn the hand wheel to raise up the
needle to the highest position. Lift the
presser foot and place the fabric to be
sewn under the presser foot. (Fig. 1)
2. Lower the presser foot. (Fig. 2)
3. Press the On/Off button to the “On”
position and begin sewing. Do not
pull the fabric. Gently guide the fabric
to keep the seam straight. (Fig. 3)
4. After finishing sewing, press the
On/Off button to the “Off” position to
stop sewing. (Fig. 3)
5. Turn the hand wheel to raise the
needle to the highest position. Lift the
presser foot and gently remove the
fabric away from the sewing machine.
(Fig. 4)
6. Cut the thread using the thread cutter.
(Fig. 5)
Fig. 1
Fig. 2
Fig. 3
Fig. 4
5
Fig. 5
STITCH LENGTH ADJUSTMENT & REVERSE SEWING
Before sewing your garment, test for the correct stitch length using a piece of fabric.
You can select from three different (3) stitch lengths for sewing and three (3) for
reverse sewing. To select the stitch length:
1. Turn the stitch length adjustment dial all the way to the left for the longest stitch
length. This is recommended for normal sewing.
2. As you turn the dial to the right, you decrease the length of the stitch until you get
to the center point which is “0” length. The needle will remain stationary if you set
the dial at this point.
3. As you continue to turn the dial to the right, you will now set the sewing machine
into reverse sewing. Again, you have three (3) different stitch lengths for reverse
sewing, the farthest to the right being the longest.
4. Use reverse sewing to secure your stitches at the beginning of your seam and at
the end. This will strengthen your seams.
Caution: Do not sew at “0” stitch length as this will cause your machine to get stuck.
0
Regular Sewing
Reverse Sewing
0
WORK LIGHT
If additional light is needed, press the light
switch to turn the light “On”. Press the switch
again to turn it “Off”.
6