Installation – Elite Screens WhiteBoardScreen User Manual
Page 3
Rev. 093009‐JA
2
X 2
2
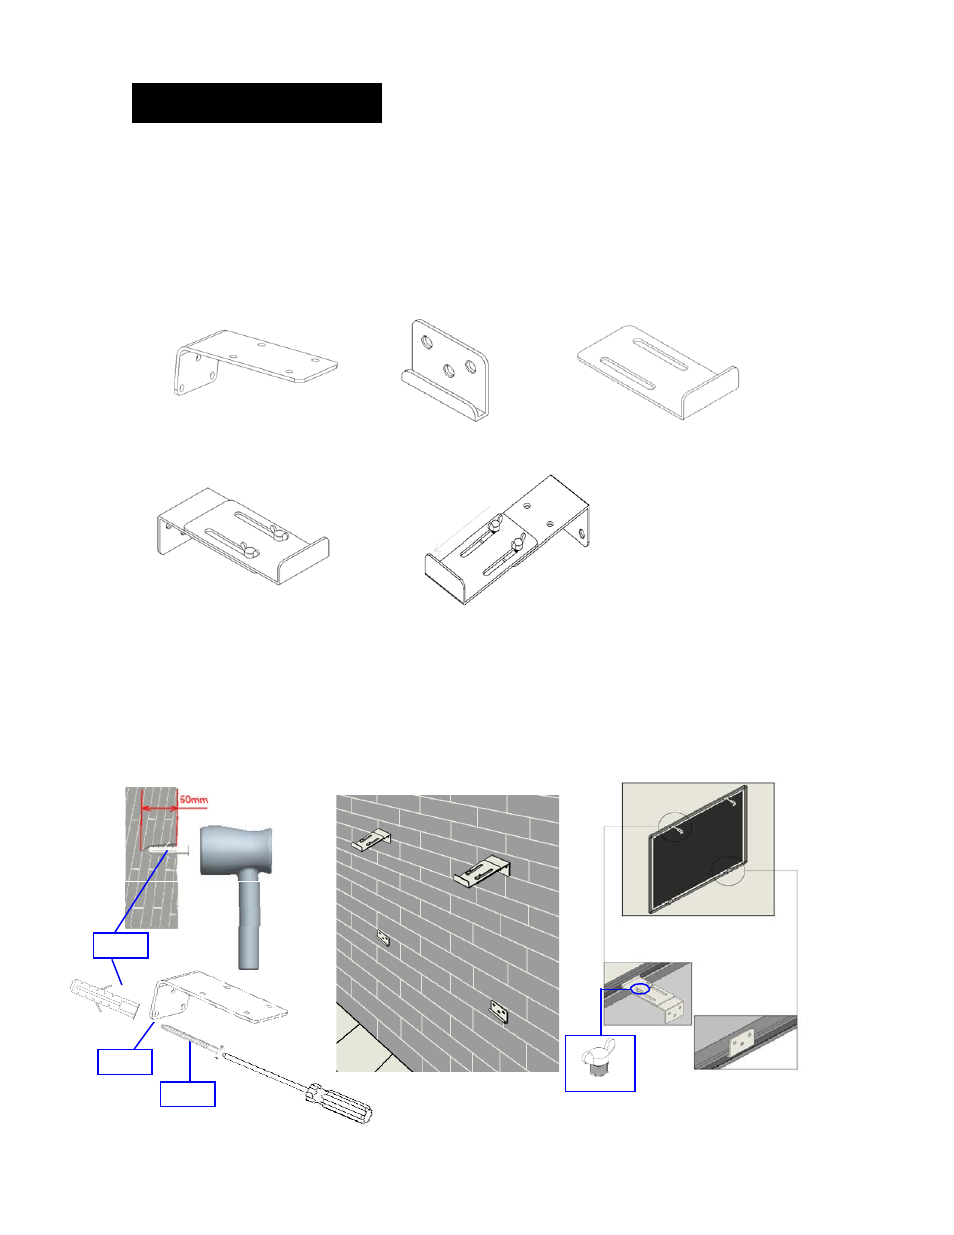
Fig. 6
Installation
1. Mark the location the WhiteBoard™ screen will be installed and drill your holes for all Top Hanging Wall
Brackets (fig. 1) and Bottom Frame Hanging Brackets (fig. 2)
2. Attach the Top Hanging White Board Brackets (fig. 3) to the Top Hanging Wall Brackets (fig. 1) with the
Butterfly Screws according to the size of the WhiteBoardScreen™ as specified in fig. 4 and 5 below.
3. Next, affix the Top Hanging Wall Brackets (fig. 1) and the Bottom Frame Hanging Brackets (fig. 2) to the
drilled locations and install the wall screws (fig. 6).
4. Lastly, hang the WhiteBoardS creen™ on the brackets (fig. 7).
Fig. 1
Fig. 2
Fig. 3
Fig. 4
Fig. 5
Note:
Fig. 4 Bracket configuration for white board 60 inch diagonal (4:3) screens
Fig. 5 Recommended Bracket configuration for white board 80 inch (4:3) and 96 inch (16:9)
C x 12
D
B X 1
A X 4
Fig. 7