Setup, Introduction – Smithco Sweep Star V62 (sn 78001 – 78019) Operator Manual User Manual
Page 9
7
Introduction
SETUP
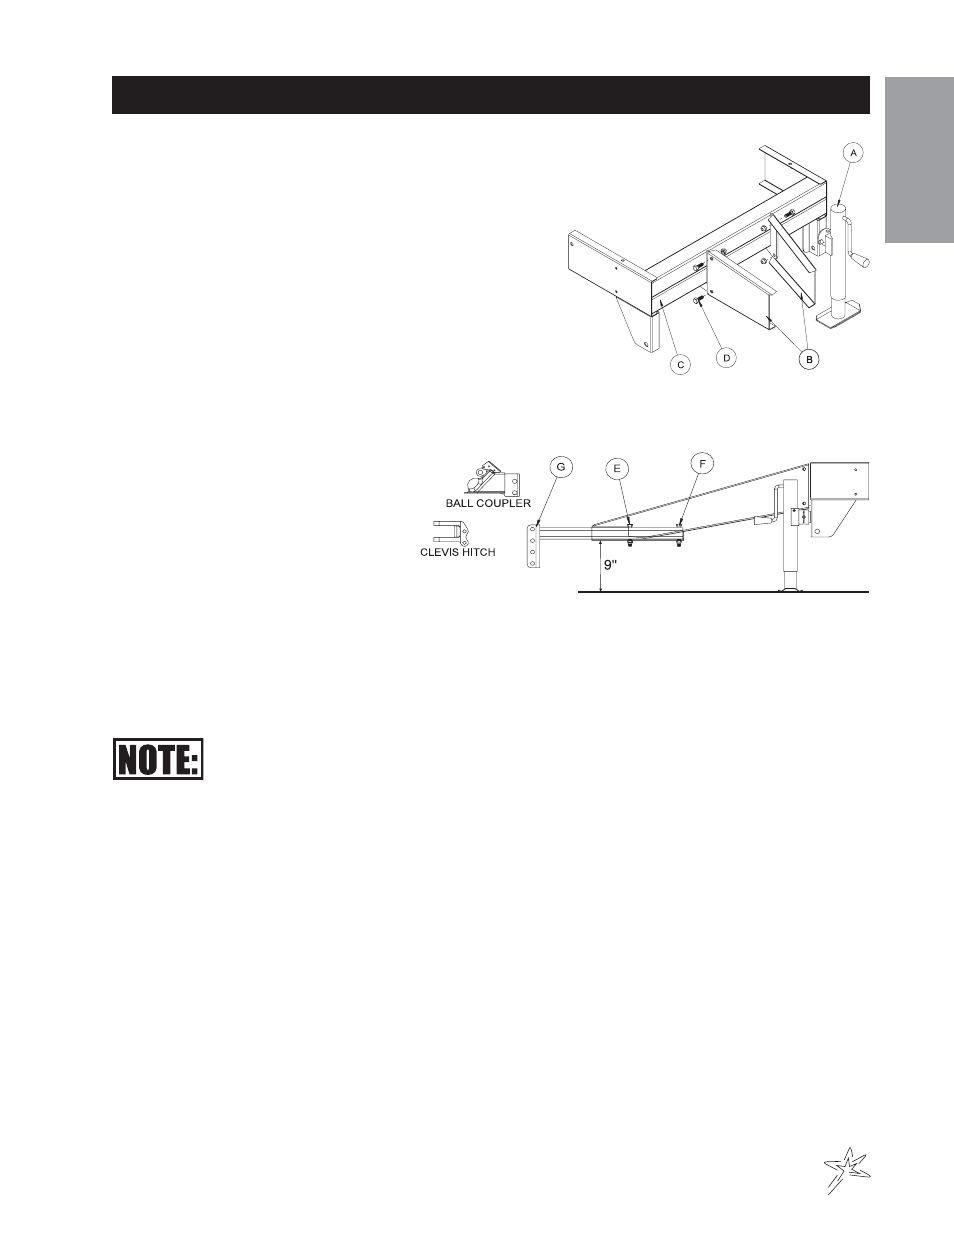
INSTALL HITCH - GENERAL
Use two people to install hitches.
1. Block both wheels so machine does not roll.
2. Use the jack (A) that is part of the sweeper to raise or
lower sweeper to comfortable working height.
3. Slide the hitch (B) over the tabs on the front of the
sweeper frame (C). Hitch must be on the outside. Use the
four
1
/
2
- 13 x 1
1
/
4
bolts (D) on the outside and four lock
nuts on the inside. Tighten all four bolts.
4. See next pages on how to install the remaining parts of
each individual hitch.
ADJUST HITCH HEIGHT - CLEVIS OR BALL HITCH
Have the sweeper on a level surface. Use
the jack to raise or lower the front of the
sweeper, so the tongue is 9" off the
ground. Position the hitch insert (G) into
the tongue; It has two holes, the first hole
(F) is for making a longer tongue and the
second hole (E) for a shorter tongue.
Note: The bolt in (E) is for reference only.
There is only one bolt needed in the hitch
insert.
Back the towing vehicle up to the sweeper and using either the ball coupler or the clevis, check the height to the
drawbar on the tow vehicle. The ball coupler or clevis can be adjusted by placing into different holes on the hitch
insert (G). The hitch insert can also be turned over to provide more height options. The clevis can also be rotated
180° for more height options.
Do not tow on public roadways.