Introduction, Connecting the v2v-hdav, Application diagram applications – Smart Avi V2V-HDAV User Manual
Page 2: Features
INTRODUCTION
As high-definition signals and routing have become
the dominate sources in the AV world thanks to the
prevalence of HD television and Blu-ray players,
many users have found some of their previous and
established AV systems have become obsolete.
Upgrading a system to handle 1080p video and digi-
tal audio inputs can be extremely costly, especially if
the user’s system works just fine.
Using that feedback from customers, SmartAVI de-
veloped a user-friendly and inexpensive solution for
such systems. The V2V-HDAV takes an HDMI input
and downscales the signal to a composite video sig-
nal, allowing users to bridge the gap between the
latest advances in HD signals and the older displays
and audio receivers that many systems still rely on
and use effectively.
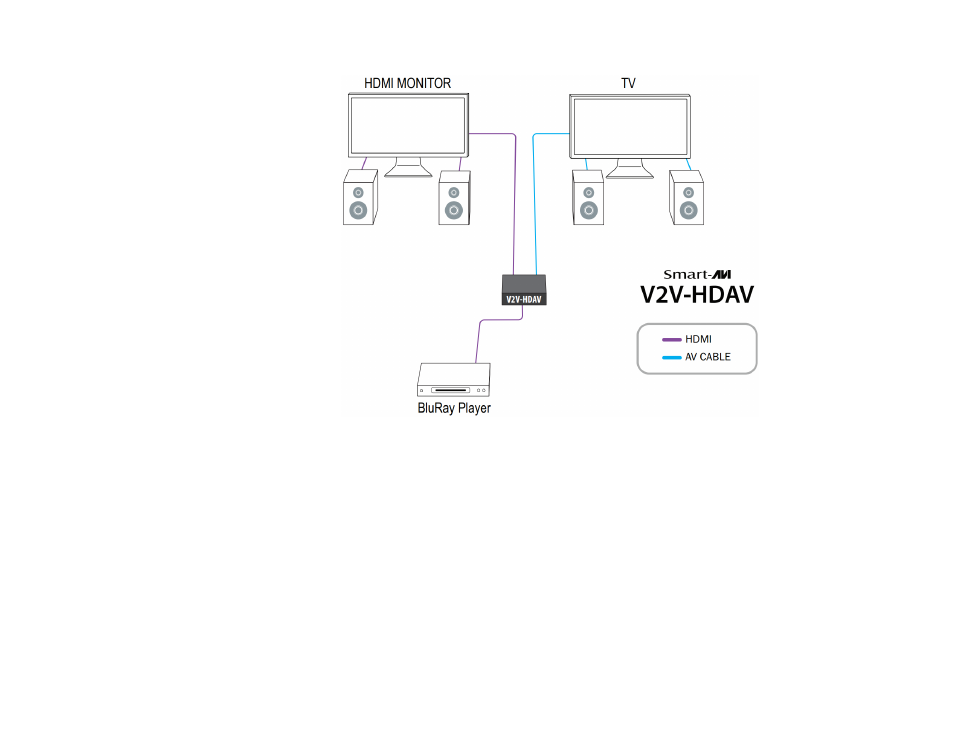
CONNECTING THE V2V-HDAV
1. Turn ON the V2V-HDAV.
2. Connect an HDMI cable from the HDMI input device to the HDMI input of the V2V-HDAV.
3. Connect an RCA composite cable from your video output device (TV or monitor) to the RCA
connector of the V2V-HDAV.
4. Optionally connect an HDMI TV or monitor to the local HDMI pass-through output of the V2V-
HDAV.
5. Choose between NTSC (480i) or PAL (576i) standard using the selector switch.
APPLICATION DIAGRAM
APPLICATIONS
• Video Conferencing
• Video Capture
• Video Walls
• Education
• Security Systems
• Video Modulation
• Multimedia Presentations
• Video Installation
FEATURES
• Hardware conversion, plug and play without any
software driver
• HDMI 1.3 compatible
• Support NTSC and PAL two standard TV formats
• One HDMI input, one HDMI output, one AV output,
one stereo output
• HDMI input: 480P, 576P, 720P, 1080I, 1080P @
60Hz
• Compatible with DVI mode 800x600,1024x768,
1280x720, 1280x1024, 1920x1080 @ 60hz
• Supports the HDCP protocol
• Support for HDMI 1.3
• CVBS output: 480i, 576i