Product - installation diagram, Installation – Smart Avi FDX-500 User Manual
Page 6
6
www.smartavi.com
Installation
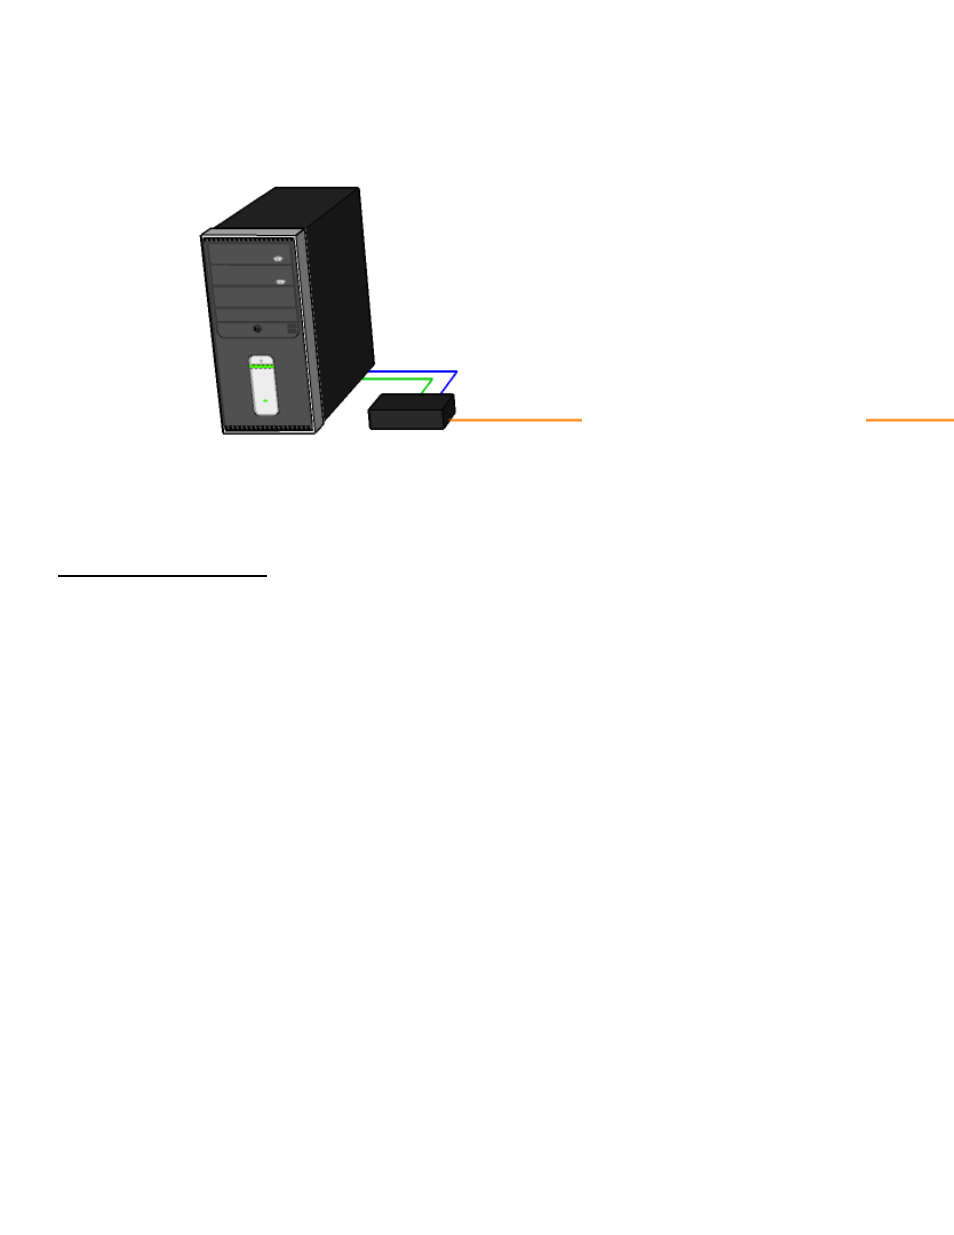
1. Turn off the computer, display, and speakers.
2. Connect the DVI extension cable and audio cable (not included)
to the computer and to the ports on the FDX-500-TX.
3. Connect the display to the DVI connector on the FDX-500-RX.
4. Connect speakers to the audio connector on the FDX-500-RX.
5. Connect the FDX-500-TX to the FDX-500-RX with a multimode
fiber-optic cable (see opposite page).
6. Connect the power cord and power on the FDX-500TX and the
FDX-500-RX.
7. Power on the computer, display and speakers.
Product - Installation Diagram
up to 1,500 ft over Fiber
FDX-500TX
COMPUTER
See also other documents in the category Smart Avi Accessories for video:
- HDCVX (2 pages)
- XTPRO (2 pages)
- VSA-100 (2 pages)
- XTAV (2 pages)
- XTWALL (2 pages)
- HDX-PRO (2 pages)
- UTX-500 (2 pages)
- UXPRO (2 pages)
- UX-PLUS (2 pages)
- XTPro Xtreem (8 pages)
- DVX-100 (2 pages)
- DVX-200 (2 pages)
- DVX-PRO (2 pages)
- DVX-PLUS (2 pages)
- FDX-2000 (2 pages)
- DVX-Multi (2 pages)
- UDX-Plus (2 pages)
- DVX-200-Pro (2 pages)
- SDX (2 pages)
- SDX-Plus (2 pages)
- RK-DVX2U-A (2 pages)
- UDX-2P (2 pages)
- DVX2U (2 pages)
- DVX4P (2 pages)
- SDX-2P (2 pages)
- RK-DVX-Plus (2 pages)
- HDX-100 (2 pages)
- RK-DVX200 (8 pages)
- HDX-Plus (2 pages)
- HDX Ultra (2 pages)
- HDX-400 (2 pages)
- HFX-TX/RX (2 pages)
- USB2-Mini (2 pages)
- USB2Pro (2 pages)
- USBXpress (2 pages)
- USB-100 (2 pages)
- AR-100 (2 pages)
- HDCIR (2 pages)
- VS2P (2 pages)
- VS8P (2 pages)
- AVS4P (2 pages)
- VCT-400 (2 pages)
- VCA-400 (2 pages)
- XT-TX1600 (2 pages)
- HDC-400 (2 pages)