Product - installation diagram, Installation – Smart Avi FDX-4P User Manual
Page 6
6
www.smartavi.com
Installation
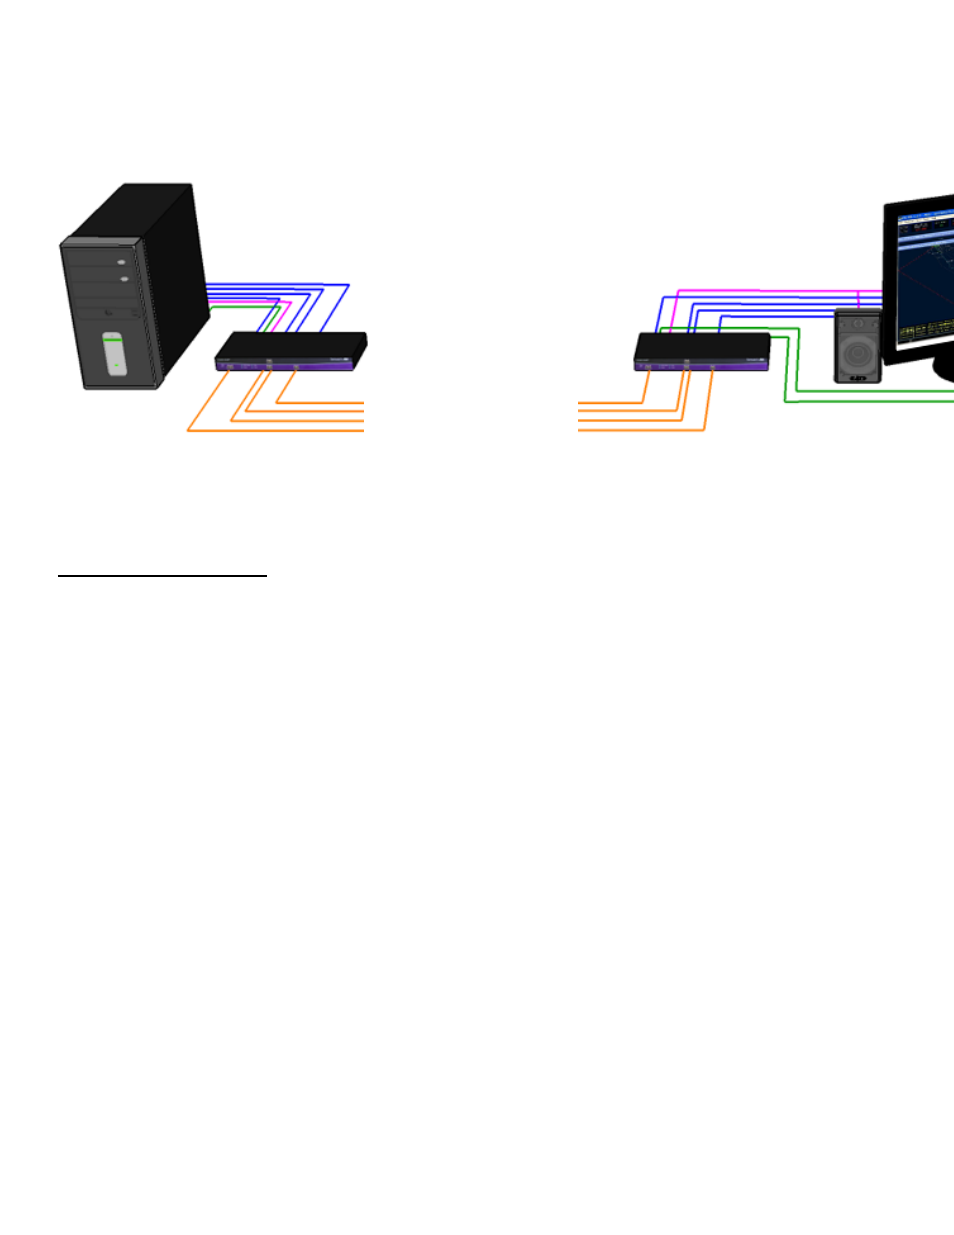
1. Turn off the computer, displays, and speakers.
2. Connect the DVI extension cables, USB cable, and audio cable
(not included) to the computer and to the ports on the FDX-
TXM4P.
3. Connect the displays to the DVI connectors on the FDX-RXM4P.
4. Connect USB mouse and keyboard ONLY to the USB connectors
on the FDX-RXM4P.
5. Connect speakers to the audio connector on the FDX-RXM4P.
6. Connect the FDX-TXM4P to the FDX-RXM4P with a multimode
fiber-optic cable (see opposite page).
7. Connect the power cord and power on the FDX-3000TX and the
FDX-RXM4P.
8. Power on the computer, displays and speakers.
Product - Installation Diagram
FDX-M4P
Receiver
FDX-M4P
Transmitter
Computer
Stereo Speakers
Up to 1,400 feet
(400 m) over 4
fiber optic cables
- HDCVX (2 pages)
- XTPRO (2 pages)
- VSA-100 (2 pages)
- XTAV (2 pages)
- XTWALL (2 pages)
- HDX-PRO (2 pages)
- UTX-500 (2 pages)
- UXPRO (2 pages)
- UX-PLUS (2 pages)
- XTPro Xtreem (8 pages)
- DVX-100 (2 pages)
- DVX-200 (2 pages)
- DVX-PRO (2 pages)
- DVX-PLUS (2 pages)
- FDX-2000 (2 pages)
- DVX-Multi (2 pages)
- UDX-Plus (2 pages)
- DVX-200-Pro (2 pages)
- SDX (2 pages)
- SDX-Plus (2 pages)
- RK-DVX2U-A (2 pages)
- UDX-2P (2 pages)
- DVX2U (2 pages)
- DVX4P (2 pages)
- SDX-2P (2 pages)
- RK-DVX-Plus (2 pages)
- HDX-100 (2 pages)
- RK-DVX200 (8 pages)
- HDX-Plus (2 pages)
- HDX Ultra (2 pages)
- HDX-400 (2 pages)
- HFX-TX/RX (2 pages)
- USB2-Mini (2 pages)
- USB2Pro (2 pages)
- USBXpress (2 pages)
- USB-100 (2 pages)
- AR-100 (2 pages)
- HDCIR (2 pages)
- VS2P (2 pages)
- VS8P (2 pages)
- AVS4P (2 pages)
- VCT-400 (2 pages)
- VCA-400 (2 pages)
- XT-TX1600 (2 pages)
- HDC-400 (2 pages)