Connecting the dpn-4p, Controlling the dpn-4p, Installation diagram dpn-4p front dpn-4p rear – Smart Avi DPN-4P User Manual
Page 2
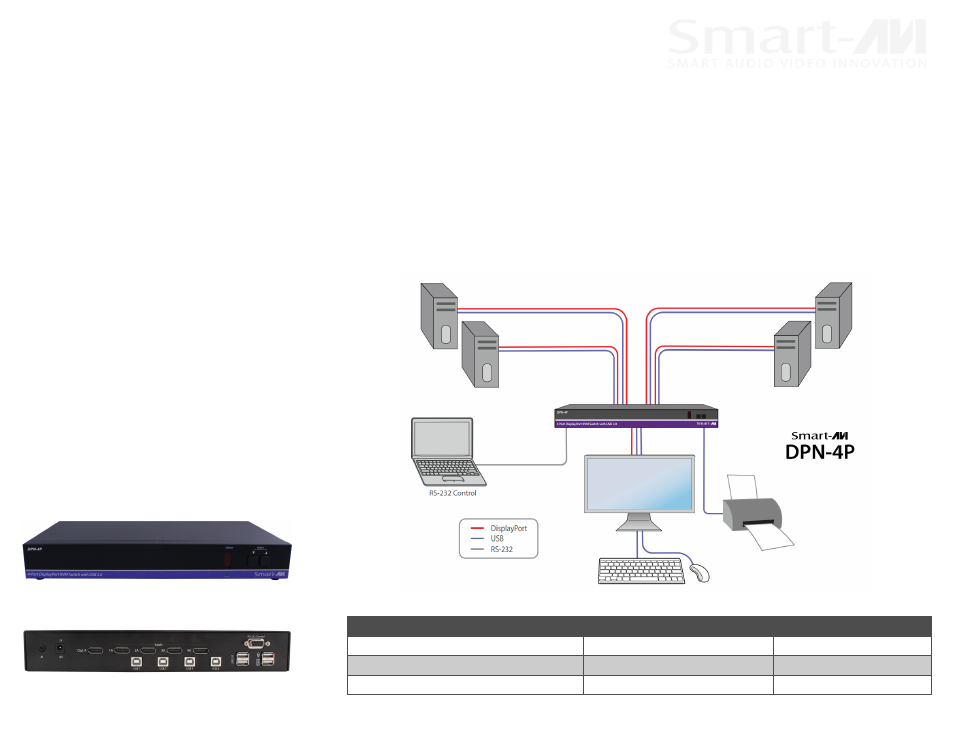
CONNECTING THE DPN-4P
1. Ensure that power is disconnected from DPN-4P.
2. Connect the DisplayPort cables and USB cables (male-A to male-B) from the computers to the respective ports
on the DPN-4P.
3. Optionally connect RS-232 for control functions.
4. Connect the USB keyboard and mouse to the two USB ports on the right .
Note: The 2 USB ports on the right are dedicated for keyboard and mouse emulation. The 2 on the left are for
other USB peripherals (flash drives, printers, etc.)
5. Connect the DisplayPort monitor to the OUT connector on the DPN-4P.
6. Power on the DPN-4P.
CONTROLLING THE DPN-4P
Front Panel Control
To switch ports using the front panel, press the UP
button to navigate up and DOWN button for down.
RS-232 Control
Use a male-to-female serial cable to connect a com-
puter to the RS-232 port of the DPN-4P. Use termi-
nal client software such as the HyperTerminal
HyperTerminal
HyperTerminal
HyperTerminal to
connect to the DPN-4P
.
Make sure to use the stan-
dard communication mode of 9600 bps, 8, N, 1, N.
This port can also be used for software upgrade.
Please refer to online manual for more details.
Hotkey Commands
The Hotkey command is a keyboard sequence used
to trigger an action on the DPN-4P through the use
of the keyboard connected on the USB port of the
DPN-4P. To activate the hotkey sequence, press the
CTRL key twice and then enter the desired hotkey
commands.
COMMANDS
HOTKEYS
RS-232 CONTROL
Switch all devices (KVM, USB 2.0, and Audio) [CTRL] [CTRL] m
m
m
m [port #] [ENTER]
//m
m
m
m[port #]
Switch KVM only
only
only
only
[CTRL] [CTRL] c
cc
c [port #] [ENTER]
//c
cc
c[port #]
Reset
[CTRL] [CTRL] rrrr [ENTER]
//rrrr
INSTALLATION DIAGRAM
DPN-4P FRONT
DPN-4P REAR