Chapter 2: installation, Connecting the xtpro-rx – Smart Avi CATSwitch User Manual
Page 10
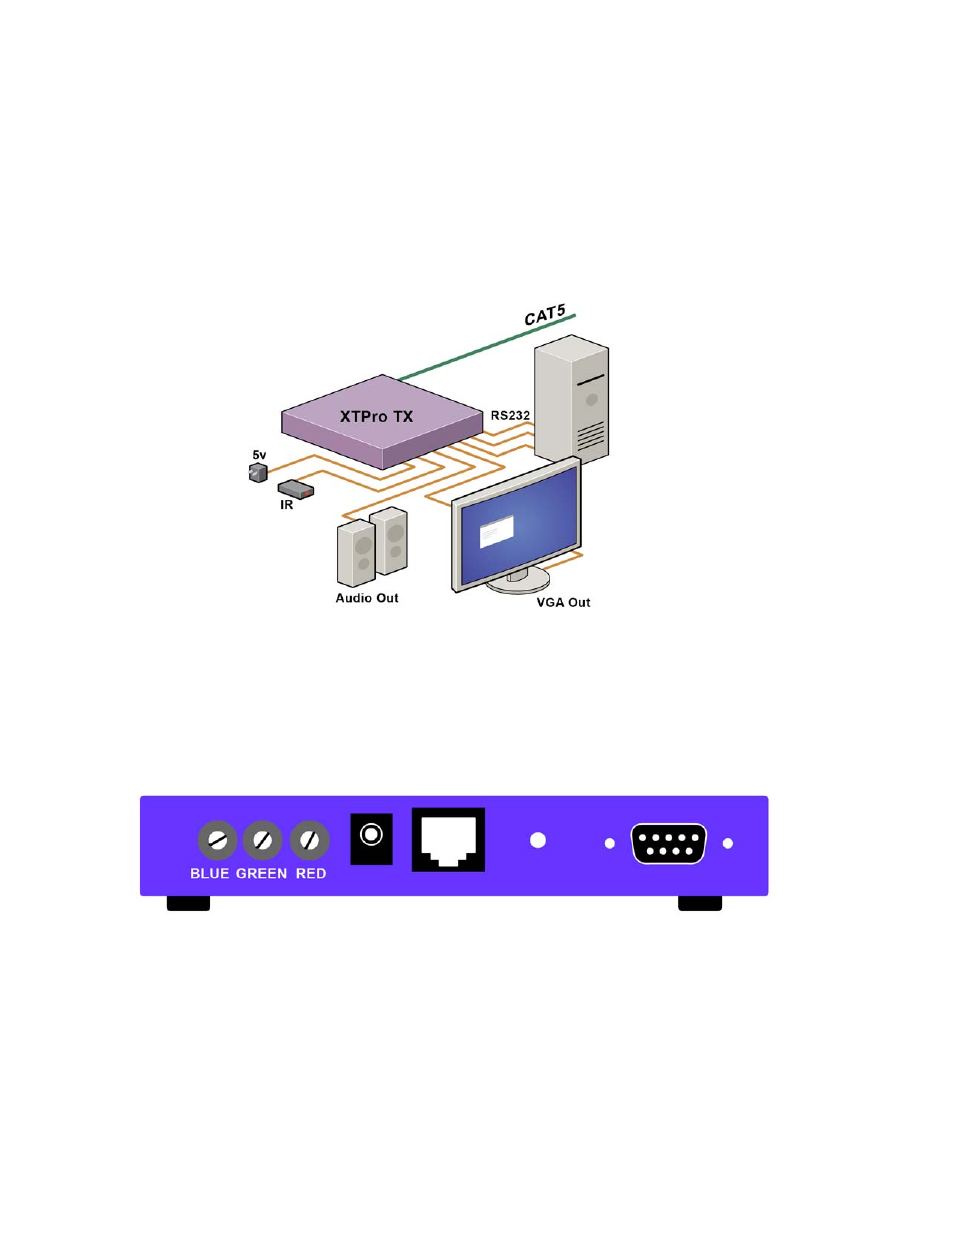
Connecting the XTPro-RX
Connecting The Receiver
Connect CAT5 cable (coming from the transmitter) to the back of the receiver.
1.
Connect 1-2 display monitors to the VGA out connectors on the front of the receiver.
2.
Connect 1-2 sets of external speakers to the audio output connections on the front of the
3.
unit. (Standard 3.5mm stereo Miniplug
Chapter 2: Installation
Adjusting and Tuning the Signal
In order to fine tune the signal, adjust the individual dials one at a time starting with GREEN, then
BLUE, and lastly RED. As you turn the dials you will notice the colors slightly change as you increase
or decrease the strength. All dials should be around the same distance.
See also other documents in the category Smart Avi Accessories for video:
- HDCVX (2 pages)
- XTPRO (2 pages)
- VSA-100 (2 pages)
- XTAV (2 pages)
- XTWALL (2 pages)
- HDX-PRO (2 pages)
- UTX-500 (2 pages)
- UXPRO (2 pages)
- UX-PLUS (2 pages)
- XTPro Xtreem (8 pages)
- DVX-100 (2 pages)
- DVX-200 (2 pages)
- DVX-PRO (2 pages)
- DVX-PLUS (2 pages)
- FDX-2000 (2 pages)
- DVX-Multi (2 pages)
- UDX-Plus (2 pages)
- DVX-200-Pro (2 pages)
- SDX (2 pages)
- SDX-Plus (2 pages)
- RK-DVX2U-A (2 pages)
- UDX-2P (2 pages)
- DVX2U (2 pages)
- DVX4P (2 pages)
- SDX-2P (2 pages)
- RK-DVX-Plus (2 pages)
- HDX-100 (2 pages)
- RK-DVX200 (8 pages)
- HDX-Plus (2 pages)
- HDX Ultra (2 pages)
- HDX-400 (2 pages)
- HFX-TX/RX (2 pages)
- USB2-Mini (2 pages)
- USB2Pro (2 pages)
- USBXpress (2 pages)
- USB-100 (2 pages)
- AR-100 (2 pages)
- HDCIR (2 pages)
- VS2P (2 pages)
- VS8P (2 pages)
- AVS4P (2 pages)
- VCT-400 (2 pages)
- VCA-400 (2 pages)
- XT-TX1600 (2 pages)
- HDC-400 (2 pages)