Introduction, Features, Connecting the hdnet-4p – Smart Avi HDNET-4P User Manual
Page 2: Automatic mode, Installation diagram, What’s in the box learning edid
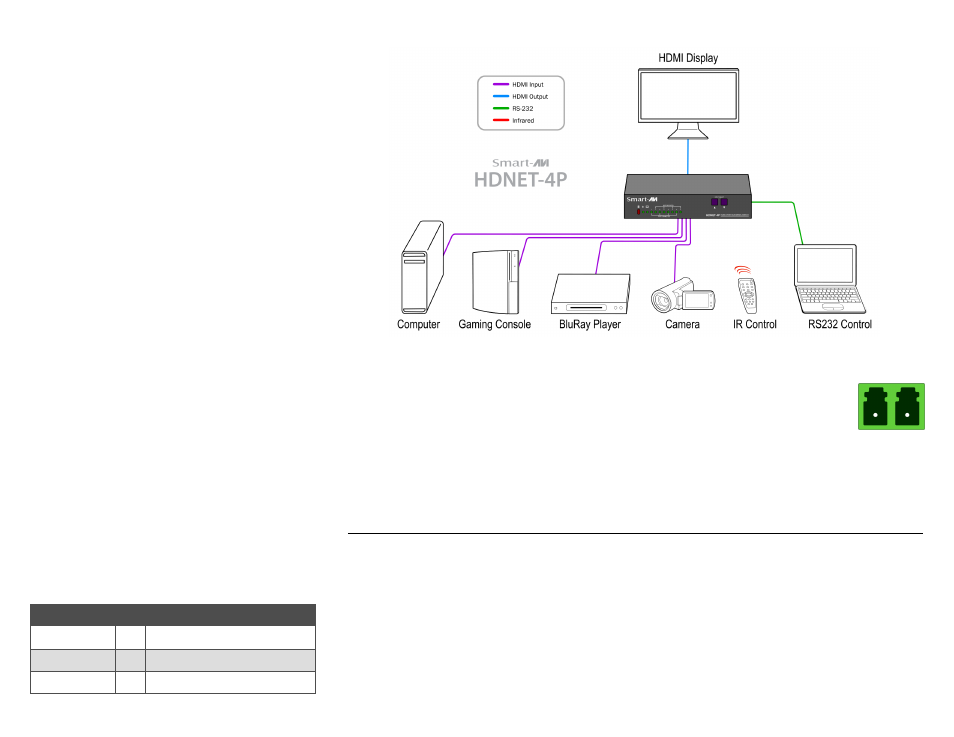
INTRODUCTION
With SmartAVI’s HDNET-4P it is now possible to con-
nect up to four HDMI devices to one display screen
for easy switching between sources. Transmit high
definition sources such as BluRay players, gaming
consoles, computers or cable receivers effortlessly
while viewing on a single HDTV monitor.
The HDNet-4P offers an automatic switching mode,
and when configured as an automatic switcher, it
has the ability to switch to a selectable secondary
input upon powering off of the primary input. HDNet-
4P will automatically switch to the next device when
the higher input is powered off. This allows the user
to control multiple devices with the HDNet-4P.
FEATURES
RS232 switching control
IR switching control
Front panel switching control
EDID learning of any monitor
Maintains 480p, 720p, 1080i and 1080p video
formats
Supports HDMI 1.3 digital audio format, LPCM/
Dolby-AC3/
DTS7.1/DSD
ATC & HDCP compliant
Connect four HDMI components to one HDTV
monitor
Supports DVI-D
CONNECTING THE HDNET-4P
1. Ensure that power is disconnected from HDNET-
4Pro.
2. Connect up to four HDMI cables from the source
devices to the respective HDMI IN ports on the
HDNET-4P.
3. Optionally connect RS-232 for control functions.
4. Connect the display monitor to the HDMI OUT on
the HDNET-4P.
5. Power on the HDNET-4P.
AUTOMATIC MODE
1. Locate the Phoenix Connector at
the rear of the unit.
2. Plug in the Phoenix Connector
jumper.
3. When the device is in automatic mode and at
least one input is plugged in, the monitor LED
will blink.
*Note: The pushbuttons will be disabled in Automatic Mode.
EDID programming is also disabled in this mode.
INSTALLATION DIAGRAM
PART NO.
QTY DESCRIPTION
HDNET-4PS
1
HDMI 4x1 Automatic Switch
Power Supply 1
PS5VDC-2A
User Manual
1
WHAT’S IN THE BOX
LEARNING EDID
1. Unplug all of the inputs to the HDNet4P, make sure the HDNet4P is in manual mode (Not automatic mode, so
remove the phoenix connector jumper.)
2. Plug the display monitor that you will be using into the HDNet4P
3. Turn on the HDNet4P
4. Turn on the display monitor
5. After a moment simply press and hold both buttons on the front control panel for about a second and then let go.
6. Notice the lights on the front control panel will begin flashing for about 10 seconds
(if this isn’t the case then try again.)