Product - installation diagram, Introduction, Connecting the usb2pro – Smart Avi USB2Pro User Manual
Page 2: Applications, Features
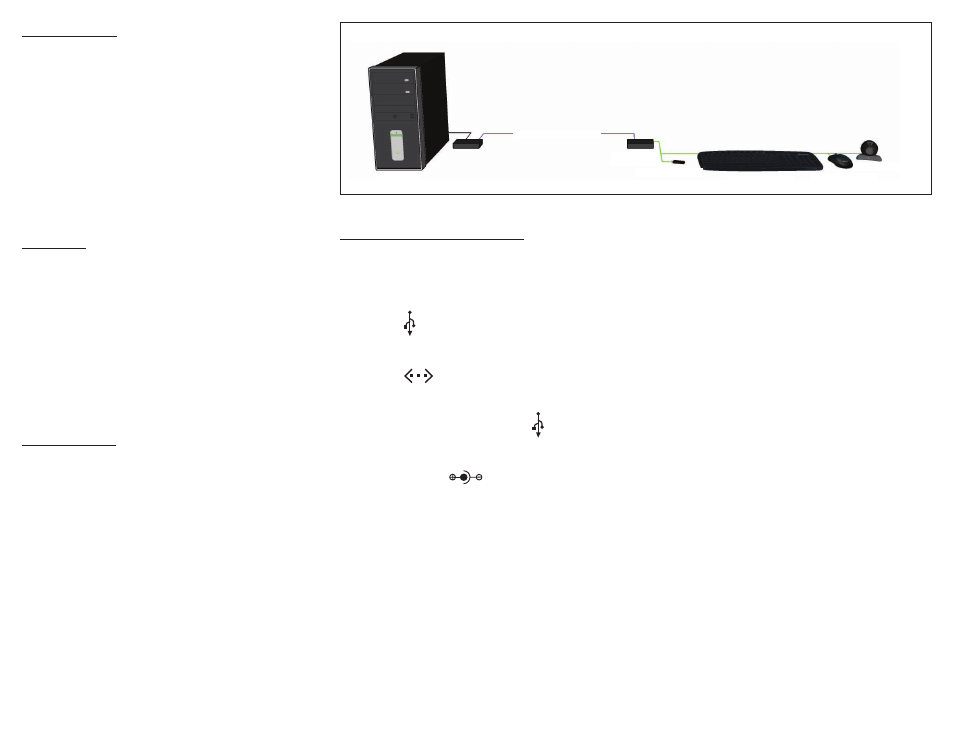
up to 300 ft over CAT5
USB2Pro-TX
USB2Pro-RX
USB FLASH DRIVE
USB KEYBOARD
USB MOUSE
USB CAMERA
COMPUTER
Introduction
SmartAVI’s USB2Pro extends standard USB (Universal
Serial Bus) 2.0 signals up to 300 feet using a single CAT5
cable. The USB2Pro supports all USB 2.0 high-speed
devices, from keyboards to digital cameras and will
operate on Windows®, Mac and Linux® operating systems.
An integrated four-port hub allows for multiple devices
to be connected to the USB2Pro at once. Additional USB
hubs can be added, increasing the amount of devices
that can be plugged into the USB2Pro.
Connecting the USB2Pro
1.
Power off all devices.
2.
Connect the USB source (computer) to the USB
port on the front of the USB2Pro Transmitter
labeled .
3.
Connect the USB2Pro Transmitter to the USB2Pro
Receiver with a CAT5 cable using the front ports
labeled .
4.
Connect up to 4 USB 2.0 devices to the rear ports
on the USB2Pro Receiver labeled .
5.
Power on the USB2Pro Transmitter and Receiver
by plugging the AC Adapter into the front ports of
the unit labeled .
6.
Power on the computer and USB devices.
Applications
•
Digital Signage
•
Home Networking
•
Remote USB Connections
•
USB Device Sharing
•
Webcam
•
USB Electronics Devices
•
Security Systems
•
KVM Extension
Features
•
Supports all USB 2.0 and1.1 Devices Transparently
(Flash Drives, Printers, Cameras, Scanners, etc.)
•
Supports USB 1.1 keyboard and mouse
•
Works on Windows, Mac and Linux Operating
Systems
•
Integrated Four-Port Hub
•
Bus-Powered Local Unit
•
Power Adaptor for Remote Unit
•
Plug-and-Play
Product - Installation Diagram