Hdx-100, What’s in the box, Installation and operation – Smart Avi HDX-100 User Manual
Page 2: Features, Introduction, Connection diagram
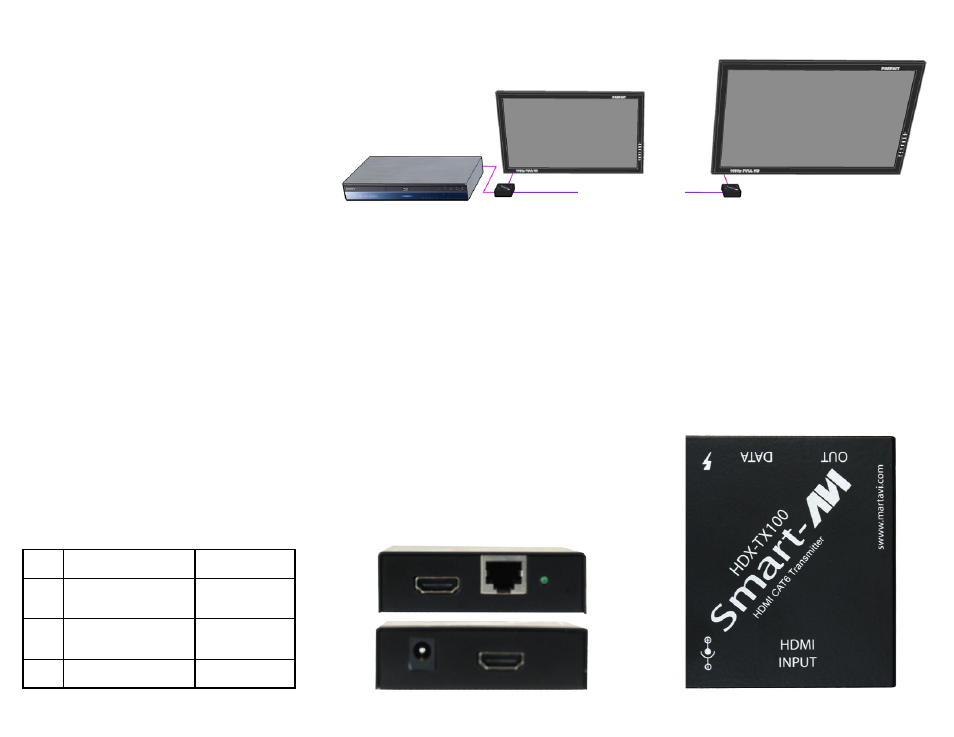
150 Feet over CAT6 STP
HDX-TX100
HDMI Source
HDX-RX100
Qty
Description
Part Number
1
HDX Transmitter, HDMI over
CAT6 STP Cable
HDX-TX100
1
HDX Receiver, HDMI over
CAT6 STP Cable
HDX-RX100
1
PowerSupply5V1A
PS5VD3AUS
WHAT’S IN THE BOX?
Please check the contents of the package before beginning
installation.
INSTALLATION AND OPERATION
Connecting the Splitter/Extender:
1. Connect the HDX-100 to the Component/TV/Monitor
with HDMI cable (included with the unit).
2. Connect HDX-TX100 to HDX-RX100 via CAT6 STP.
3. Connect HDX-RX100 to display.
4. Connect the power.
• Compact Transmitter/Receiver Units
• Local HDMI Output
• Perfect Image Quality at all Resolutions
(1920 x 1200, 480p, 720i, 720p, 1080i, 1080p)
• Video Resolutions up to 1920 x 1200 at 60H
(1280 x 1024 at 75Hz) on all Distances to the
Maximum Limit
• Bandwidth to 1.65Gps
• Unit Operates Regardless of Local Monitor
Connectivity
• Distances up to 150 Feet using CAT6 STP Cabling
• Compatible with all Operating Systems
• Plug-and-Play – No Software Required
FEATURES
The HDMI signal transmission unit is placed near the HDMI
source. Connect the HDMI source to the transmission unit,
which will extend the signal up to 150 feet over a single
CAT6 STP cable.
INTRODUCTION
HDX-100
Connection Diagram