Caution, Warning – Rena TB-690 User Manual
Page 5
3
Installing the Conveyor
1. Roll the conveyor up to the machine that requires stacking of
its output.
2. Adjust the height of the conveyor to match the output end of
the machine by loosing (counterclockwise) the two large knobs
(one on each end), raising the conveyor to the proper height and
tightening (clockwise) the two knobs one at a time.
WARNING
THE CONVEYOR IS VERY HEAVY.
IT IS RECOMMENDED THAT TWO
PEOPLE WORK TOGETHER TO
RAISE IT INTO THE PROPER
OPERATING HEIGHT. A BLOCK OF
WOOD UNDER THE CENTER OF
THE LEG WILL HELP PREVENT
INJURY DURING SETUP.
Operating the Conveyor
1. Plug the conveyor into a properly grounded wall outlet using the
power cord supplied. Turn on the main power switch located
above the power receptacle.
CAUTION
THE CONVEYOR IS DESIGNED TO BE
PLUGGED INTO A GROUNDED OUTLET.
FOR YOUR SAFETY, DO NOT REMOVE THE
GROUND PIN FROM THE LINE CORD.
2. Adjust the speed control knob on the front of the conveyor to
obtain the proper speed. If the conveyor does not start check to
see that the Emergency Stop switch has been released.
NOTE: THE EMERGENCY STOP SWITCH IS
ACTIVATED BY PUSHING IN ON IT AND RELEASED
BY TURNING IT CLOCKWISE IN THE DIRECTION OF
THE ARROWS.
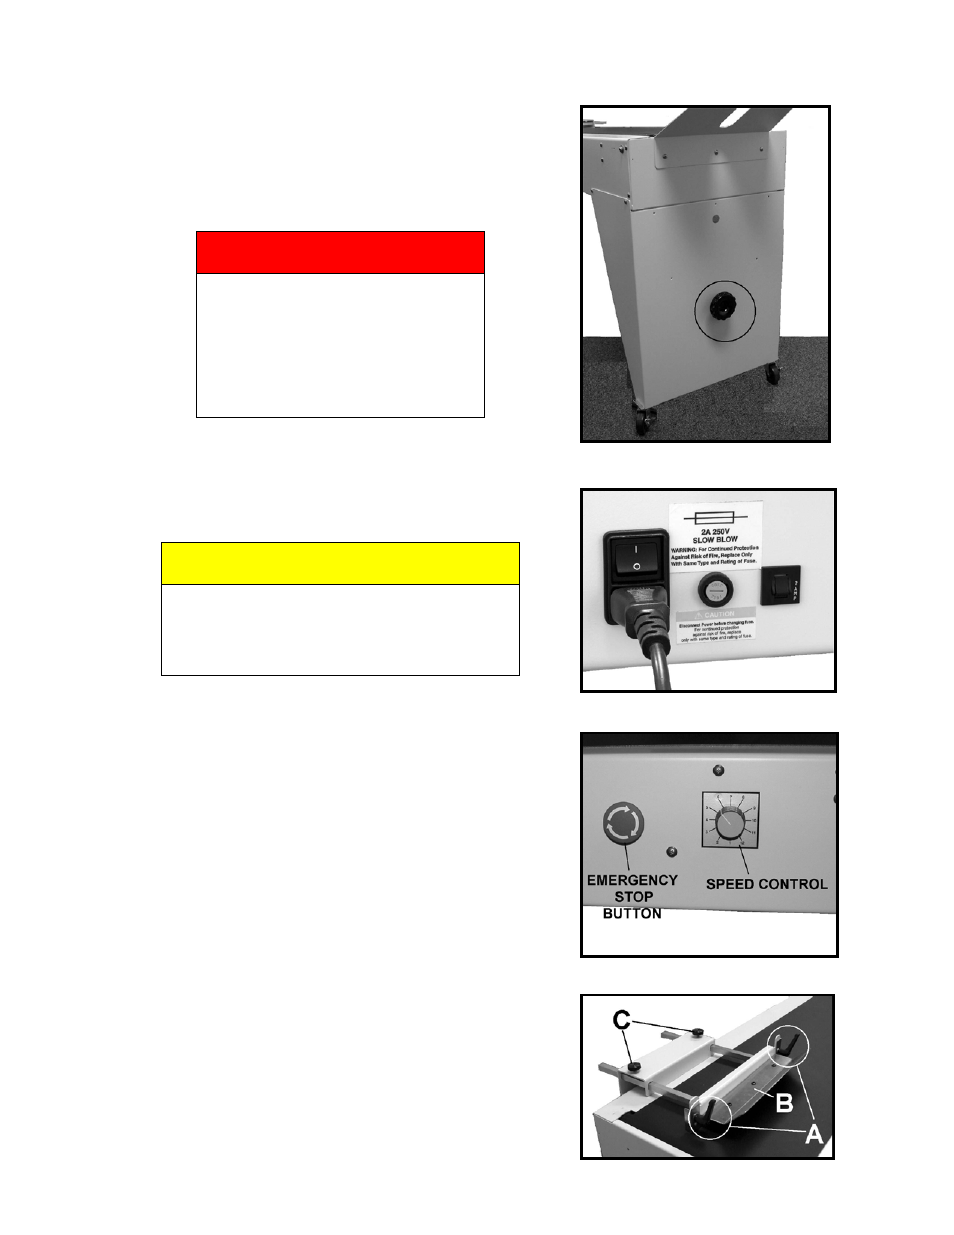
3. If you are using the conveyor in the right angle mode (conveyor is perpendicular to the machine feeding it)
then adjust the Right Angle Guide as follows:
a) With the conveyor belt stopped, loosen the two ball rack
locking levers [A]and raise the ball rack [B]. Place a piece
of media under the ball rack, then lower, and lock the
levers.
b) Loosen the locking screws [C] and move the ball rack
assembly in or out to center the media on the belt.